IX Squad, 1st Company: The Bearers of Hope – Azure Flames Chapter Approved Dataslate (part 2)
So I’ve been hinting at secret projects, and I’m proud to unveil the first in what will be a series of Games Workshop Chapter Approved dataslates. Behold! The Bearers of Hope, 9th squad, 1st Company
Backstory
The 9th squad of the Azure Flames 1st Company was wiped out during the Chasma Spica conflict. After the Azure Flames claimed Iperin as their homeworld, Chapter Master Perseus himself organized the new 9th squad from those who showed no fear in the face of the most gargantuan of enemy war machines, monsters, and Titans. In a galaxy where large threats are becoming more commonplace, The Bearers of Hope are Chapter Master Perseus’ answer to the most powerful weapons of the enemies of Man. Often staying aboard the Battle Barge His Hammer II, major threats are either spotted by Azure Flames forces, or from orbit (for exceptionally large targets). Deploying by Drop Pod, The Bearers of Hope crash into the hottest parts of the battlefield and erase large targets before they can devastate Imperial positions.
Unit Composition
The Bearers of Hope – Sternguard Veteran Squad x10 – 350 Points (plus 35 Points for a Drop Pod as a Dedicated Transport)
Wargear
- Bolt Pistol
- Bolter-Melta
- Frag Grenades
- Krak Grenades
- Special Issue Amunition
- Power Fist (Sergeant Only)
- Melta Bombs (Sergeant Only)
Special Rules
- And They Shall Know No Fear
- Chapter Tactics: Azure Flames
- Combat Squads
- Gargantuan Destroyers: Any model with this special rule may re-roll any rolls to hit, wound, or penetrate against any Superheavy Vehicle, Gargantuan Monstrous Creature, or building with the Mighty Bulwark special rule.
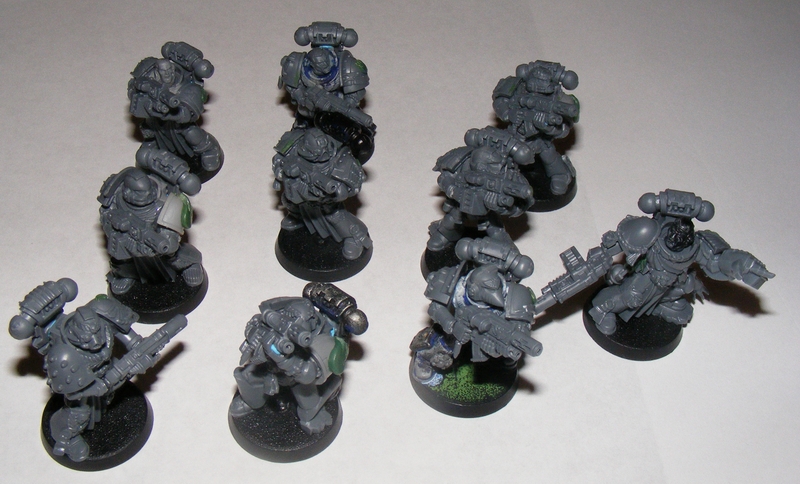
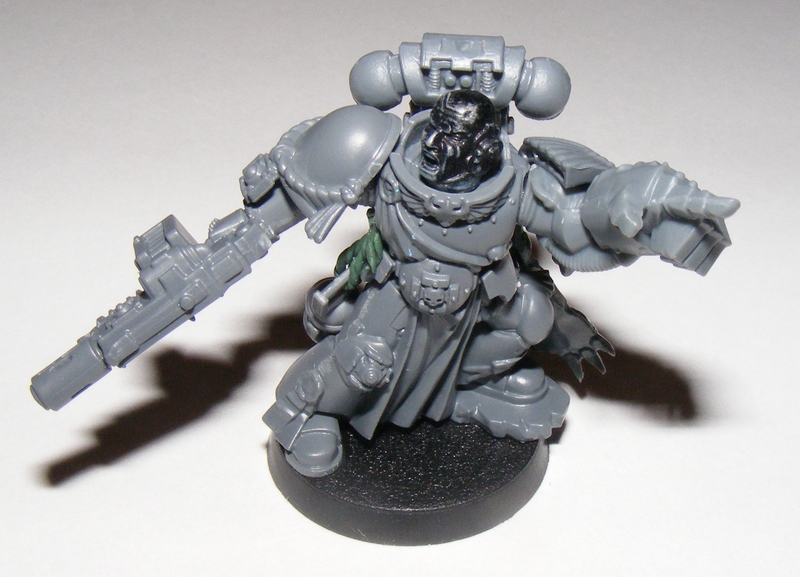
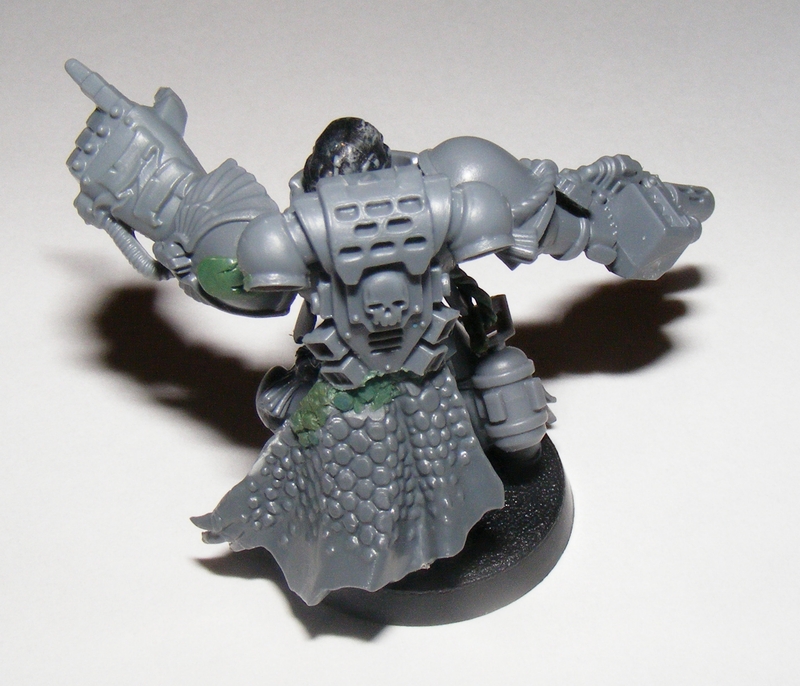
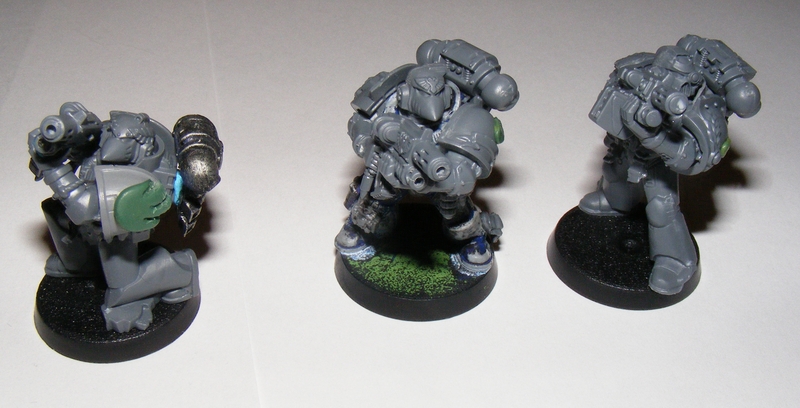
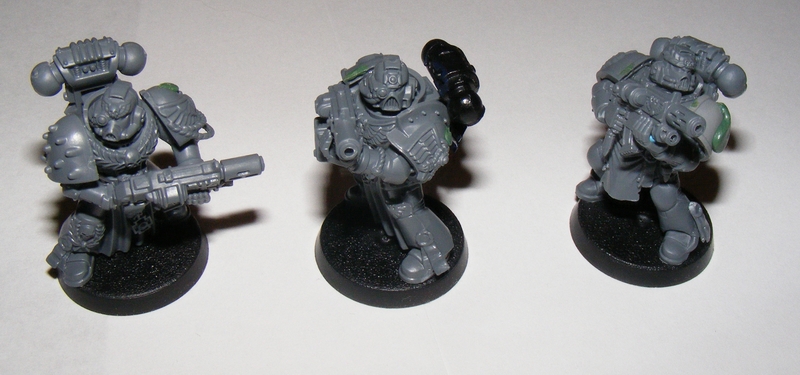
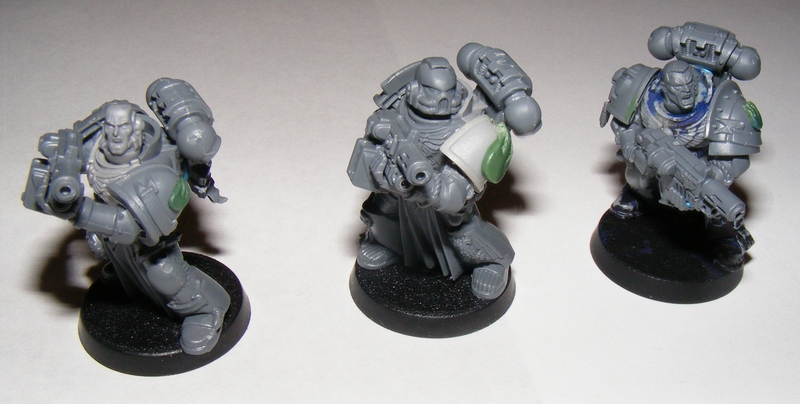
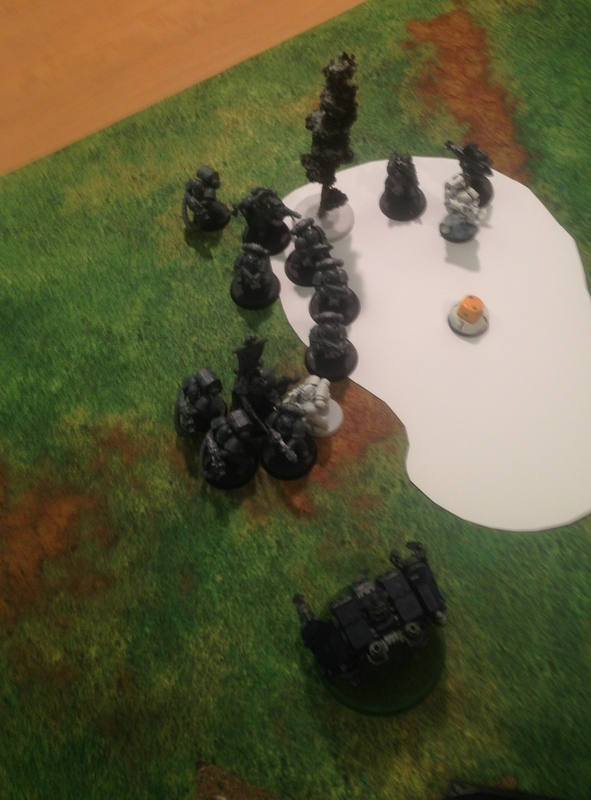
Modeling
To fit the idea that this squad is specifically designed to destroy large targets, I had most of the squad looking and aiming their weapons up. I am particularly proud of the sergeant, who seems to be turning to his right in order to shout orders and point out weaknesses. I even saved one of the shouting sergeant heads from the old 3rd edition Space Marine sprue! Classic! I also figured that the sergeant of such an important and esteemed squad would be one of the rare few to participate in the Salamander Hunt on Nocturne. I used a cloak from a Dark Elf Corsair, and sculpted more scales to mesh it with an ordinary Space Marine Backpack. I tried to give the impression that he was turning with the cloak. I also added a Melta Bomb with a custom sculpted rope to hold it in place. Each member of the squad has a custom sculpted Flame on their left shoulder pad.
Sharp eyed players may notice that backpacks are a bit askew, and there are bits of blue here and there. The Bolter-Meltas and backpacks are stuck on with blu-tac for ease of painting!
———————————————————
Coming up next, a custom vehicle and a very special character to lead the Azure Flames as the End Times approach! Stay tuned!
Chapter Tactics: Azure Flames – Chapter Approved Custom Chapter Tactics (part 1)

All three people who frequently visit fourstrandshobby.com are familiar with the Azure Flames, my Space Marine Chapter. You have probably read the Chapter Approved for the Azure Flames that describes their backstory. However, new developments have come about.
My friend Ian recently became the manager of the Games Workshop store, newly opened in Ypsilanti, MI. Games Workshop had a contest to see which manager could drive sales for the Space Marines’ 30th Anniversary. Ian’s idea: every person that purchases a Space Marine unit, vehicle, and character could create a Chapter Tactics for a chapter that they invented. To do this, they either choose a Chapter Tactic from the Space Marine codex, or the special rules from another codex for a specific chapter (such as Blood Angels). You would then remove one of the special rules for that chapter, and replace it with another special rule to make your new chapter similar to their parent chapter, but unique.
In addition, the unit, vehicle, and character that you purchased could be used as a Dataslate for an army chosen with your unique Chapter Tactics. This works even if the particular unit is not in your codex (such as an Imperial Fist successor being able to take a custom Dark Angels Nephilim Jetfighter). As a bonus, each Dataslate can change or add one special rule, to fit your chapter.
Finally, your Dataslate will be compiled and printed by Ian who has recieved from Games Workshop the OFFICIAL CHAPTER APPROVED STAMP. That’s right, the actual, physical, rubber-and-ink stamp, with which he will stamp YOUR DATASLATES and make them OFFICIAL AND LEGAL IN ANY GAMES WORKSHOP STORE IN THE WORLD.
Of course, I couldn’t say no.
So, this article is the first of four articles detailing all of my official rules (in a first draft form). Soon, the Features bar to the right of the main articles will feature Codex Supplement: Azure Flames, a PDF scan of the Azure Flames Chapter Tactics and the three Dataslates that go with it.
——————————————————————–
Chapter Tactics – Azure Flames (Salamanders Successor)
Adhering to the teachings of their Primarch and parent Chapter, the Azure Flames emphasize close range firefight and flame based weaponry. However, the Azure Flames were formed just over 400 years ago, and for the majority of their existence have been a mobile Crusade based chapter, unable resupply without the help of the Departmento Munitorum. As such, they lack the relics and master crafted weapons common in their parent chapter. To make up for this, they fight each battle with the dogged determination that even one small victory can change the galaxy.
Flamecraft: Adherents of the Promethean Cult, the Azure Flames follow the rules for Flamecraft from the Salamanders Chapter Tactics in Codex Adeptus Astartes p. 190.
Never Give Up, No Matter The Cost: The Azure Flames believe that the battle you are currently fighting is the most important battle. Despite the relatively short time their chapter has existed, they are known for turning an overwhelming loss into a bitter stalemate, and snatching victory from the jaws of defeat. A player that has his Warlord chosen from an Azure Flames detachment may choose to play another full game turn (consisting of one player turn for each side) after the game is supposed to end. This special rule does not apply for missions that end due to a certain event (such as the assassination of a character or the destruction of a building). This also does not apply to a game which has ended due to a pre-arranged time allotment (such as a Tournament game). In the case that this additional turn is the 8th or higher turn, any effects that rely on the turn number simply treat the new turn as the highest possible turn number. (i.e. if a mission tells you to draw 7 mission objectives on turn 7, but has no instructions for turn 8, simply treat turn 8 as another turn 7)
——————————————————————–
Next: IX Sqaud, 1st Company: the Bearers of Hope, a character squad with a big surprise for big targets! Stay tuned!
Highlander May Tournament Prep part 2
As stated in the previous post, I played Right Place at the Wrong Time with one other opponent; Josh who I had not seen before at club but was a pleasure to play against. He brought his Tau, of which finished models such as his Stormsurge are fantastically painted. Here’s another batrep! Once again, please excuse fuzzy pics due to camera troubles.
——————————————————
Bozeman – Azure Flames Space Marines (Salamanders)
- Combined Arms Detachment
- Leonidas, Captain of the 1st Company (counts as Vulkan He’stan)
- Ironclad Dreadnought, Chainfist, replace Storm Bolter with Heavy Flamer, Ironclad Launchers
- Drop Pod
- Terminator Assault Squad x5, 5x Thunder Hammer/Storm Shield
- Land Raider Redeemer, Extra Armour, Multi-Melta
- Tactical Squad x10, Veteran Sergeant, Power Fist, Bolter-Melta, Meltagun, Multi-Melta
- Drop Pod
- Scout Squad x5
- Land Speeder Storm, Multi-Melta
- Land Speeder Squadron x3, 3x Multi-Melta
- Stormtalon Gunship, Skyhammer Missile Launcher
——————————————————
Josh – Tau
- Combined Arms Detachment
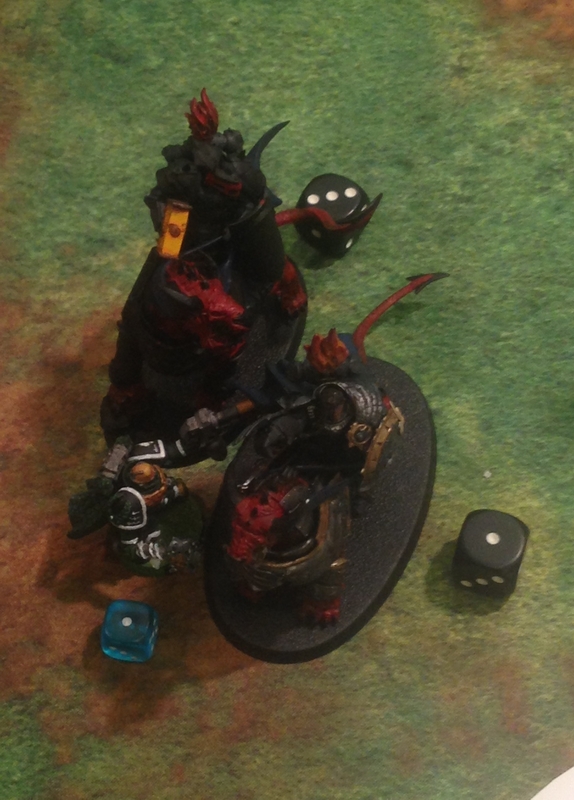
- Commander with no weapons and all of the wargear that gives his unit unspeakable buffs. (Note: Josh’s commander is in pieces, so his Commander this game is proxied with Forge World’s Moratarion)
- XV88 Broadside Battlesuit x3, High Yield Missiles, Smart Missile system, Velocity Tracker
- Riptide, Velocity Tracker
- Fire Warrior Strike Squad x5
- Devilfish, Seeker Missile
- Kroot Carnivores x10
- Stormsurge, Velocity Tracker, 4x some kind of missile that is ridiculously strength D
- Drone Net VX1-0
- Drones x4, 4x Marker Lights
- Drones x4, 4x Marker Lights
- Drones x4, 4x Marker Lights
- Drones x4, 4x Marker Lights
——————————————————
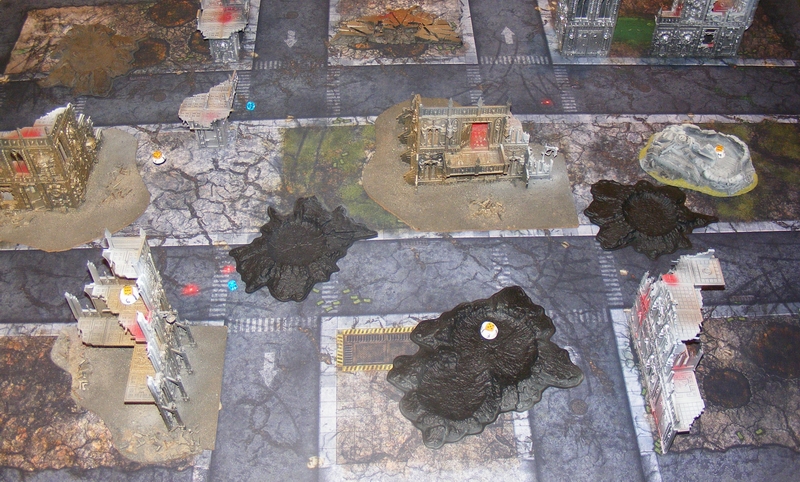
Mission – Right Place at the Wrong Time
Players alternate setting up 6 numbered objectives. When an objective is first claimed, roll a D6. On a 1, the objective explodes, causing D6 S5 AP4 hits to the squad that claimed it, and then the objective is removed from the game permanently! On a 2-3, the objective is removed. On a 4+, the objective is “real” and is rolled for as a Mysterious Objective, re-rolling all results of 1.
If 3 objectives are removed, the remaining 3 are “real” and if 3 are identified as “real” all others are removed (assume they are deactivated). Objectives are worth 3 points at the end of the game. First Blood, Linebreaker, and Slay the Warlord for one point each.
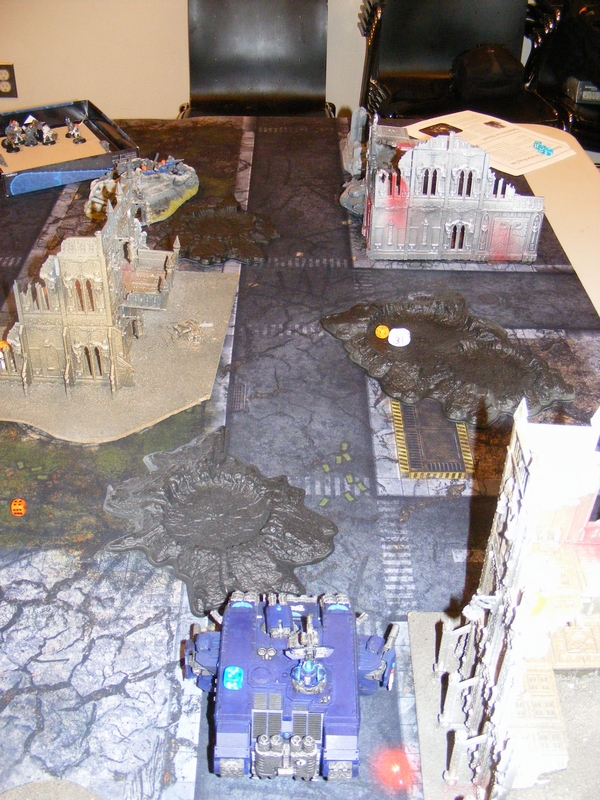
For this game with Josh, we played with a short board edge deployment.
Setup


This is the first time I have played a tournament scenario with this club in which I went first, even counting last year.
——————————————————
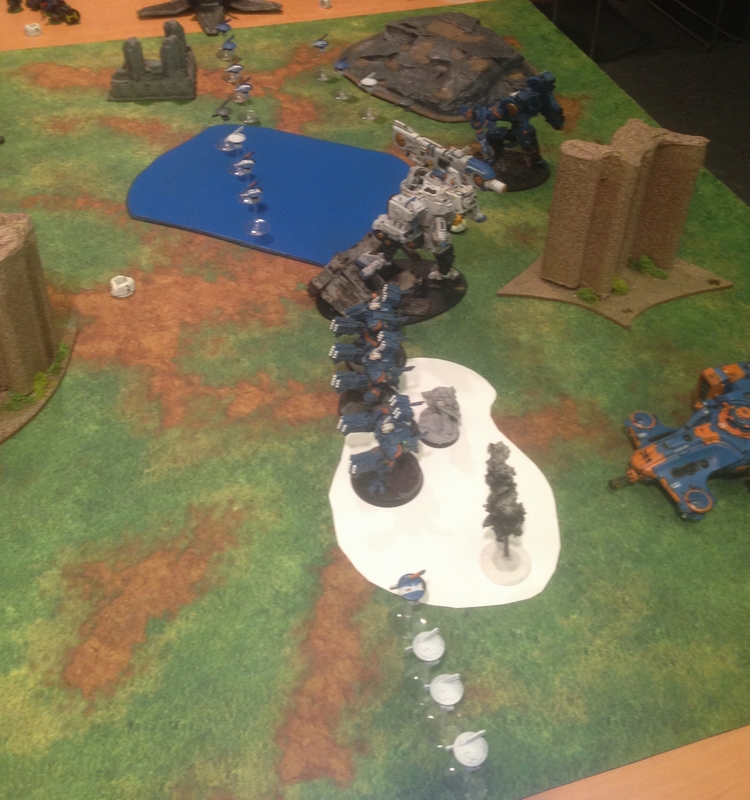
Azure Flames – Turn 1
Ironclad drops behind the Devilfish and glances it with the Heavy Flamer, but the Meltagun is jink-saved. Land Raider with Leonidas and his posse move Flat Out while the Land Speeders chill by an objective.

Ironclad shakes up the backfield, but a lucky jink save spares the Devilfish from melta doom!

The Land Raider risks extra movement in lieu of using Smoke Launchers. The Land Speeders cower by the objective.
Tau – Turn 1
Marker Lights turn the Land Raider into an Xmas tree, and then four Strength D missiles wreck it. Leonidas and the Terminators take fire from the Kroot, but are unscathed. Battlesuits unleash fury on the Ironclad, doing 2 glances. Turn not pictured.
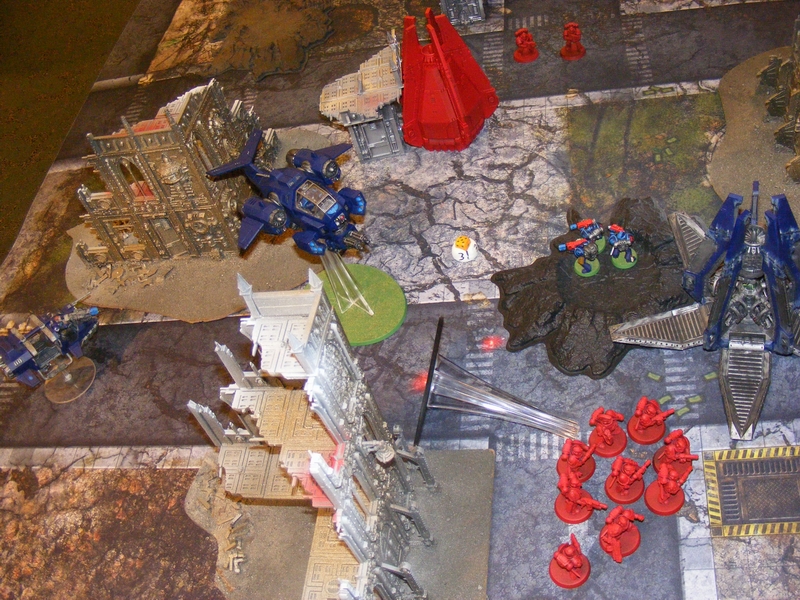
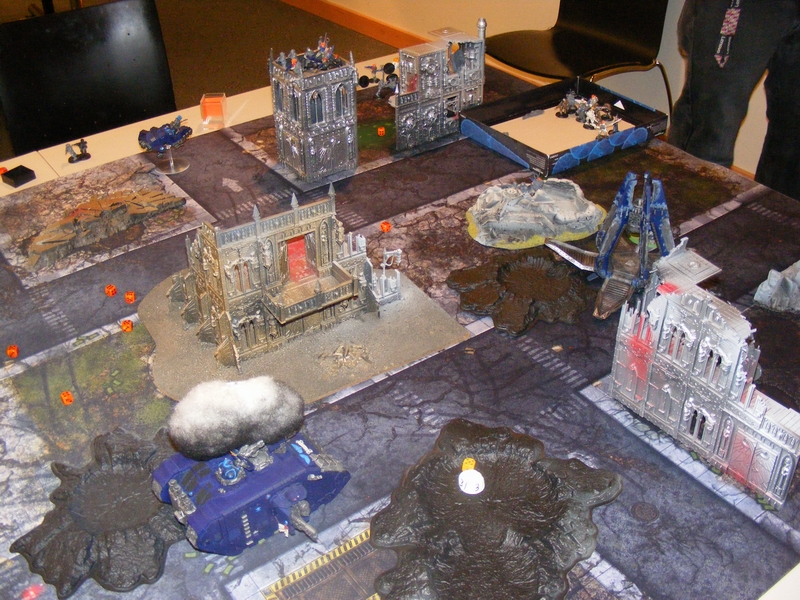
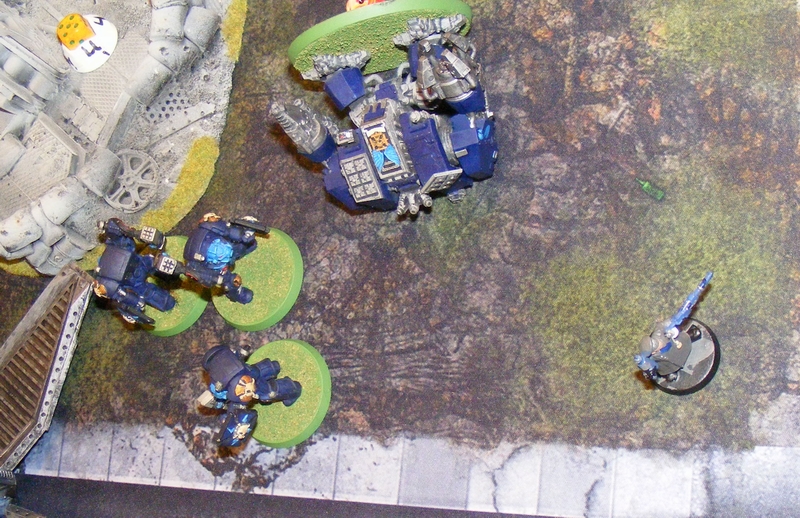
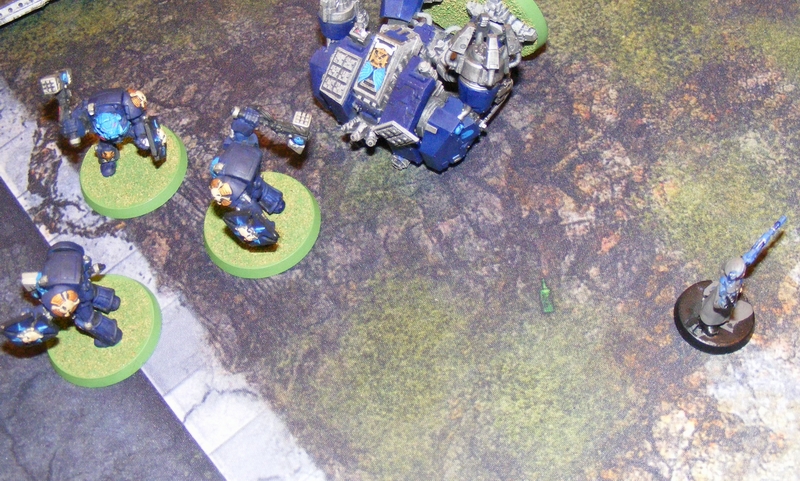
Azure Flames – Turn 2
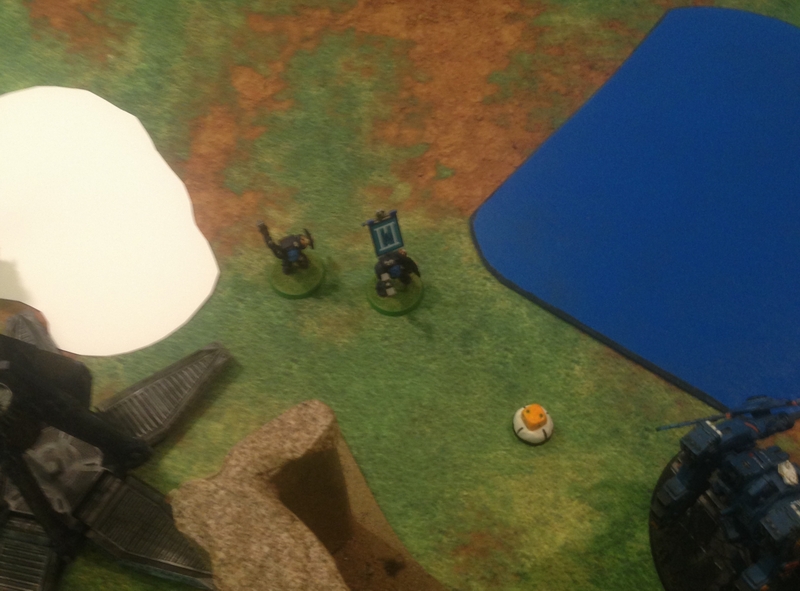
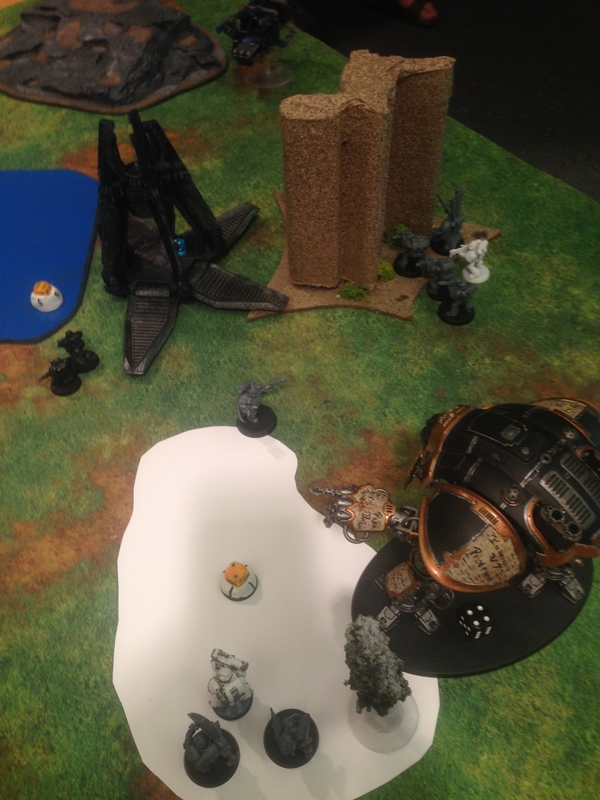
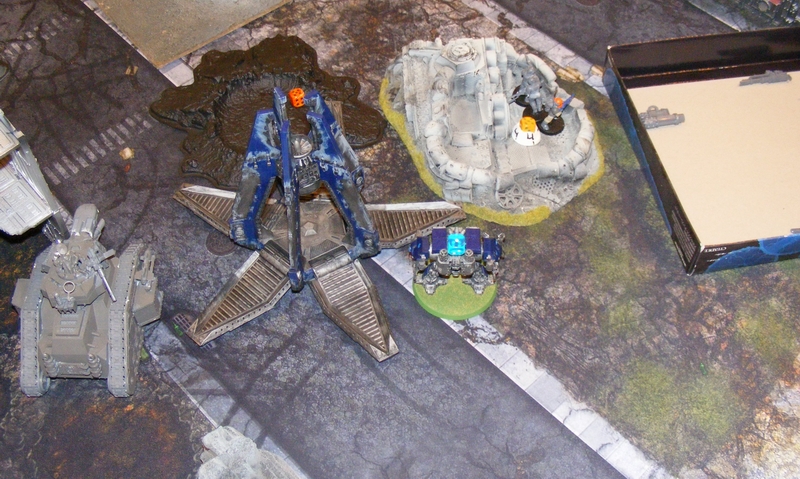
Leonidas splits off from the Terminators, burns 4 Kroot, and charges the rest, breaking them and wiping them out. Land Speeders emerge from cover to fire at the Stormsurge, but lucky Invulnerable saves negate their shots. The Terminators charge the Stormsurge, doing 6 wounds and narrowly avoiding stomp attacks! Ironclad charges the Suits, but one glance from overwatch fire wrecks it!

Leonidas takes the Kroot out as they flee.

Undeterred by the loss of their Land Raider, the Terminators charge the Stormsurge! It’s stomp attack doesn’t catch them off guard.

One more missile makes the Ironclad give up.
Tau – Turn 2
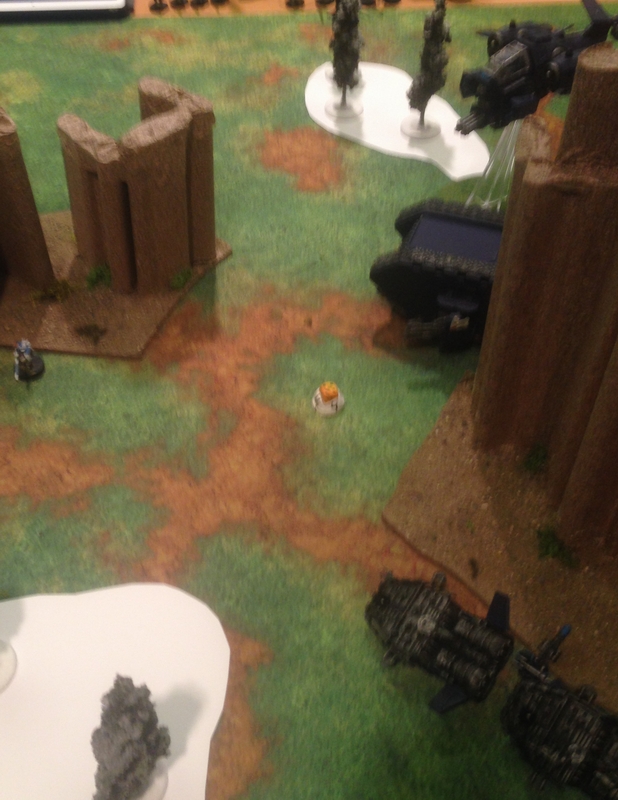
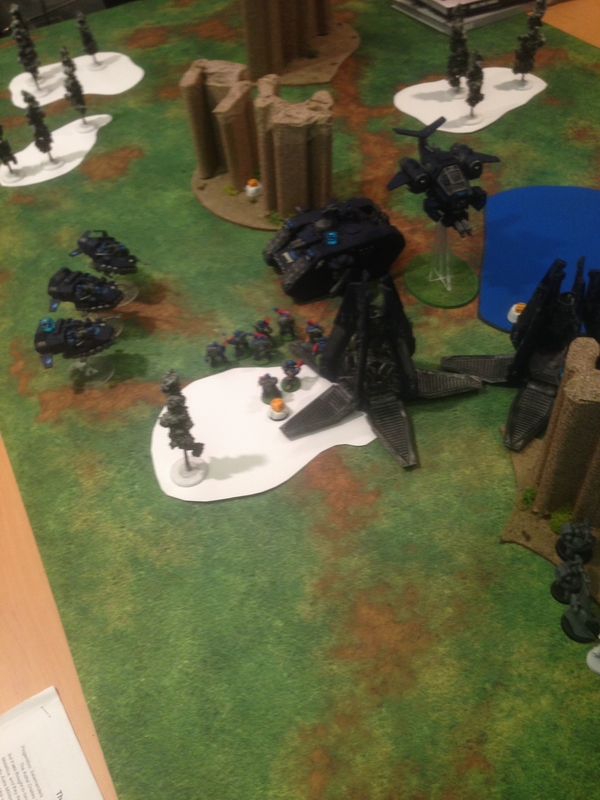
The Riptide uses marker lights to turn the Land Speeders into crushed beer cans. The Devilfish advances on the central objective. Terminators finish off the Stormsurge.
The Land Speeders taste Tau firepower, as the Fire Warriors go for the gold!

Hey guys, how’s it going?
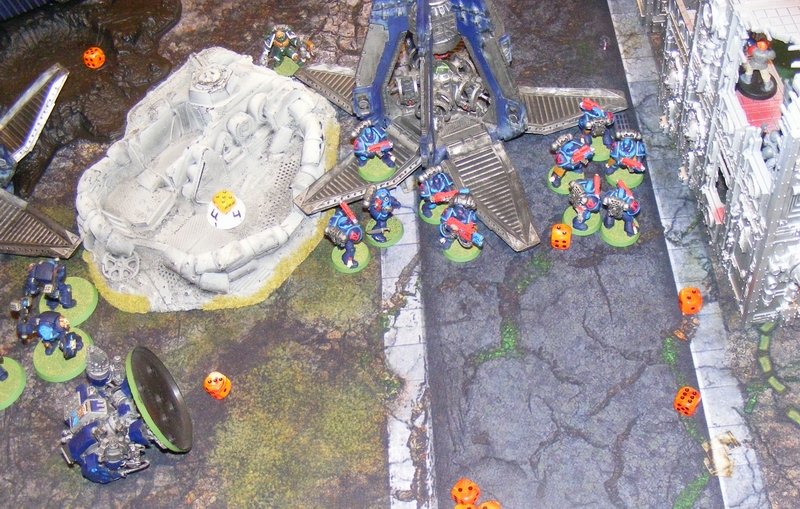
Azure Flames – Turn 3
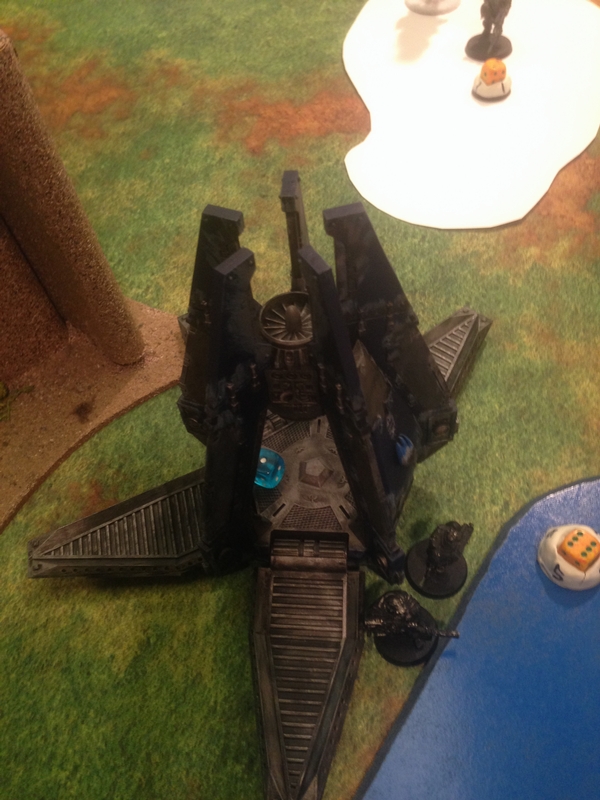
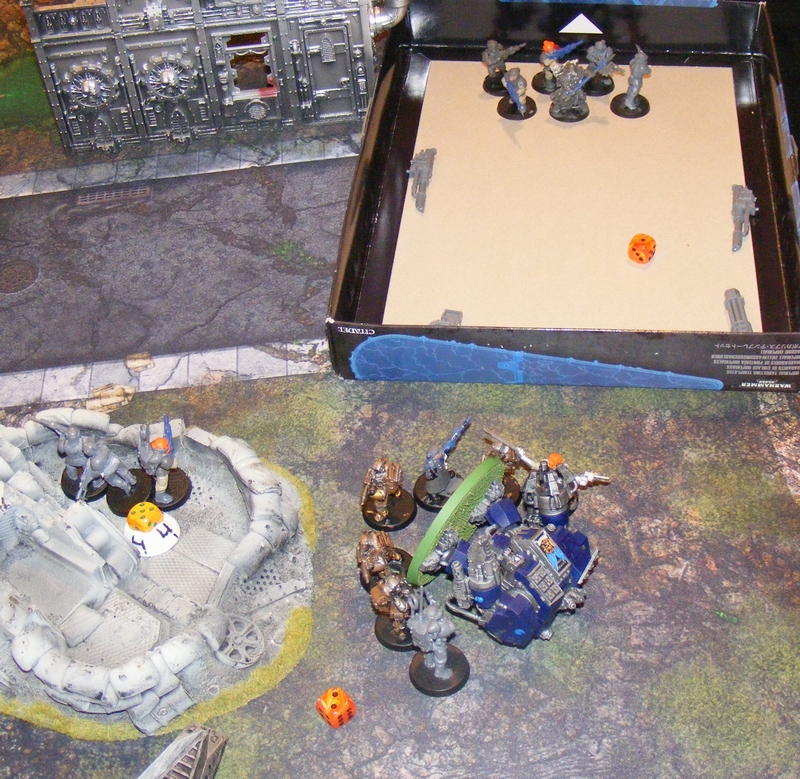
Terminators lose two models to overwatch fire, but survivors kill the suits and the commander! Stormtalon arrives and puts one more glance on the Devilfish. Tactical squad arrives and combat-squads to hold the objective and menace the Devilfish.
Commander and suits are now roughly the consistency of medium-spicy salsa.
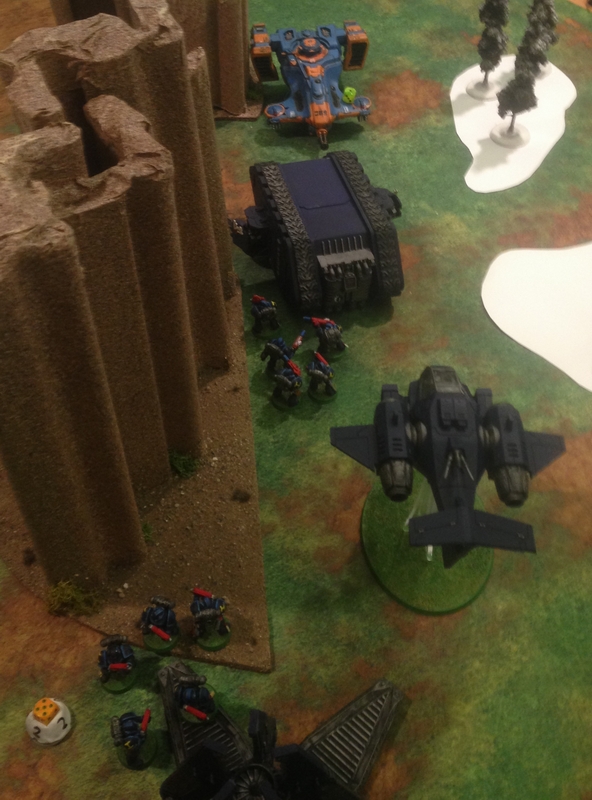
Tactical squad is finally on the job.
Tau – Turn 3
Riptide lays into the Terminator survivors, but good invulnerable saves protect them. Fire Warriors and Devilfish kill two Tactical Marines, breaking the combat squad!
The Tactical squad has to fall back before the Tau onslaught.

Riptide tries to put the hurt on the Terminators, but they’re just too hard!
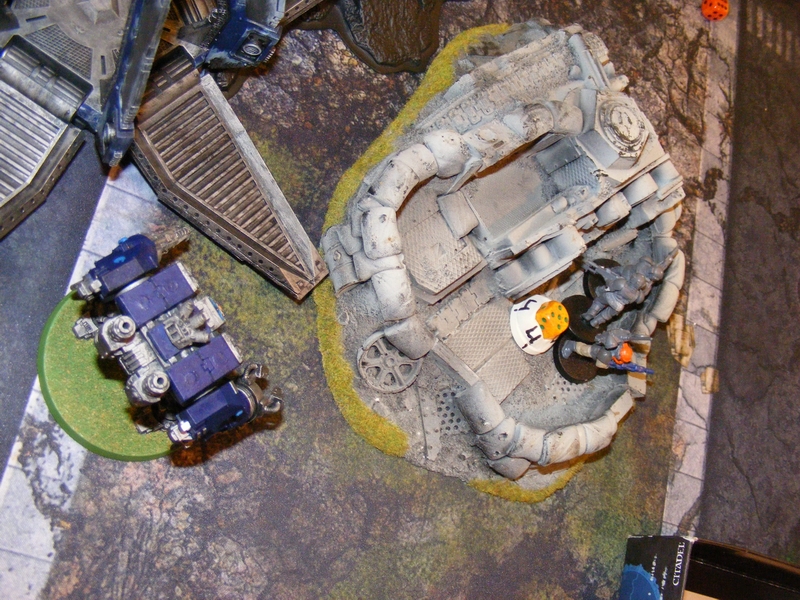
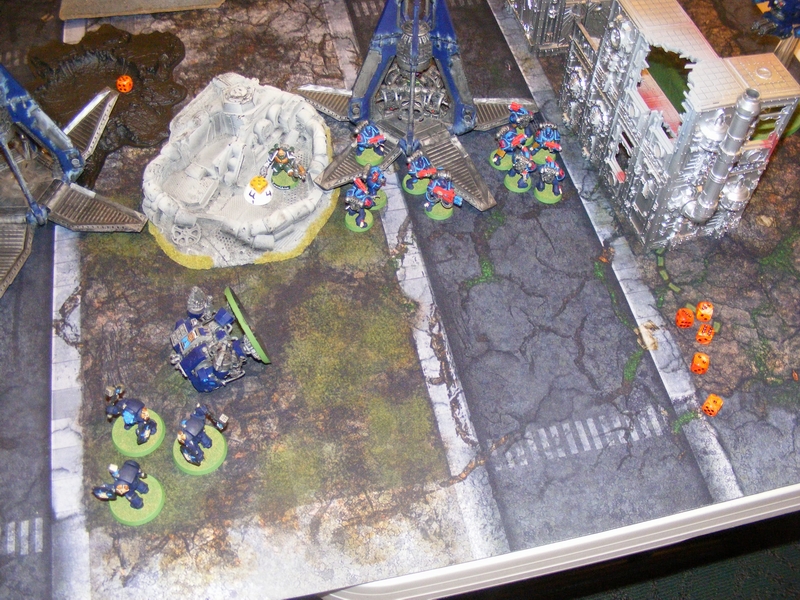
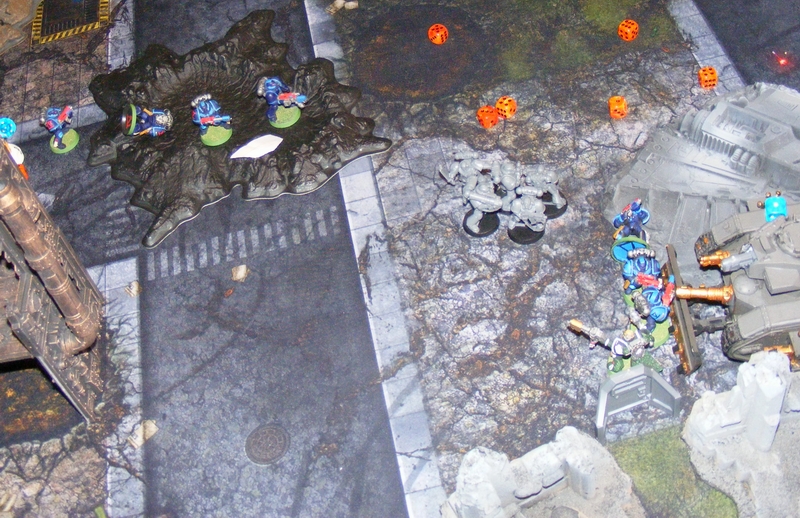
Azure Flames – Turn 4
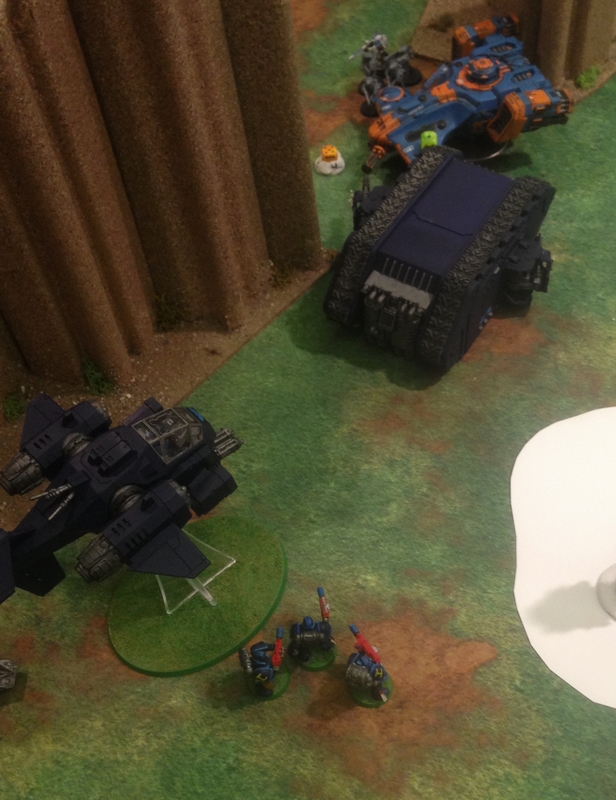
Melta firepower from the Tactical squad explodes the Devilfish, and the Stormtalon kills four of the Fire Warriors, breaking them. The Terminators take the objective by the lake.
The Tau are driven back.

Objective secured.
Tau – Turn 5
Terminators survive another round of fire. Game ceded.
—————————————————-
Josh’s Tau list relies a LOT on Marker lights. They turn a moderately-sized CAD into a can’t miss scalpel, able to kill any target with devastating precision. Worse, if you take the time to kill Marker Light Drones, you’re not killing things that can kill YOU. The Stormsurge is a great super heavy, but it can’t hold up to a kickass melee unit like Thunder Hammer Terminators.
Next: Modeling projects, painting, special rules, fluff and MORE! Stay tuned!
Highland May Tournament Prep part 1
Good news! I played two more missions in preparation for the upcoming tournament!
Bad news. I forgot my camera at home, and was forced to use my phone’s camera, which is nowhere near as good.
Oh well. Here’s a condensed Batrep against Kyle, a foustrandshobby.com veteran! Please forgive fuzzy pictures.
——————————————————
Bozeman – Azure Flames Space Marines (Salamanders)
- Combined Arms Detachment
- Leonidas, Captain of the 1st Company (counts as Vulkan He’stan)
- Ironclad Dreadnought, Chainfist, replace Storm Bolter with Heavy Flamer, Ironclad Launchers
- Drop Pod
- Terminator Assault Squad x5, 5x Thunder Hammer/Storm Shield
- Land Raider Redeemer, Extra Armour, Multi-Melta
- Tactical Squad x10, Veteran Sergeant, Power Fist, Bolter-Melta, Meltagun, Multi-Melta
- Drop Pod
- Scout Squad x5
- Land Speeder Storm, Multi-Melta
- Land Speeder Squadron x3, 3x Multi-Melta
- Stormtalon Gunship, Skyhammer Missile Launcher
——————————————————
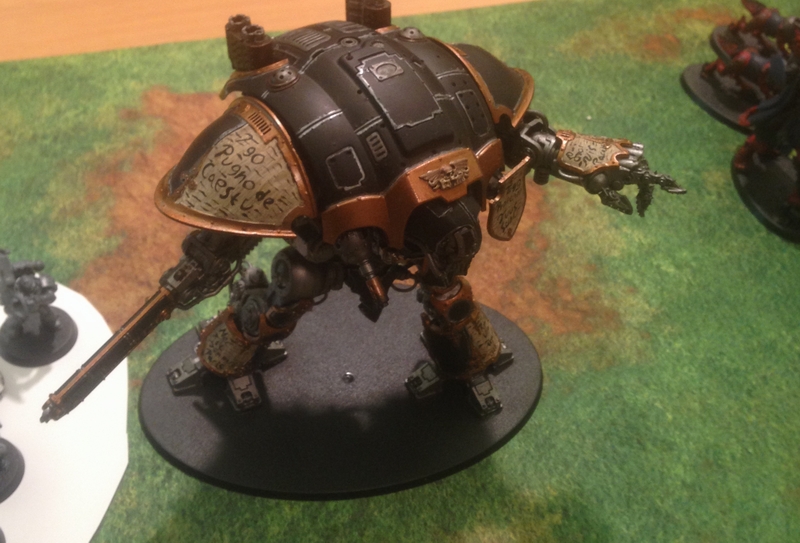
Kyle – Astral Drakes Space Marines with Imperial Knight Ally (special chapter, counts as Salamanders, but loses master crafted weapons and instead gains ability to take Heavy Flamers and other special units).
- Combined Arms Detachment
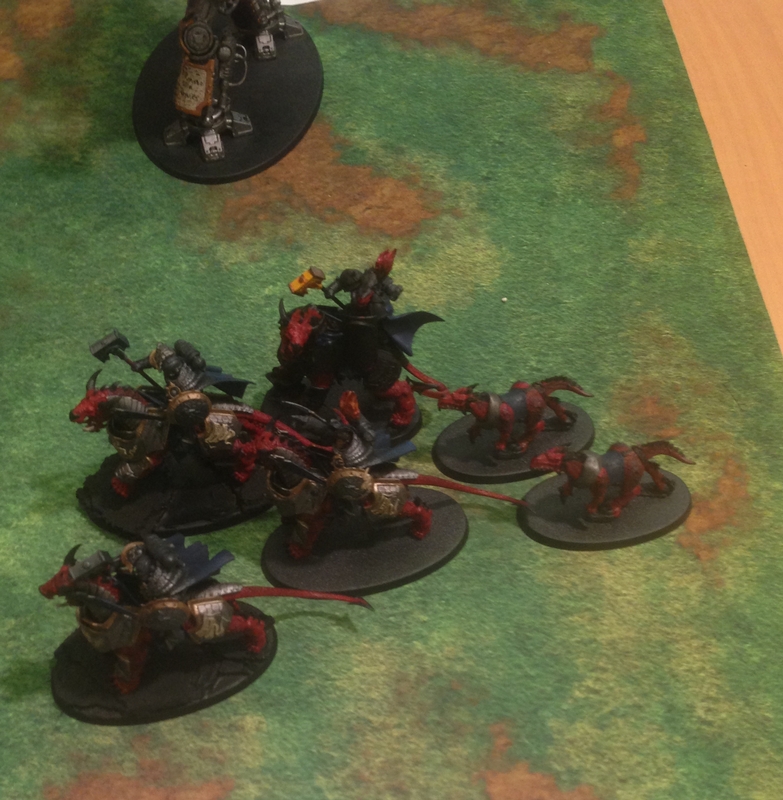
- Special Chapter Master on Firedrake (counts as Wolf Lord with Thunderwolf, Thunder Hammer, Storm Shield, and throwable S10 AP2 Hammer)
- Immature Firedrakes x2 (counts as Fenrisian Wolves)
- Firedrake Cavalry x3 (counts as Thunderwolf Cavalry, 2x Thunder Hammer/Storm Shield, 1x Wolf Claws)
- Tactical Squad x10, Flamer, Combi-flamer, Heavy Flamer (note: this is allowed due to unique Chapter Tactics)
- Sternguard x5, 3x Combi-Flamer, 2x Heavy Flamer
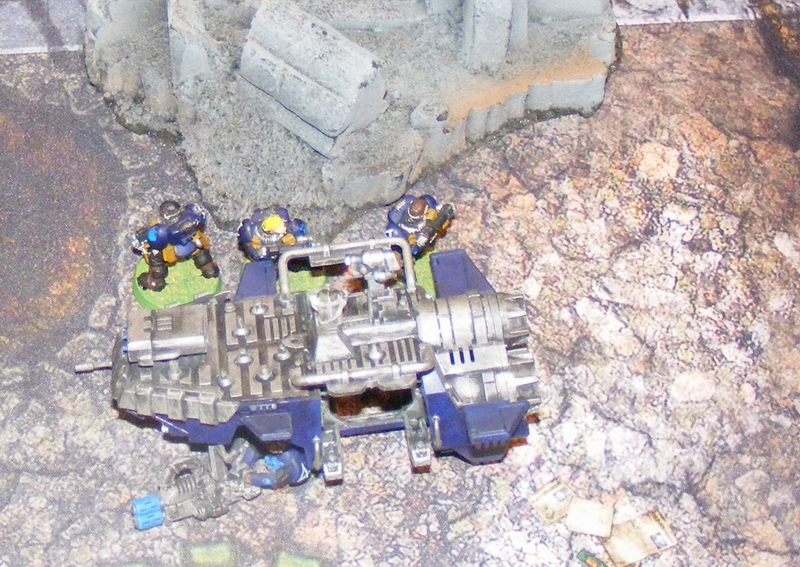
- Promethean Rhino (unique unit, counts as a Rhino that gives any infantry model within 2″ the Torrent special rule for any weapon that is a “flamer” according to the main rulebook)
- Devastators x5, 4x Missile Launchers, 4x Fireball Missile upgrade (special Chapter Tactics missile, S5 AP4 small blast ignores cover, +15pts/model)
- Scouts x5, 5x Sniper Rifles, Camo Cloaks
- Special Chapter Master on Firedrake (counts as Wolf Lord with Thunderwolf, Thunder Hammer, Storm Shield, and throwable S10 AP2 Hammer)
- Allied Knight Detatchment
- Knight Gallant (Knight Chainsword and Power Fist) with Meltagun
——————————————————
Mission – Right Place at the Wrong Time
Players alternate setting up 6 numbered objectives. When an objective is first claimed, roll a D6. On a 1, the objective explodes, causing D6 S5 AP4 hits to the squad that claimed it, and then the objective is removed from the game permanently! On a 2-3, the objective is removed. On a 4+, the objective is “real” and is rolled for as a Mysterious Objective, re-rolling all results of 1.
If 3 objectives are removed, the remaining 3 are “real” and if 3 are identified as “real” all others are removed (assume they are deactivated). Objectives are worth 3 points at the end of the game. First Blood, Linebreaker, and Slay the Warlord for one point each.
For this game with Kyle, we played with a long board edge deployment.
——————————————————
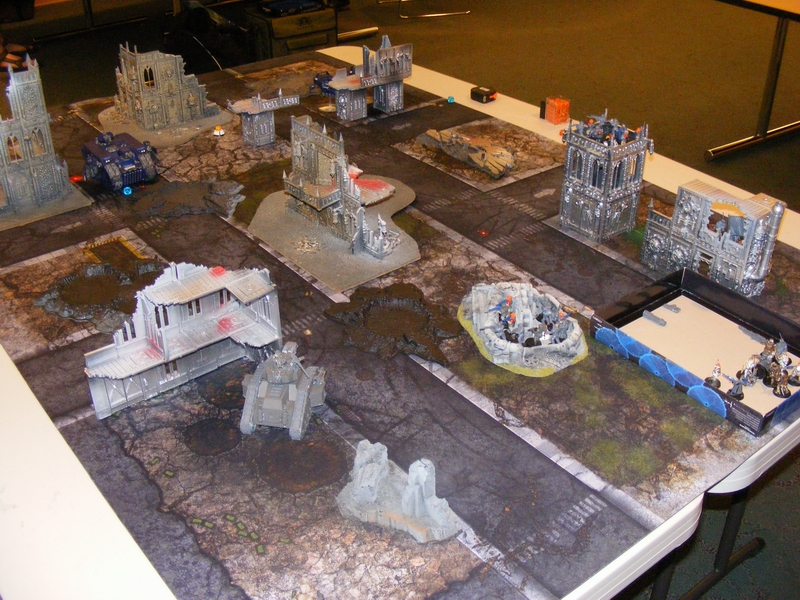
Setup
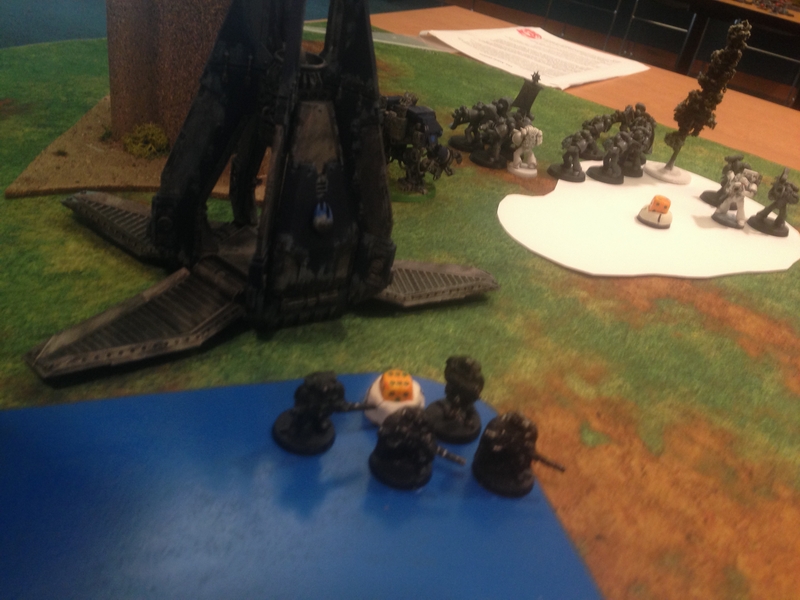
I deployed Leonidas and the Terminators in the Land Raider Redeemer, with the Land Speeders around them. Kyle had the Tactical Squad and Devastators in a forest, with the Sternguard in the Rhino Promethean. The Chapter Master and Firedrake Cavalry were to the left of the Knight Titan (from Kyle’s POV).

——————————————————
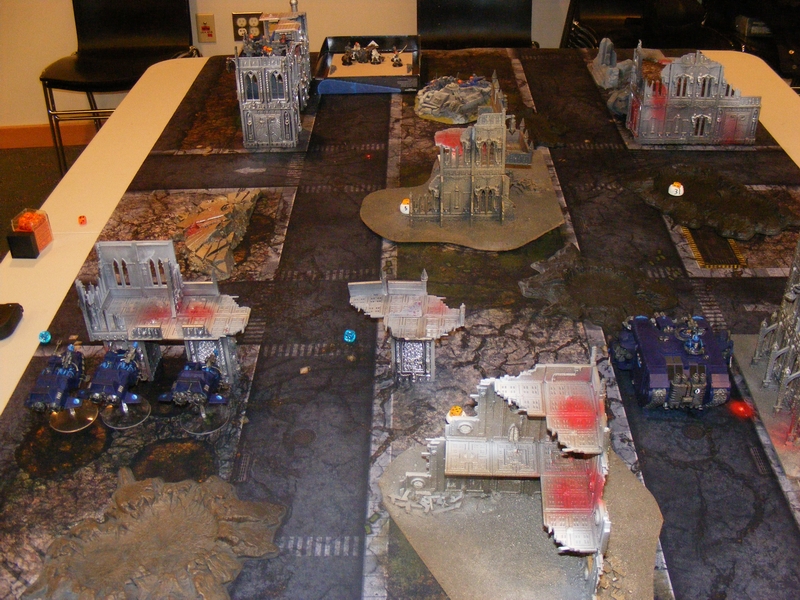
Turn 1 – Astral Drakes
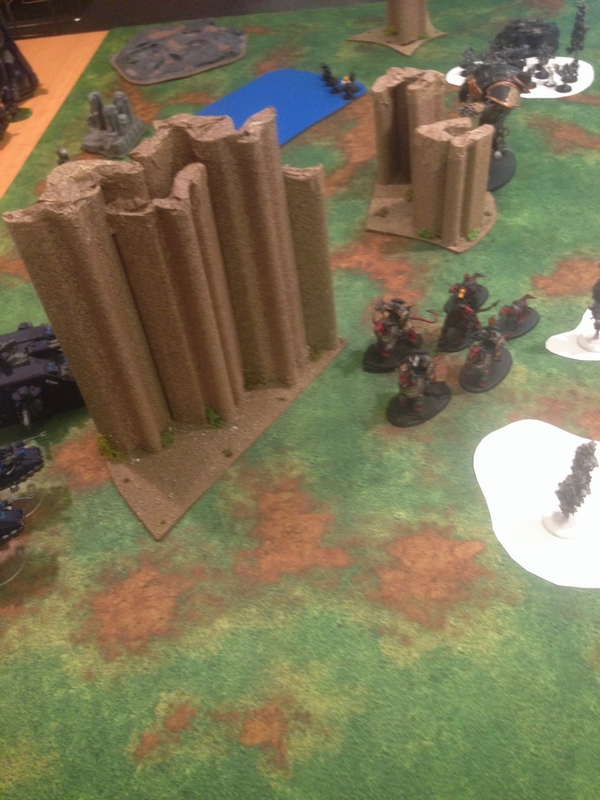
The Chapter Master and his Firedrakes move out towards the Land Raider. The Knight takes cover behind some terrain.
We have 4 attacks for some reason! Here we come!
Knight seeks cover among the flatiron rock formation.
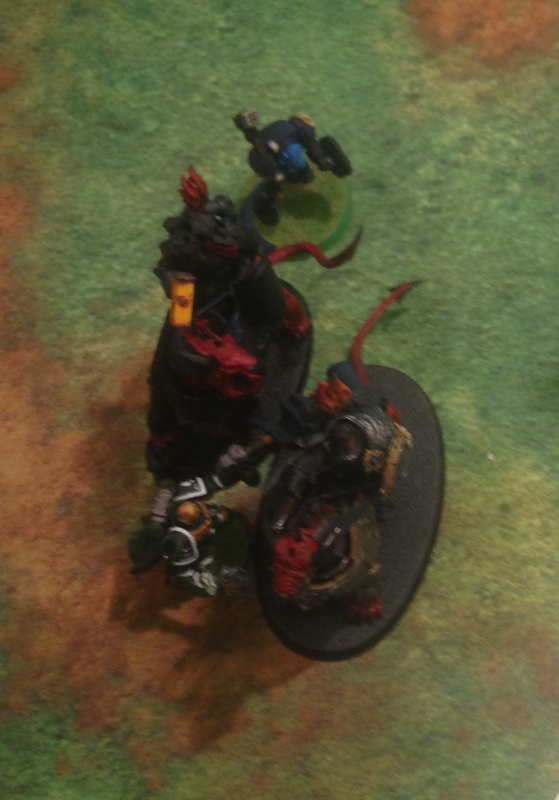
Turn 1 – Azure Flames
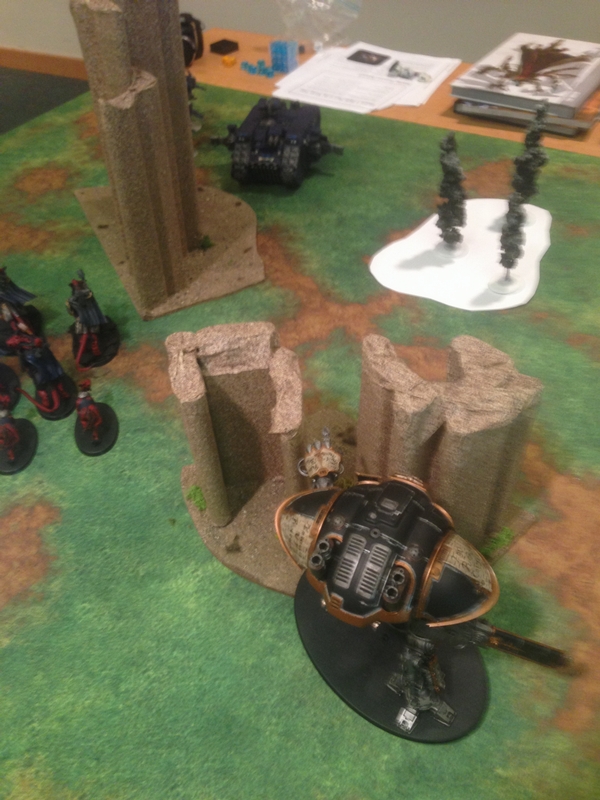
Leonidas and the Terminators charge the Firedrakes. Lord challenges the Terminator Sergeant and kills him, but Immature Firedrakes die as well as a couple wounds from one of the Firedrakes. Two other Terminators are killed by Firedrakes. Ironclad drops by the squads in the forest and kills the Promethean Rhino. Drop pod kills one Sniper Scout.

Leonidas and the Terminators throw themselves at the counts-as Thunderwolves to slow them down. They succeed pretty well.
Hey, that was a really nice custom Rhino!
Drop Pods are always so annoying…
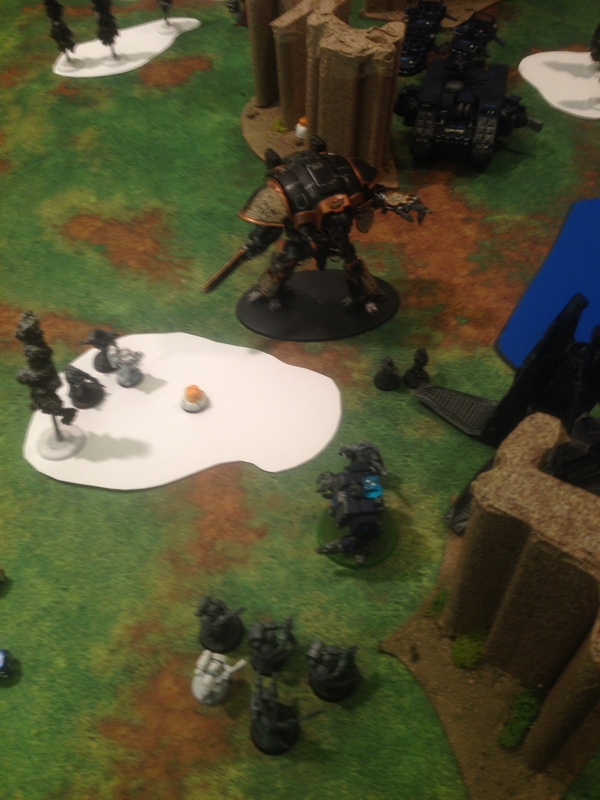
Turn 2 – Astral Drakes
Good saves by the Terminators mean only one Terminator dies. Knight rolls triple 1’s for difficult terrain, and so cannot charge the Ironclad this turn. Tactical squad charges and a few die, but keeps the Ironclad in a tarpit. Before the charge, Krak missiles do a Crew Shaken result to the Ironclad. Scouts charge the Drop Pod and do one glance.
Leonidas toughs it out as the Firedrakes do more damage.

Awful roll prevents the Knight from charging the Ironclad.
 Drop pods are REALLY annoying…
Turn 2 – Azure Flames
Leonidas takes one wound from the remaining Wolf Claw Firedrake. Land Raider and Land Speeders move up behind cover to hold an objective. Ironclad kills all but one Sergeant in the tatsquad. Land Speeder Storm arrives. Drop pod and Land Speeder Storm kill two more sniper scouts, breaking the squad.

Leonidas has lasted much longer than I expected him to.

Waiting to rush the Knight…

The Scouts flee from bolter fire!
 The Ironclad still takes on the Tactical squad.
Turn 3 – Astral Drakes
The last Terminator is killed, as Leonidas takes one more wound, just barely hanging on! The Knight charges the Ironclad, destroying it but taking two hull points with it.
Leonidas barely holds on…
The Titan turns the Ironclad into shrapnel, saving the Tactical Sergeant.
Turn 3 – Azure Flames
Leonidas succumbs to the Firedrakes. The Land Speeder Storm, Land Speeders, and Land Raider team up and just barely manage to remove the last wound from the Knight! It explodes and takes the last Tactical marine with it! The Stormtalon blasts all but one of the Devastators.

The Chapter Master finishes Leonidas and prepares a nasty surprise for the Azure Flames vehicles…
 Now THAT’S how you kill a Knight!
Turn 4 – Astral Drakes
Chapter Master charges the Land Raider, doing 3 hull points. Remaining Sterguard turn their flamers on the Land Speeder Storm, killing it and ALL of the Scouts inside before they can even disembark! Two remaining Sniper Scouts charge the Drop Pod and take one more hull point.
That Drop Pod…

A S10 Thunder Hammer puts the hurt on the Land Raider
Turn 4 – Azure Flames
Tactical Squad finally arrives. Shooting takes care of the Chapter Master, Firedrake, Devastators, and Scouts. Having only one Sternguard squad of 4 men, Kyle cedes.
———————————————————————-
Thunderwolf Cavalry is hard, but even a weaker but still hard melee unit can really slow them down and make them less scary. Knights can also be very scary. Kyle told me after the battle that I did EXACTLY what you need to do to a Knight; hit it from multiple sides with dedicated anti-vehicle weapons.
Next, I take on Josh and his Tau Markerlight madness!
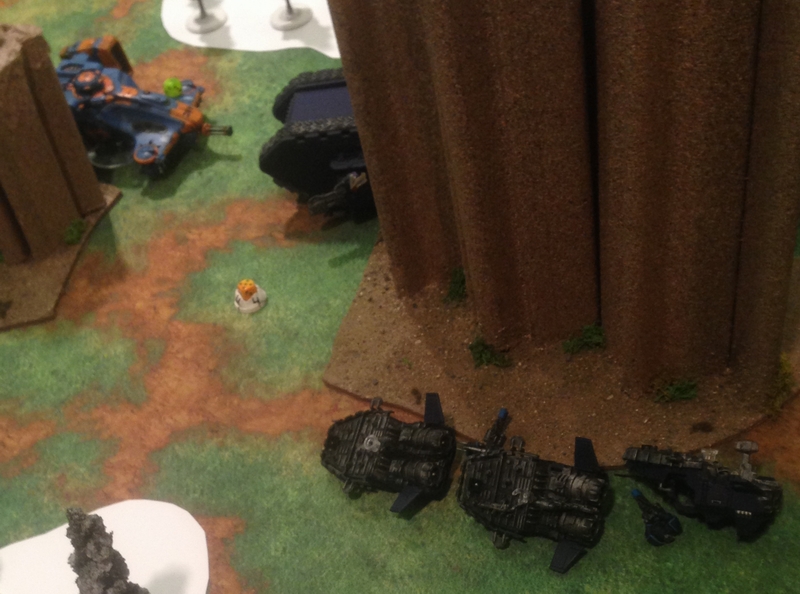
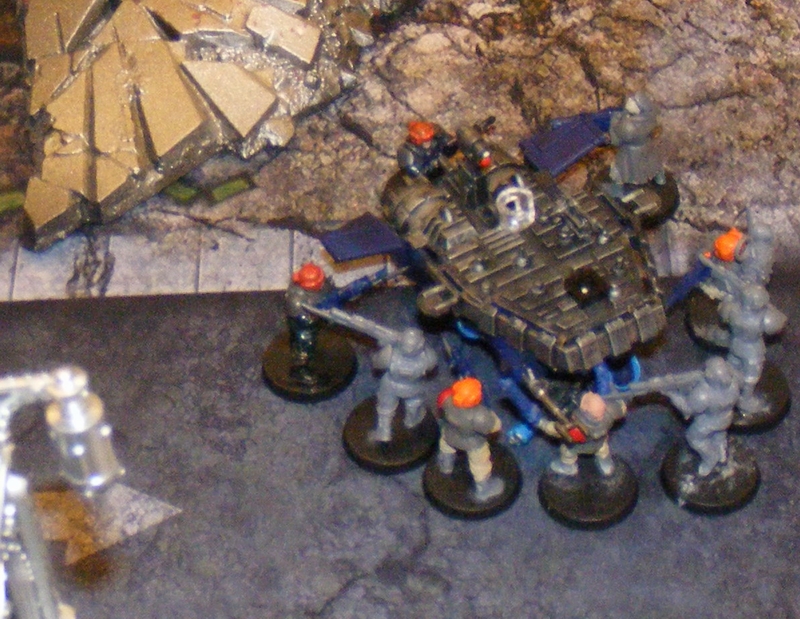
Tau Kor’or’vesh Kir’shashvre “Castellan” escorts


FINALLY. This squadron has been plaguing me for months. These Castellan escorts have almost as much detail as larger Forgeworld Tau capital ships in less than 1/4 the area. The three color scheme doesn’t make it easy. Finally, the Tau script on the bases took forever because even though there was only one word per ship, it was much harder than the big ships with multiple words. I had to do it OVER and OVER and I got sick of it.
I am not looking forward to the 8 Wardens, even though Kir’la is only a 5 letter word.
However, I am taking a break from the Tau. Coming up next is some battle reports from Highland in prep for this year’s Golden Rhino tournament. After that, BIG projects for the Azure Flames which are in various stages of development. This is an exciting time! Stay tuned!
Highland April Tournament Prep part 2 – Dark Angels with White Scars
Part two of my Tournament Prep was with Paul! He wanted to try some of the new things from the Angels of Death supplement.
Just as in my previous post, we played a 1500 point game. We were limited to one CAD and one other formation, with Highlander rules (see previous post). We also played Right Place at the Wrong Time, this time with Dawn of War (long table edges).
——————————————————
Bozeman – Azure Flames Space Marines (Salamanders)
- Combined Arms Detachment
- Leonidas, Captain of the 1st Company (counts as Vulkan He’stan)
- Ironclad Dreadnought, Chainfist, replace Storm Bolter with Heavy Flamer, Ironclad Launchers
- Drop Pod
- Terminator Assault Squad x5, 5x Thunder Hammer/Storm Shield
- Land Raider Redeemer, Extra Armour, Multi-Melta
- Tactical Squad x10, Veteran Sergeant, Power Fist, Bolter-Melta, Meltagun, Multi-Melta
- Drop Pod
- Scout Squad x5
- Land Speeder Storm, Multi-Melta
- Land Speeder Squadron x3, 3x Multi-Melta
- Stormtalon Gunship, Skyhammer Missile Launcher
Paul – Dark Angels with White Scars
- Combined Arms Detachment (Dark Angels)
- Librarian, Lv2, Conversion Field, Bike, Fulmination discipline (new in Angels of Death)
- Ravenwing Command Squad x6, Apothecary, Ravenwing Standard, Plasma Talons
- Scouts x5, Shotguns
- Tactical Squad x10, Grav Cannon with Grav Amp, Grav Gun
- Drop Pod
- Tactical Sqiad x5
- Drop Pod
- Ravenwing Land Speeder Vengeance
- Ravenhawk Assault Wing (White Scars)
- Stormraven
- Venerable Dreadnought, Plasma Cannon, Heavy Flamer
- Sternguard x10, Power Sword, Heavy Flamer
——————————————————
Setup


——————————————————
Before turn 1
Dark Angel Ravenwing Bikes make a scout move to claim an objective. However, it is a bomb which kills the Apothecary, leaving them without Feel No Pain!
Dark Angels/White Scars – Turn 1
The Tactical Squad arrives via drop pod and destroys the Land Speeders with bolter and Grav fire. The rest of the army advances. Turn not pictured.
Azure Flames – Turn 1
Land Raider advances and destroys the Land Speeder Vengeance with a well placed Meltagun shot. Ironclad Dreadnought deep strikes and bakes a bike with his Heavy Flamer.

Land Raider menaces the rest of the board, while the Ironclad drops behind.
Dark Angels/White Scars – Turn 2
Bikes retreat to stay away from the Land Raider, while the Tactical Squad immobilizes the Ironclad with a grav shot. Scouts charge the Drop Pod. The 5-man tactical squad and the Ravenhawk Assault Wing arrive on the left side of the board to get objectives. Sadly, one of the objectives evaporates for the tatsquad.

Ironclads are much less threatening when they can’t walk.

It’s objective time!
Azure Flames – Turn 2
Land Raider makes a mad dash across craters and bakes 1/2 the Tactical Squad, including all the Grav! Even immobilzed, the Dreadnought fires its Heavy Flamer and bakes the Scouts. Stormtalon arrives and puts two glances on the Stormraven!

The Land Raider drives like it’s auditioning for Fast & Furious 40,000.

Nice shooting by the Stormtalon!
Dark Angels/White Scars – Turn 3
Tactical squad charges the Drop Pod, glancing it as Bikes stay cautiously out of Land Raider charge range. Venerable Dreadnought disembarks to get the objective.

Bikes are cautious while Tatsquad is gutsy!

The Venerable Dreadnought’s struggle is real, as is the objective he finds.
Azure Flames – Turn 3
Land Speeder Storm arrives behind the Stormraven, but due to Reinforced Ceramite, the Multi-Melta is useless! Tactical Squad arrives via Drop Pod, grabs both objectives by combat squadding, and vapes the Venerable Dreadnought. However, an explosion kills the Sergeant! Land Raider Redeemer Kool-Aid Mans through the wall and takes the central objective. Stormtalon menaces the 5 man tatsquad, killing 3.

Melta is less effective without the extra D6. Meanwhile, the Stormtalon brings Death from Above.

Got it!

Stunt Driver! OH YEAHHHHH!
Dark Angels/White Scars – Turn 4
Bikes go the long way around to avoid the Land Raider. Sternguard disembark and completely wipe out the bolter squad.

Still wary of the Land Raider.

Sternguard arrive for some serious firepower.
Azure Flames – Turn 4
Land Raider rolls out to go for the other objective. Stormtalon finishes off the Stormraven.
Stormraven finally goes down, as the Stormtalon risks a hover.

Land Raider goes for a different objective.
Dark Angels/White Scars – Turn 5
Remaining two bolter marines run to secure central objective. Bikes charge the Land Raider with rending sticks and do nothing, then hit-and-run 12″. Sternguard charge the remaining tatsquad in the crater, and kill them!

The bikes punch the Land Raider in the butt to no effect.

Sternguard get the job done!
Azure Flames – Turn 5
Leonidas and the Terminators disembark the Land Raider, and then the Land Raider moves back to the central objective. The two bolter marines holding it are killed, and the Land Raider holds the objective. The Stormtalon hovers flat-out to get the objective in the crater, and Leonidas and the Terminators charge the Sternguard, killing them all. The scouts hold the last objective. Game ends.

Leonidas finally shows up, and puts the hurt on the Sternguard!

Land Raider makes one more dash through a wall, and takes the last objective.
——————————————————
Final Score:
Azure Flames: 9 plus Linebreaker for 10
Dark Angels/White Scars: First Blood for 1
——————————————————
Paul was banking on a psychic power to trade places with another unit, and get a turn one charge! Unfortunately, he did not roll that power. He had a good list, but 3 of the 4 objectives he identified were removed, one of which killed his apothecary!
In the end, I love this mission because it requires you to be mobile and tactical, but not as frantically as a Maelstrom mission.
Next: more painting and modelling projects!
Highland April Tournament Prep part 1 – Imperial Guard
Last year, I took on an anything-goes style 40K tournament with one goal: show that 40K is still fun by standing up to beardy broken lists with a balanced fun Highlander-style Combined Arms Detachment. I succeeded beyond my wildest dreams, because I not only won the tournament, I made quite the impression on Ian, the event coordinator.
So, this year, the points value is reduced to 1500, and players are limited to one Combined Arms Detachment plus one other formation of any kind, subject to the Highlander rules of composition. For those unfamiliar, you can only take one of any given unit. The exception is Troops choices, but you can only duplicate Troops choices after taking one of every type of Troops in your Codex.
The Tournament is in July. Never too early to prep. With the help of the wonderful people of the Highland Library 40K Club, I played two great games to see how my initial list performs. My first game was against Michael, who I played against last month.
The mission that we played was the 4th mission from last year’s tournament. We didn’t get to play it properly, so it will be the first mission in this year’s tournament.
————————————————————–
Bozeman – Azure Flames Space Marines (Salamanders)
- Combined Arms Detachment
- Leonidas, Captain of the 1st Company (counts as Vulkan He’stan)
- Ironclad Dreadnought, Chainfist, replace Storm Bolter with Heavy Flamer, Ironclad Launchers
- Drop Pod
- Terminator Assault Squad x5, 5x Thunder Hammer/Storm Shield
- Land Raider Redeemer, Extra Armour, Multi-Melta
- Tactical Squad x10, Veteran Sergeant, Power Fist, Bolter-Melta, Meltagun, Multi-Melta
- Drop Pod
- Scout Squad x5
- Land Speeder Storm, Multi-Melta
- Land Speeder Squadron x3, 3x Multi-Melta
- Stormtalon Gunship, Skyhammer Missile Launcher
Michael – Imperial Guard (I’m not calling them Astra Militarum)
- Combined Arms Detachment
- Land Raider Executioner Command Tank, Camo Netting
- Commander Pask
- Commisar, Plasma Pistol, Power Sword, Refractor Field
- Commisar, Plasma Pistol, Power Sword, Refractor Field
- Veteran Squad, Grenadiers, Forward Sentries, Demolitions
- Infantry Platoon
- Platoon Command Squad, Medic, Commander, Power Sword, Plasma Gun
- Infantry Squad, Plasma Gun
- Infantry Squad, Plasma Gun
- Primaris Psyker, Lv2
- Techpriest Enginseer
- 5 Servitors, Servo Arms
- Stormlord Superheavy Tank, 2x Lascannon, Camo Netting
- NOTE: Due to Michael not owning a Stormlord, he used a box top as a proxy. Fire arcs were approximated and judged with a 4+.
- Land Raider Executioner Command Tank, Camo Netting
————————————————————–
Mission – Right Place at the Wrong Time
Players alternate setting up 6 numbered objectives. When an objective is first claimed, roll a D6. On a 1, the objective explodes, causing D6 S5 AP4 hits to the squad that claimed it, and then the objective is removed from the game permanently! On a 2-3, the objective is removed. On a 4+, the objective is “real” and is rolled for as a Mysterious Objective, re-rolling all results of 1.

If 3 objectives are removed, the remaining 3 are “real” and if 3 are identified as “real” all others are removed (assume they are deactivated). Objectives are worth 3 points at the end of the game. First Blood, Linebreaker, and Slay the Warlord for one point each.
Setup zones are Random. For this game with Michael, we played Hammer and Anvil (short table edges, 24″ deployment)
Setup
In the grand tradition of Tournament scenarios, I did not go first.
————————————————————–
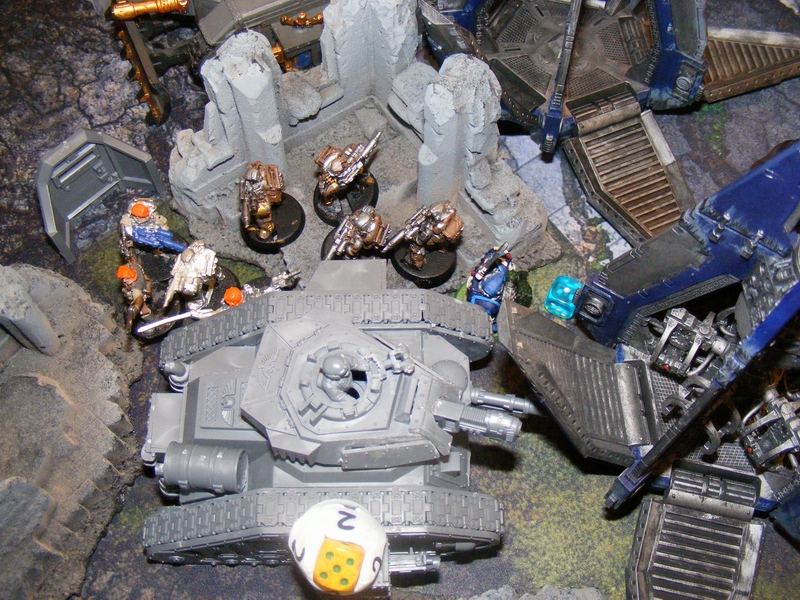
Imperial Guard – Turn 1
The Stormlord fires a Lascannon at the Land Raider Redeemer, glancing it, and fires its Vulcan Megabolter at the Land Speeders. Luckily one of them is out of its fire arc.

The Land Speeders take a huge amount of fire!
Land Raider is glanced.
Azure Flames – Turn 1
Land Raider advances and pops smoke. Ironclad Dreadnought arrives and damages the platoon squad in the bunker. Last Land Speeder flies towards the enemy.
Let’s move out.
 Surprise!
Imperial Guard – Turn 2
Plasma fire from several sources puts two glances on the Ironclad. An Infantry Squad charges the last Land Speeder and kills it.
Guardsmen rush!
Not enough to bring down the Ironclad!
Azure Flames – Turn 2
Ironclad charges the Stormlord, doing 8 hull points of damage, just one away from doing it in! Land Raider moves up and uses its Multi-Melta to destroy Pask’s Leman Russ. Land Speeder Storm arrives and takes cover behind some ruins. Turn not pictured.
Imperial Guard – Turn 3
Veteran squad disembarks from the Stormlord and charges the Ironclad, killing it with Melta bombs! Vulcan Megabolter whiffs against the Land Speeder Storm, but Heavy Bolter sponsons shred the speeder, and other guns kill two of the Scouts, forcing them to go to ground.
Expensive Veterans are worth it, as they save the Stormlord from the Ironclad.
Scouts are stymied in the ruins by heavy fire.
Azure Flames – Turn 3
Stormtalon arrives and kills many of the Infantry squad that killed the last Land Speeder, breaking them. Leonidas and the Terminators disembark the Land Raider, and split up. The Terminators go after the Veterans, killing everyone but the Commissar who breaks and flees! Leonidas kills the remaining troops in the bunker with his Heavy Flamer. Tactical Squad arrives via drop pod, combat squads, and blows up the Stormlord with Melta power! The only survivor is a lone Servitor who is killed by a Drop Pod Storm Bolter.
Air power gets revenge!
This Commissar doesn’t have anyone to shoot, so he flees!
Leonidas clears the bunker, as the Tactical Squad finishes off the Stormlord.
Imperial Guard – Turn 4
Platoon commander orders the Commissar to Get Back in the Fight! Commissar fires his plasma, but a Terminator makes his save.
The Commissar is back, but out of luck.
Azure Flames – Turn 4
Bolter fire and fire from the Stormtalon kill all remaining models. Tabled.
Shot him before the Terminators could finish him.

The Stormtalon hovers to take care of business.
———————————————————————–
I knew holding objectives would be hard with a Superheavy designed to wipe Space Marines off the table, so I poured everything I had into killing it. That ended up working well, as Michael put all his eggs in one basket. A superheavy basket. However, without the Stormlord to dish out punishment, the rest of the army was a bit lacking.
Next: I go up against a Dark Angels/White Scars list with new tricks from the latest Space Marine Supplement: Angels of Death! Stay tuned!
DRILL OUT YOUR BOLTER BARRELS
Look at this. Is there anything that screams laziness more than the barrel of this Space Marine’s Boltgun?

No one wants to see that. That’s bush league. Don’t be like that. Here’s a handy guide on how to drill the barrels of Boltguns so they don’t look terrible.
- Get a good pin vise set with a 1/32″ and a 3/64″ drill bit. The standard Dremel 7 bit set comes with this and is usually less than $5.
- Put the smallest bit (1/32″) in the pin vise, and begin to drill the crossbore of the Bolter.
- PRO TIP: If you are at a bad angle, you’ll ruin the barrel. Instead of going through the whole Bolter at once, drill a bit on one side and switch. Keep switching after a couple turns until you break through.
- Continue as above until you see daylight through the Bolter. DO NOT STOP UNTIL YOU SEE DAYLIGHT. See below.

- Keep the same 1/32″ bit in, and drill a very small divot into the front of the barrel. Try to make it as centered as possible.

- Replace the 1/32″ bit with the 3/64″ bit. Drill out the barrel all the way to the cavity you created in the crossbore.

- Sometimes, the crossbore gets a little extra plastic from the barrel drill, as seen below. Put the 1/32″ bit back in and use it to carefully clean the crossbore.

- If any of your barrels were damaged, fix them with putty or replace the Bolter if you can.
- Now your Bolters don’t look like garbage!
Next: A huge update to the Azure Flames, including two Tactical Squads, and some special surprises courtesy of Games Workshop’s 20th anniversary of the Space Marines! You won’t want to miss this!
Space Marines vs. Imperial Guard/Marines 1500 Big Guns Never Tire
Went back to Highland, got a 1500 pt. game with Michael, who was trying out a new Imperial Guard list. Let’s go!
—————————————
Bozeman – Azure Flames Space Marines (Salamanders)
- -Demi-Company
- Leonidas, captain of the 1st company (counts as Vulkan He’Stan)
- Tactical Squad x10, Veteran Sergeant, Power Fist, Combi-Melta, Meltagun, Multi-Melta
- Drop Pod
- Tactical Squad x10, Veteran Sergeant, Power Fist, Combi-Melta, Meltagun, Multi-Melta
- Drop Pod
- Tactical Squad x10, Veteran Sergeant, Power Fist, Combi-Flamer, Flamer, Multi-Melta
- Rhino, Extra Armour
- Assault Squad x5, 2x Flamers
- Devastator Squad x10, Veteran Sergeant, 4x Missile Launcher, 4x Flakk Missile upgrade
- Whirlwind Suppression Force
- Whirlwind x2
- Land Speeders x3, Multi-Melta x3
- Librarius Conclave
- Librarian, Lv2, Terminator Armour, The Shield Eternal, Dominate, Terrify, Psychic Shriek
- Librarian, Lv2, Invisibility, Terrify, Psychic Shriek
- Librarian, Lv2, Fiery Form, Fire Breath, Flame Breath
—————————————
Michael – Imperial Guard with Space Marine Allies (unbound)
- Imperial Guard
- Leman Russ Exterminator x3, Plasma Cannon Sponsons, Lascannon, Heavy Stubber, Camo Netting, Fire Barrels
- Commander Pask (Warlord)
- Wyvern x3, Camo Netting, Fire Barrels
- Guardsman Squad x10, Medic, Banner, Krak Grenades
- Guardsman Squad x10, Medic, Banner, Krak Grenades
- Guardsman Squad x10, Medic, Banner, Krak Grenades
- Tempestus Scion x10, Tempestus Prime
- Lord Commisar
- Lord Commisar
- Vendetta Gunship, 2x Heavy Bolter Sponson
- Techpriest Enginseer
- Leman Russ Exterminator x3, Plasma Cannon Sponsons, Lascannon, Heavy Stubber, Camo Netting, Fire Barrels
- Space Marine Allies
- Tactical Squad x9, Plasma Cannon
- Tactical Squad x9, Plasma Cannon
- Fortification
- Aegis Defense Line
—————————————
Mission – Big Guns Never Tire (D3+2 objectives, we rolled 3. Heavy Support choices killed give 1VP)
Deployment – Vanguard Strike
Setup:


—————————————
Turn 1 – Azure Flames
Leonidas and the three Librarians join the Assault Squad and they deep strike behind enemy lines, as does one of the melta Tactical Squads. Despite primo back armour melta shots, camo netting saves the Leman Russes with minimal damage. The Librarians cast Invisibility, Terrify, and fire breath. Flamers and heavy flamer then eat into the 30 man guard squad, but a ridiculous amount of Feel No Pain saves reduces the casualties significantly. Land Speeders move flat out as Whirlwinds blast the 10 man guardsman squad doing a few casualties. Devastators lay into the Leman Russes, but cover saves negate their shots.
 Drop Pod Blitz behind enemy lines! Waves of fire and melta shots! …less effective than I’d have liked.
 Move out!
Turn 1 – Imperial Guard
The entire Imperial Guard army fires on the non-invisible portion of the army, and the Invisible portion takes a walloping. All but one of the Assault Squad and the entire tactical squad go away. Despite jinking, one Land Speeder explodes and one is immobilized.
 Eerily accurate plasma makes a big dent in the blitz!
 Land Speeders take a beating.
Turn 2 – Azure Flames
Leonidas, all alone, charges the large Guard squad and challenges the Commisar, killing him outright and taking two guardsmen with him. The Guard hold despite Terrify. The Librarians all split off and charge separate targets, two of the Wyverns and the Tempestus Scions. One of the Wyverns is immobilized, and the Scions lose a few members, but not much else happens. Rhino advances on objective 3. Sadly, the last Assault Marine charges one of the Wyverns and Fire Barrels kill him!
 Leonidas goes after the guardsmen alone!
 Tempestus Scions get charged. Overwatch does a wound to the Librarian, and several are cut down in return.
 Objective 3 obtained!
Turn 2 – Imperial Guard
Combat with the Tempestus Scions and the Librarian continues. The lower Wyvern backs up, and with good rolls kills one of the Librarians, but the immobilized Wyvern was still in combat with the Terminator Librarian so the Terminator Librarian finishes the Wyvern which explodes! Leonidas kills some Guardsmen, they break, and are cut down as they flee! Small guard squad leaps over their Aegis defense line and assault the immobilized Land Speeder, wrecking it. Rhino is destroyed, and all 10 men inside take wounds, losing 3. Other shots take two more, leaving the squad at half strength.
 The Scions gang up on the Librarian!
 The fight goes well for Leonidas!
 With nothing left to lose, the Guardsmen charge the helpless Land Speeder!
 What’s left of the Tactical Squad clings to the objective.
Turn 3 – Azure Flames
Second melta squad arrives and explodes one of the Leman Russes, killing two Tempestus Scions in the explosion! Cover saves manage to protect Pask’s Leman Russ from the other combat squad and other shots. Leonidas charges into the Tempestus Scions and clears them with the Librarian’s help. Terminator Librarian charges the other Wyvern but does no damage. Whirlwinds kill half of the squad that took out the Land Speeder.
 Objective 2 is cleared by a huge explosion!
 Whirlwinds don’t forgive the Guardsmen. Half of them are taken out.
Turn 3 – Imperial Guard
Vendetta arrives, and drops off one of the Tactical Squads, who put the hurt on the Melta squads. The other Tactical Squad walks on from the board edge, and combined fire with the Wyverns put one wound on the Terminator Librarian. Note to self: USE INVISIBILITY EVERY TURN. Small guard squad order Go! Go! Go! to run toward enemy lines.
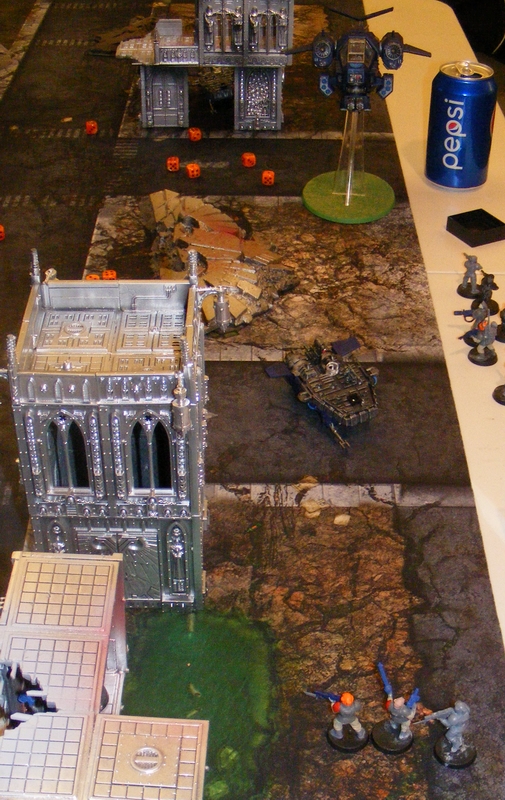
 Vendetta gives the Tactical Squad a lift, and they unload on the melta squad. (Vendetta is alive despite it’s appearance, it was purchased secondhand)
 The Librarian has some new company…
 Fantastic effort from the guardsmen.
Turn 4 – Azure Flames
Remains of the melta squad charge Pask’s Leman Russ, knocking off a Plasma Cannon. Leonidas can’t charge the Tactical Squad. On an unrelated note, have I mentioned that I hate random charge ranges? The Terminator Librarian charges the newly arrived Tactical Squad. Flakk missiles that I purchased for the Devastators work for the first time since they were introduced in 5th edition and shoot down the Vendetta. Seriously, first time Flakk missiles were not a complete waste of points.
 Good news: Flakk takes out the Vendetta. Bad news: Leonidas fails to charge the Tactical Squad.

The Terminator Librarian fights for his life.
Turn 4 – Imperial Guard
The fight with the Terminator Librarian goes well, as he kills two Marines and they break and flee off the board! The Tactical Squad charges Leonidas which was, really, the only thing they could do.
 Librarian chases the Tactical Squad off the board.
 These are very sad Tactical Marines.
Turn 5 – Azure Flames
Leonidas finishes the Tactical Squad and consolidates onto objective 2. Librarian chareges a Wyvern and knocks off… the Heavy Stubber. Great.
 Objective 2 is held by Leonidas, all alone.
 Charge does very little.
Turn 5 – Imperial Guard
 The whole remaining army fires on Leonidas, taking one wound.
Turn 6 – Azure Flames
Devatators cause one final glance on Pask’s Leman Russ, wrecking it. The Terminator Librarian perils and dies!
 Pask finally takes one missile too many!
Turn 6 – Imperial Guard
Fire against Leonidas does not kill him.

Turn 7 – Azure Flames
Missile fire from the Devastators does nothing to the last Leman Russ. Turn not pictured.
Turn 7 – Imperial Guard
Leonidas loses one more wound, but lives to fight another day.
———————————
Final Score
Azure Flames – 3 objectives plus Slay the Warlord = 10
Imperial Guard – First Blood = 1
———————————
Michael rolled like a god this game. He rolled more Hits than Scatter results. He wounded 10 Marines on a 4+ when their Rhino exploded. He saved at least 10 out of 17 FNP5+ rolls. Why then did Michael not do better?
He got nowhere near the objectives. He held objective 2 for a while, but the all-tank strategy didn’t help much. He also went for a Razorback with a squad when he could have fought the Devastators or Whirlwinds to try to take objective 1. The 30 man Blob squad was a big (admittedly tough) target, but it couldn’t get any objectives.
Keep your eyes on the prize, kids.
Next: hopefully some painting if I can get 5 minutes.
Azure Flames vs. Imperial Navy – Escalating Engagement 1500pts
Stephen and I have played pretty much every mission, except Escalating Engagement. We dropped 1500 points. Who’s gonna come out on top?
———————————
Bozeman – Azure Flames Space Marines (Space Marine Crusade Fleet)
-Master of the Fleet Zeraf Antonius, Ld 10, 3 re-rolls (aboard the Honor)
-Strike Cruiser Honor, Extra Shield
-Strike Cruiser Vigilance, Extra Shield
-Strike Cruiser Courage, Extra Shield
-Strike Cruiser Sacrifice, Extra Shield
-Strike Cruiser Duty, Extra Shield
-Nova Frigate x5, Light Squadron
-Hunter Destroyer x4 Wrath Squadron
-Hunter Destroyer x4 Vengeance Squadron
———————————
Stephen – Imperial Navy Segmentum Obscurus Bastion Fleet
-Admiral, Ld 9, 1 re-roll (aboard one of the Gothic class cruisers)
-Lunar class cruiser, Nova Cannon
-Lunar class cruiser, Nova Cannon
-Gothic class cruiser
-Gothic class cruiser
-Gothic class cruiser
-Dauntless class light cruiser, lances
-Dauntless class light cruiser, torpedoes
-Firestorm x3
-Cobra x2 and Sword x1
———————————
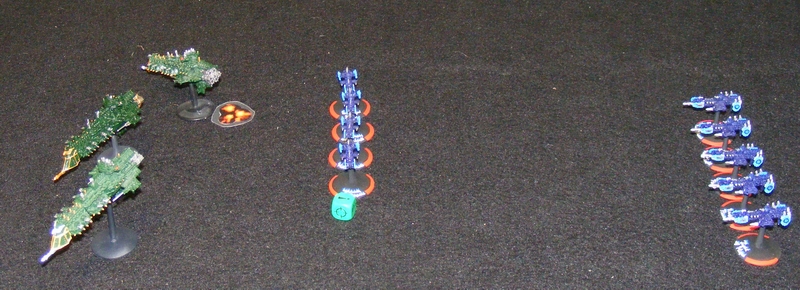
Mission: Escalating Engagement
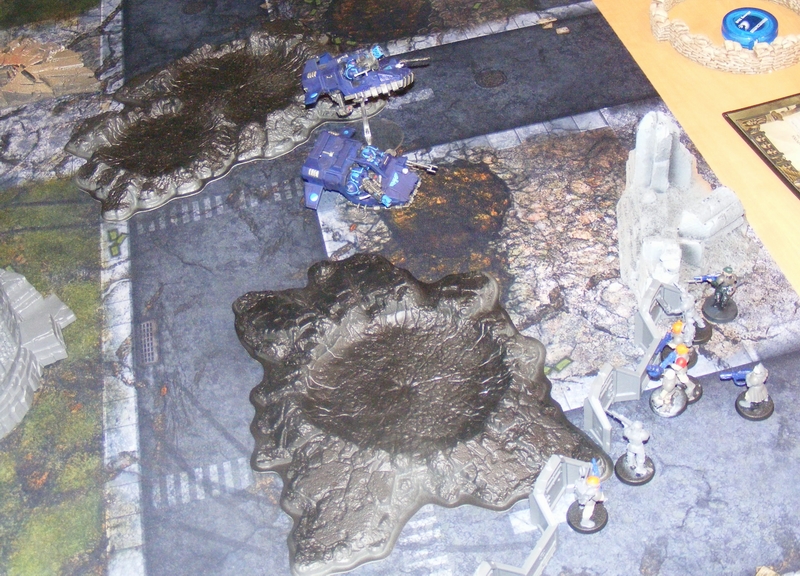
Battlezone: Flare Region
Setup:

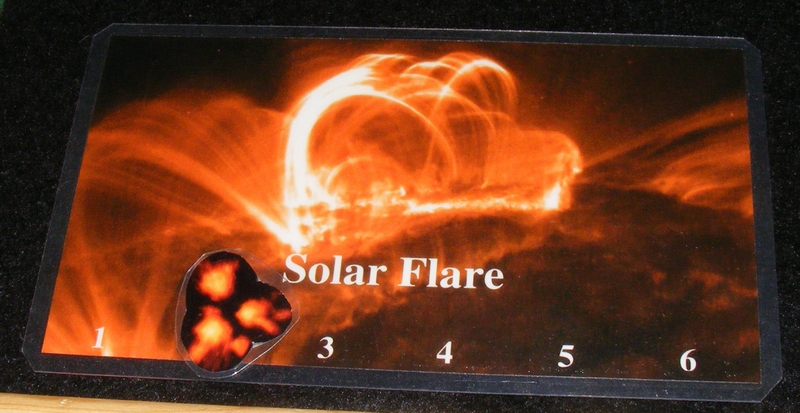
We rolled 2 Solar Flares, so terrain was scarce on the board.
———————————
Turn 1 – Azure Flames
Wrath Squadron goes on Burn Retros in order to hide behind the asteroids.

Turn 1 – Imperial Navy
Squadron of 3 Gothic cruisers advances.

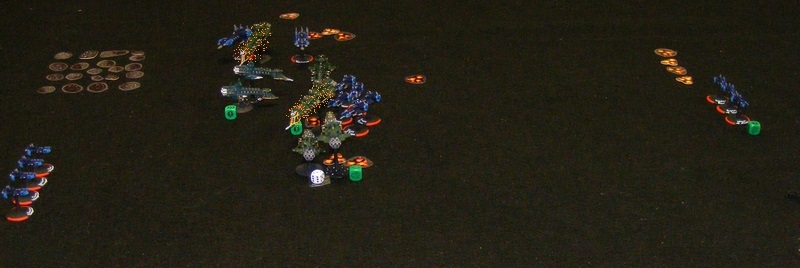
Turn 2 – Azure Flames
Light Squadron appears on the right board edge, but fails to go on All Ahead Full. Wrath Squadron, unable to Burn Retros again, pops out and fires batteries and torpedoes at the Gothic class ships. The Gothics Brace for Impact. Batteries take down one shield, but then the torpedoes die in the resulting blast marker! Note to self: cool it on the crappy batteries when the badass torpedoes are on the line.

Turn 2 – Imperial Navy
The Gothic ships come forward and fire, but the most incredibly awful rolls followed by the most incredible Brace Saves by Wrath Squadron keeps all of them alive!

Turn 3 – Azure Flames
Wrath Sqaudron flies through the Gothics and takes down one of their shields. Light Squadron tries to go on All Ahead Full again and fails again.
Turn 3 – Imperial Navy
SOLAR FLARE OCCURS! Gothic ships go on Burn Retros because Blast Markers make Come to a New Heading useless. They barely stay in formation. A few lance shots take out one of Wrath Squadron. Turn not pictured.
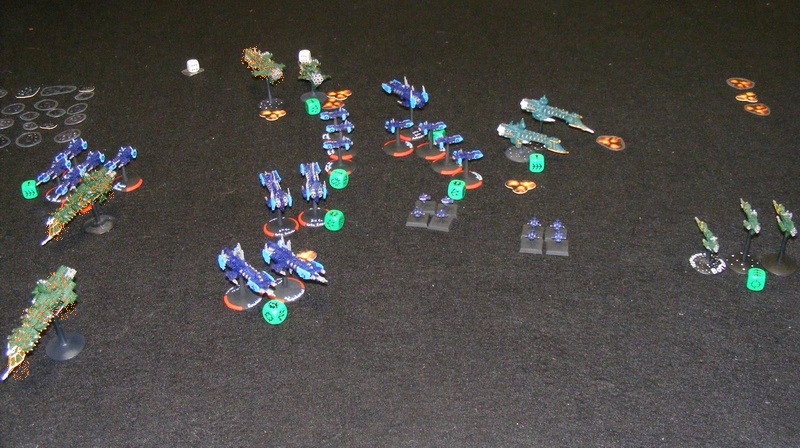
Turn 4 – Azure Flames
Squadron of Vigilance and Courage comes in from the far long edge, fires torpedoes and Thunderhawks, doing serious damage to one of the Gothics, and doing a bit to the other two. Light Squadron takes a big risk by flying into blast markers and blasting the Gothics, crippling one, thanks to Lock On.

Turn 4 – Imperial Navy
Squadron of 2 Dauntlesses arrives on the left board edge, goes on All Ahead Full. Squadron of 2 Lunars arrives and peppers the Strike Cruisers with Nova Cannons. Poor rolls take down one shield. The crippled Gothic tries to disengage, but fails.

Turn 5 – Azure Flames
Vengeance Squadron arrives via the left board edge, and does some damage to the Lunars who fail to Brace. Light Squadron finishes off the lower Gothic, and the Strike Cruisers board the higher Gothic, turning both into Drifting Hulks! Wrath Squadron finally Reloads Ordnance after several turns of bracing.
Turn 5 – Imperial Navy
The fleet tries to regroup, but Brace orders and being a bit out of position do very little for the Imperials. Turn not pictured.
Turn 6 – Azure Flames
Squadron with Sacrifice and Duty arrives, fires torpedoes and Thunderhawks that cripple the last Gothic. Honor arrives as part of the same marker and goes on All Ahead Full to launch Thunderhawks to stifle the Dauntlesses. Vengeance, and the other Strike Cruisers POUR ON the torpedo damage, crippling one of the Lunars. Light Squadron, on Brace from last turn, fly around to regroup.

Turn 6 – Imperial Navy
The Lunars try to harm Light Squadron, but a gutsy decision to not Brace pays off as the crippled, braced ships can’t put out a lot of fire. Squadron of Firestorms arrives from the lower board edge. The Dauntlesses force a Brace on Wrath Squadron, and fire batteries at the Honor, but fails. The Gothic with the Admiral disengages.

Turn 7 – Azure Flames
Vengeance Squadron reloads and torpedoes the Dauntlesses, crippling one. Torpedoes from the Sacrifice and the Duty turn one of the Lunars into a Blazing Hulk. Two flights of Thunderhawks wait till next turn.
Turn 7 – Imperial Navy
Cobra/Sword squadron arrives from the right board edge and fires on Light Squadron, causing a Brace but no casualties. Firestorms cause a brace on Vengeance Squadron. Dauntlesses try to come about. Lunar tries to disengage and fails. Ordnance causes the hulked Lunar to explode!


Turn 8 – Azure Flames
Despite Brace for Impact, Light Squadron destroys the Cobras and Sword. Thunderhawks do one last damage to the Lunar, destroying it. Torpedoes and Thunderhawks take out the Dauntlesses. Batteries and Bombardmant Cannons finish off the Firestorms. Tabled.
———————————
Final score:
Azure Flames: 1466
Imperial Navy: 0
———————————
OK, so the past few games have been a bit unbalanced. Let’s do an autopsy on this one. Why was the margin so huge? Here are some reasons why I think this happened.
Unbalanced Fleets: Being a Specialist Game, Battlefleet Gothic doesn’t really have overpowered fleets (I’ve changed my mind on the Necrons, they are actually a bit fragile thanks to their low HP count and no ordnance). Some fleets are better at some scenarios than others. Space Marines are fast and speed is key for Escalating Engagement. That said, the Imperials can make a decent showing with escorts and Dauntlesses. Sadly, Stephen only owns two Dauntlesses, and eschewed more escorts for the Gothics in order to punch though Space Marine armour. Oddly, this didn’t hurt him, as the capital ships came in before the escorts! Despite the initial unbalance, fleets didn’t cause this.
Tactics: Stephen’s ships bunched up in the center of the board. This made them prime targets for multiple torpedo waves. Stephen also had no fighters to protect against my torpedoes which did the lion’s share of the damage in this fight. Stephen also turned the Gothics different directions, limiting their effectiveness.
Luck: UGH. Stephen failed SO MANY TURRET ROLLS. Those torpedoes would have been way less effective with turrets doing their jobs. He also got several Brace saves that failed in key situations. Die rolls are always a big factor. Plus, Stephen’s escorts failed to come in on a 4+ for like three turns.
My final verdict, Stephen bunched up in the middle, couldn’t stop torpedoes, and had some really terrible rolls.
Next: some more action at Highland!