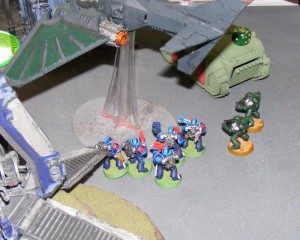
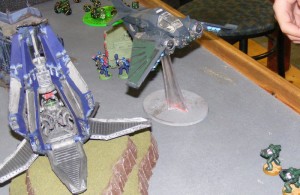
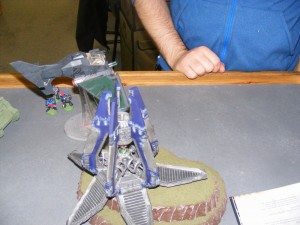
Big Game VI Mission Trial v1.0 – Fight for the Omega Station Power Control
Big Game VI is right around the corner, and I have been tasked with creating the scenario. I have a version, but it’s impossibl eto test without 10 people or more and terrain and boards I don’t have…
Luckily there are boards and ample terrain at AFK Games in Holt, and some regular players who are more than helpful! Chris, who I played against last week, brought his two sons, Kyle and Connor, who all helped me test a modified version of the Big Game VI scenario.
Incidentally, the modified version was a one-on-one, and I modified it on the fly to accomodate Chris’ sons who were more than eager to help!
———————————————–
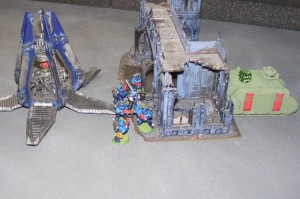
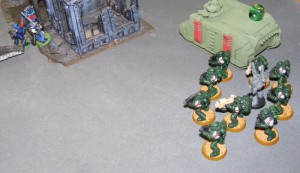
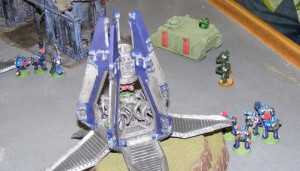
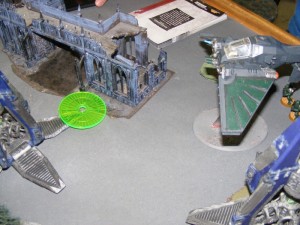
Little Big Game VI – Fight for the Omega Station Power Control (v1.0)
The Armies
Two players are the forces of Order, while two are the forces of Disorder. All four players build a list using 50 power, limited to one Battalion, Spearhead, Outrider, or Vanguard detatchment, and, optionally, one additional Patrol or Auxilliary Support detachment. No model may have the Primarch characteristic.
One order player is the Defence force, while the other is the Relief force. The Relief force has no restrictions. The Defence force cannot contain any models that Fly, and cannot have any models that are forced to deploy alternately (such as Drop Pods or Daemons).
The Battlefield
Terrain must be appropriate to the desolate rocky exterior of the Omega Station. a 1’x1′ terrain feature is placed 6″ from the Defence Force’s short table edge, centered between the long edges. This structure is the elevator entrance to the Omega Station’s Power Control, and is impassible, and lines of sight cannot be drawn across it. This structure must have one clearly defined entrance on each side. See map below for deployment zones.
Deployment
The Order player who controls the Defence force deploys first. Units that are held in reserve to deploy alternately (such as Terminators) may not be held in reserve; they MUST set up in the deployment zone.
Both Disorder players may then deploy within the designated zone. Units able to deploy alternately may do so, but may not deploy within Order deployment zones.
Finally, the Order player who controls the Relief force deploys within the secondary deployment zone. This player may hold units in reserve, as normal.
Virus Nodes
Each Disorder player secretly nominates two models within their forces to hold Virus Nodes; handheld computers supplied by Genestealer Cult infiltrators that can seize control of Omega Station computer systems. These models have many restrictions, but must be a model that could reasonably walk through a tight corridor (so no Bikes, Monstrous Creatures, swarms, etc.).
If a model with a Virus Node is slain, the Disorder player controlling it has two options:
- Remove the model. The Virus Node is destroyed.
- Replace the model with a marker for the Virus Node. Any model that moves over the marker takes it with them. The marker stays with this model, and cannot be dropped, transferred, or re-hidden.
Note that Order players can (and should!) pick up Virus Nodes.
If a model with a Virus Node moves to within 3″ of an entrance to the Power Station Elevator, the model and its entire unit may be removed from the board; they have infiltrated the Power Station with help from Genestealer Cult infiltrators!
Fighting within the Power Station
Units within the Power Station may choose to shoot or fight.
Units that choose to shoot may, in the Disorder shooting phase, shoot all of their weapons at an infinite number of Imperial Navy Ratings, with the standard statline of an Imperial Guardsman. During the Order shooting phase, 2D6 Ratings shoot the unit with lasguns.
Units that choose to fight may, in either Fight phase, fight using all attacks as if in base contact with infinite Navy Ratings. 2D6 Ratings attack back.
If the unit is killed, the Virus Node is destroyed.
If the unit kills 10 or more Ratings, they have fought hard enough to reach a terminal and implant the Virus Node! They continue ot fight inside the Power Station, but are ignored for the rest of the game (they’ve done their job).
Genestealer Cult Infiltrators prevent Order units from entering the Power Station.
Victory Conditions
Take the number of successfully implanted Virus Nodes, and subtract the number of Virus Nodes held by Order forces. If this number is 0 or less, the forces of Order win. If the number is 2 or more, the forces of Disorder win. Any other result is a draw.
———————————————–
FORCES OF ORDER
Bozeman – Azure Flames (Salamanders) Defence force
- Battalion Detachment
- Captain Edgard of the 3rd Company, Power Fist, Combi-Melta, Salamander Mantle, Rites of War
- Librarian, Force Staff, Might of Heroes, Veil of Time
- Tactical Squad x5, Power Fist, Combi-Melta, Lascannon
- Tactical Squad x5, Power Fist, Combi-Melta, Lascannon
- Scouts x10, Camo Cloaks, 9x Sniper Rifle, 1x Missile Launcher
- Thunderfire Cannon
- Dreadnought, Heavy Flamer, Twin Lascannon
- Devastators x10, Storm Bolter, 4x Missile Launcher
Chris – Blood Angels Relief Force
- Battalion Detachment
- Captain in Terminator Armour, Thunder Hammer, Storm Shield, Teleport Homer
- Lieutenant, Jump Pack, Relic Blade, Plasma Pistol
- Intercessors x10
- Scouts x5, Camo Cloaks, Missile Launcher, 4x Sniper
- Tactical Squad x5, Storm Bolter, Heavy Bolter
- Razorback, Lacannon with Twin Plasma Gun
- Assault Squad x10, Power Sword, 2x Flamer
- Baal Predator
FORCES OF DISORDER
Kyle – Dark Eldar
- Battalion Detachment
- Archon (VIRUS NODE)
- Archon
- Warrior x5, Blaster
- Venom
- Warrior x5, Blaster
- Venom
- Warrior x5, Blaster
- Venom
- Ravager
- Incubus x5
- Patrol Detachment
- Succubus (VIRUS NODE)
- Wyches x9
- Raider
Connor – Tau
- Battalion Detachment
- Longstrike in Hammerhead
- Cadre Fireblade (VIRUS NODE)
- Fire Warriors x10
- Devilfish
- Fire Warriors x5
- Pathfinders x5
- Stealth Suits x3 (VIRUS NODE)
- Piranha
- Piranha
- Hammerhead
———————————————–
Setup
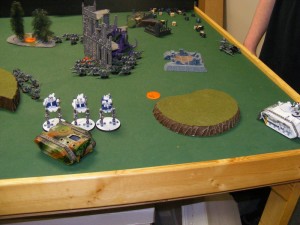
Kyle’s Dark Eldar characters “replaced” a member of the Warrior squads, reducing them to below their starting size. After setup, the Disorder players spent 4 CP to try to seize the initiative. I spent 4/8 of my own command points to reduce their efforts. They failed on a roll of a 1, so I didn’t really have to spend any…
———————————————–
Turn 1 – Order
Missile Devastators destroy Longstrike Hammerhead. A few lascannons kill one of the Venoms near the center of the board. The Blood Angels move up and pepper the Dark Eldar.
Turn 1 – Disorder
Ravager and Venoms blast the Tactical Squad near the Librarian in the forward crater. Hammerhead kills the Thunderfire Cannon, leaving the Techmarine behind. Tau fire kills the Baal Predator and the Razorback.
Turn 2 – Order
Blood Angels Assault Squad and Lieutenant arrive. Azure Flames Librarian casts Might of Heroes on the Assault Squad, and they charge! Azure Flames Dreadnought rolls boxcars and charges the Wyches, but a MIRACULOUS roll to ignore wounds makes only one die, and the Dreadnought loses 6 wounds… Intercessors manage to catch the Tau and assault them.
Turn 2 – Disorder
Incubi deep strike and charge the Librarian and Blood Angel Lieutenant. Command Point spent by Chris lets the Lieutenant swing first, killing 3 Incubi! Wyches spend CP to retreat from the Dreadnought and charge the Assault Squad. Dreadnought is shot to death. Horrible wound and damage rolls by the Ravager does only 1 wound to the Techmarine. Tau try to gain extra movement distance by charging two surviving Scouts, both of whom survive!
Turn 3 – Order
Scouts disengage from the Tau fight, and Devastators, Techmarine, and Captain wipe the Piranhas, Hammerhead, and Fire Warriors. Intercessors continue to slay the Stealth Suits. Librarian casts Veil of Time on the Blood Angel Lieutenant, and they charge and do very little, taking wounds in return.
Turn 3 – Disorder
All Dark Eldar infantry disengages from the Marine Characters, and the characters are shot to death. Devilfish disgorges 10 Fire Warriors, who bubble wrap the last Stealth Suit. Tau fire kills the Techmarine.
Turn 4 – Order
Blood Angel Terminator Captain uses Teleport Homer to arrive on the other side of the board! Captain roasts the last Stealth Suit, forcing it to destroy its Virus Node! Captain and Intercessors battle the Fire Warriors and Cadre Fireblade.
Turn 4 – Disorder
Archon and last Wych charge the Devastator Bolters near the Power Station and wipe them. Last Tau infantry makes a break for it.
Turn 5 – Order
Blood Angels captain charges the Archon, but can’t get the job done! Devastators missile the hell out of the Succubus, killing her and forcing her to drop her Virus Node! Azure Flames Captain slays the Cadre Fireblade, destroying his Virus Node!
Turn 5 – Disorder
Archon disengages and enters the Power Station with his Virus Node! He scores 4 kills. Terminator Captain is shot to death. Warriors pick up the fallen Virus Node. Tau are tabled.
Turn 6 – Order
Devastators blast the Warriors with the Virus Node, killing them all and dropping it again! Archon inside kills 4 more Ratings. Turn not pictured.
Turn 6 – Disorder
Archon implants his Virus Node! Other Archon picks up the dropped Virus Node, but is too far from the building to get it there next turn. Disorder spends all remaining command points to guarantee a turn 7.
Turn 7 – Order
Fire is ineffective.
Turn 7 – Disorder
No more Virus Nodes are implanted. Game Over.
———————————————–
Final Score: 1 Virus Node Implanted – DRAW!
———————————————–
The Aftermath
The actual Big Game VI scenario that I wrote has victory conditions with Virus Nodes = 2* Disorder players for a win. I felt that was unfair to this scenario, so I made it to be 1 for a tie, 2 for a win. This was left unmodified when the one Disorder player was shoehorned into two. All in all this was a good experience, but it all comes down to two things:
What Worked
*imitates Rockapella* OOOOOOOOOHHH… THE CHAAAAAAAASE!
Seriously, both Disorder characters LOVED running both TOWARD and AWAY from something simultaneously. Chris’ army could have been better at chasing. After all, a footslog isn’t exactly a compelling chase against Hover vehicles. But it still worked. Several Tau and Dark Eldar units spent valuable time delaying the Blood Angels. There was a ticking clock.
Virus Nodes were also a big win before the Node entered the structure. Kyle wisely brought a lot of units that could hold nodes and was cryptic about which unit had what goal. This was EXACTLY what I was going for when I designed the scenario. His brother Connor chose… less mobile units that were a bit more obvious, but still were able to contribute to the battle while advancing.
The Setup with a big well defended area, a no-man’s-land, and a rearguard was fantastic.
What Didn’t
Even an army as fast as the Dark Eldar couldn’t get their Node in the building until the bottom of turn 5. Consider at least five players teaming up on the defenders; would they be able to get there with slower armies? Even at all? No-man’s-land was 24″ and the defenders got 18″ after that to the leading edge of the structure. That’s quite a lot of ground to cover. I’m going to do another version of this scenario with an 18″ no-man’s-land. Bonus: this will give the Relief force more than 6″ to deploy.
Fighting in the Citadel was boring. I originally wanted to avoid a separate inside board due to board and terrain constraints, and also because an abstraction would be faster and easier. But fighting infinite invisible enemies with dice is… boring.
Perhaps I can have the Order side set aside points for a defense force inside. Or, perhaps a champion. A dueling mechanic would not only be more interesting, but hearken back to Big Game 2, where Angmar and Victor Kalan slew each other in a final cinematic bout.
Finally, the defenders need fortifications. I eschewed them for the stripped down scenario to try to make it more fair. After all there are no titans or other superheavies to deal with pesky fortifications. But, despite the relief force, the defenders are outnumbered 2 to 1. They need an edge.
Next: More Big Game VI prep including the return of some old friends! Stay tuned!
100 Power Big Guns Never Tire vs. Blood Angels
In all of the games of 8th edition I’ve played, I’ve used points. They’re familiar, but Games Workshop’s new design philosopy hasn’t made it easy. Chris brought his Blood Angels again, and suggested that we give Power Levels a try to make army selection easier. We decided on the Eternal War mission: Big Guns Never Tire at 100 Power Level. I decided on an… unorthodox list. See below!
————————————
Bozeman – Azure Flames (Salamanders)
- Techmarine on Bike with Conversion Beamer, Thunder Hammer
- Land Raider
- Land Raider Crusader
- Land Raider Redeemer
- Predator, Lascannons
- Predator, Lascannons
- Vindicator
- Ironclad Dreadnought
- Servitors, 2x Heavy Bolter
- Razorback, Lacannon and Twin Plasma Gun
Chris – Blood Angels
- Captain, Power Sword, Plasma Pistol
- Librarian in Terminator Armor
- Tactical Squad x5, Missile Launcher, Storm Bolter
- Razorback, Lacannon and Twin Plasma Gun
- Tactical Squad x5, Missile Launcher, Storm Bolter
- Razorback, Lacannon and Twin Plasma Gun
- Scouts x5, 4x Sniper Rifles, Camo Cloaks, Missile Launcher
- Predator, Lascannons
- Baal Predator, Flamestorm Cannon, Heavy Flamers
- Land Raider
- Terminators x5, Assault Cannon
- Furioso Dreadnought, Blood Talons
————————————
Mission – Big Guns Never Tire
- Four objectives, each worth 3 victory points
- Heavy Support choices holding objectives ignore enemy non-Heavy Support choices
- Destroyed enemy Heavy Support choices are worth one victory point
- Slay the Warlord: 1 victory point
- First Blood: 1 victory point
- Linebreaker: 1 victory point
Setup: Chris chose the Spearhead Assault deployment.
————————————
Turn 1 – Azure Flames
Crusader and Redeemer move up and pop smoke. Other tanks advance, firing. The Blood Angel Lascannon Predator is destroyed, and one of the Razorbacks is damaged.
Turn 1 – Blood Angels
The Baal Predator charges forward, popping smoke. Vindicators fire on the Land Raider, doing 7 wounds! The Terminator Librarian deep strikes behind the Azure Flames. He casts Bloodlance, which is ineffective, but suffers a Perils of the Warp and takes a wound!
Turn 2 – Azure Flames
Servitors pile out of the Razorback, scale the ruined fortress, and charge the Terminator Librarian! He cuts two of them down, but the other two tie him up. Most other tanks move up. Lascannon fire kills one Vindicator and wounds the second. The Crusader and Redeemer do a few wounds to the Land Raider, and their regular guns kill all the Scouts except the missile launcher. The Vindicator fires on the Baal Predator, doing 10 of its 11 wounds with the cannon, and then does one more wound with its Storm Bolter!
Turn 2 – Blood Angels
The Librarian cleaves another Servitor in half. Land Raider moves up and causes 6 wounds to the Crusader. Furioso Dreadnought moves up to fire its Meltagun at the Land Raider, but misses. Other fire is ineffective.
Turn 3 – Azure Flames
The Ironclad charges the Furioso, annihilating it in one burst of attacks! The Land Raider finishes the Vindicator. Combined fire from the rest of the army kills the Land Raider, but the Terminators inside are unharmed. Techmarine approaches to help the last Servitor, but rolls a 4 to charge when he needed a 5! The Librarian has worse luck, failing to kill the Servitor! The last scout falls to some fire from the Land Raiders.
Turn 3 – Blood Angels
Terminators charge the Crusader, reducing it to 5 wounds. A stray lascannon puts one wound on the Redeemer. The Librarian finishes the Servitor and moves to exactly 1″ away from the Techmarine, daring him to charge.
Turn 4 – Azure Flames
Techmarine shoots the Librarian to no effect, but kills him on the charge. The entire rest of the army fire on the Terminators and the tactical squad hiding in the ruins, killing them. Game ceded.
————————————
When I made this list, it was for fun. It was also with the very real fear of being tabled in a few turns by opportune lascannons and melta weaponry. A land raider is worth 1.5-2 Tactical Squads, which are much more durable to extreme fire. However Chris’ dice betrayed him once again, so badly in fact that he purchased brand new dice from AFK games MID BATTLE! The new dice have flat edges, no pips (printed blood drops) and no rounded corners. They performed a bit better late battle.
Chris also correctly concluded that the Terminators should have been held in reserve with the Librarian and thrown at my backfield. The Librarian was ineffective because of poor rolls and annoying servitors tying him up. Had five more Terminators shown up, I would have had to divert significant resources to dealing with them, probably man of the lascannons that were meant for enemy tanks!
Finally, I’d like to address the elephant in the room: power level.
Not really mentioned in the battle above (because they did an incidental number of wounds) was the fact that ALL of Chris’ tanks had Hunter Killer Missiles! I chose not to do this (except for the Ironclad) because I did not have them modeled and wanted to be WYSIWYG. This incurred no addition to the power levels of his tanks. Is this important? I’m not sure.
What I do know is that a 19 power Land Raider in a 100 power list is 19% of the list, whereas a 378 point Land Raider in a 2000 point list is closer to 17%. It’s actually CHEAPER in points, in a way! (assuming that 100 power = 2000 points)
To this end, I’m not sure Power is as game breaking as I’ve heard. Some units are made to abuse it (such as Ork Nobs who can all take Power Klaws and Kombi-weapons) but because of the new minimalist design philosophy there’s not a huge amount of units that can be very different.
The Predator is an exception. The four-lascannon predators we took are the same power as a sponson-free Autocannon Predator. My suggestion is to lower the power of a Predator by two, and make adding Sponsons +2 power. However this could lead to sponsonless Predator spam, flooding the board with a bunch of wounds that block line of sight.
I am now seriously considering suggesting that Big Game 6 use power instead of points. We have a lot of old dogs who are used to points, but because they have no experience in 8th ed, Power would not be much of a jump, especially because it’s so easy.
Next: more games!
1500 Blitz vs. Blood Angels
Another action packed batrep from AFK Games! Tonight, Chris brought his Blood Angels and we played a good old fashioned Blitz!
———————————-
Mission – Blitz
The attacker gets 18″ in from a short board edge. The Defender sets up secretly on the other table half. The attacker gets 1 victory point at the end of the game if a unit has at least 1 model within 36″ of the opponent’s board edge, or 2 victory points if within 18″. The attacker gets a Preliminary Bombardment.
———————————-
Bozeman – Azure Flames (Salamanders) (Attacker)
- Captain Valerien, Combi Melta, Power Axe, Rites of War
- Ory-Hara, Chief Librarian of the Azure Flames, Force Sword, Plasma Pistol, Salamander Mantle, Smite, Veil of Time, Might of Heroes
- Tactical Squad x10, Combi Melta, Power Fist, Meltagun, Lascannon
- Razorback, Twin Lascannon
- Tactical Squad x10, Combi Melta, Power Fist, Meltagun, Lascannon
- Razorback, Twin Lascannon
- Tactical Squad x10, Combi Flamer, Power Fist, Flamer, Heavy Bolter
- Rhino
- Bikes x8 + Attack Bike, Power Fist, 2x Meltaguns, Multi-Melta
- Land Speeder, Multi-Melta
Chris – Blood Angels (Defender)
- Librarian in Terminator Armour, Force Axe, Storm Bolter
- Sanguinary Priest, Inferno Pistol, Chainsword
- Tactical Squad x5, Heavy Bolter
- Tactical Squad x5, Heavy Bolter
- Scout Squad x5, 4x Sniper Rifle, Missile Launcher, Camo Cloaks
- Furioso Dreadnought
- Baal Predator, Twin Assault Cannon, Heavy Bolter Sponsons
- Baal Predator, Twin Assault Cannon, Heavy Bolter Sponsons
- Land Raider (Phobos Pattern, 2x Twin Lascannon, Twin Heavy Bolter)
- Terminators x5, Assault Cannon
———————————-
Setup
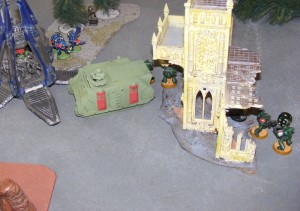
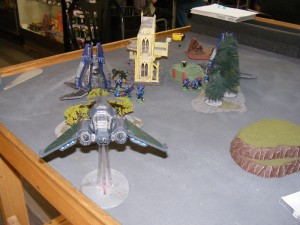
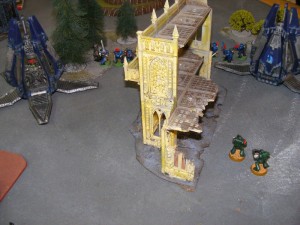
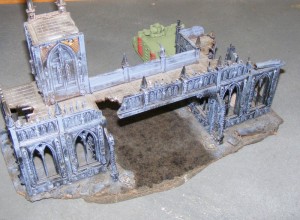
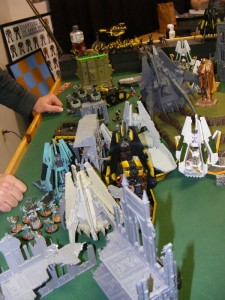
As you can see, the attacker’s board edge (left) was sparse while the defender (right) had lots of fortifications. (the guns on the building are decorative)
Chris set up secretly, then I deployed my army. My preliminary bombardment clipped his Librarian, doing one wound, but it also killed 4 of 5 men in one of the Tactical Squads, and put 6 wounds on the Furioso!
———————————-
Turn 1 – Azure Flames
The Bikes surged forward! The lone Blood Angel that survived the Bombardment died, and so did two of the other Tactical Squad. The Rhino and Razorbacks moved up and their fire finished off the Furioso Dreadnought, which exploded, but did not harm anyone. The Bikes then charged the Tactical Squad, bringing their numbers down to two!
Turn 1 – Blood Angels
Terminators disembarked from the Land Raider, and fired on the combat squad in the Rhino Ruin, killing two. ABYSMAL roll from the Land Raider only does 4 wounds to the Librarian’s Razorback! Tactical Squad falls back from the Bikes so that the Baal Predators can shoot, but they only do one wound to the Bikes.
Turn 2 – Azure Flames
Melta Weapons and Lascannons remove one of the Baal Predators and severely damage the second. Transports disgorge three Tactical Squads, then move up and pop smoke. Combat squads in the backfield snipe two Terminators with lascannons. Bikes charge the wounded Predator and the Sanguinary Priest. Bad wound rolls get the Priest only one wound.
Turn 2 – Blood Angels
Even with the -1 to hit, the Land Raider takes out the wounded Razorback. The Predator retreats, leaving the Sanguinary Priest to absorb another wound. Scouts try to snipe the Librarian, but roll awfully.
Turn 3 – Azure Flames
Backfield Lascannons snipe two more Terminators, leaving the sergeant alone! Bikes finish the Sanguinary Priest and consolidate into the ruins. Everyone moves forward.
Turn 3 – Blood Angels
Once again the Scouts roll poorly, as does the Land Raider which only does 4 wounds to the vulnerable Land Speeder.
Turn 4 – Azure Flames
Bikes move up and shoot the Scouts, then try to charge 10″ with Veil of Time. Sadly, they don’t make it.
Turn 4 – Blood Angels
Librarian casts Blood Boil and PERILS causes 6 wounds to the Bikes, leaving the sergeant with 1 wound, and the Librarian with 1 wound! Scouts and Land Raider try to pop the Rhino, but don’t. Game ceded.
Well, that was interesting. I didn’t get a chance to recycle any units. To be fair, Chris lost this game mainly because of rolls. The Land Raider SHOULD have been popping a transport a turn (possibly with help from the Scout Missile Launcher). However, he was routinely rolling 2-3 misses per turn on a 3+, and always failing to wound on one roll.
I also rolled somewhat poorly but this was offset by the AMAZING Salamanders doctrine! It feels just like the good old days of 3rd edition: Salamanders Heavy Weapons are guaranteed to hit or your pizza is free.
Also, I guess the Rhino Rush is back. Razorbacks are fantastic, and turn 1 charges seem to be the order of the day.
Finally, I’d like to say that Chris’ list had a centerpiece of the Land Raider stuffed with Terminators. He sadly kept them off to the right side of the board as a firebase. They are a big, scary unit! They should have been more aggressive, stalling my rush by plugging the hole in the middle of the fortification wall. As it stood, the Terminators killed two bolter marines, and the Land Raider blasted a few vehicles, but did nothing to stall the advance of my army.
Next: hopefully some painting!
PARANOIA 7-player superfight!
Hoo boy.
I showed up at AFK games for my usual 40K night. It was not to be. Instead, it was madness. Seven players brought 20 Power Level armies in a fight of betrayal and surprise called:
PARANOIA.
Here are the rules:
- Players get 20 power points in a Battle Forged list.
- No selection can be larger than 8 power points.
- Players receive a card. This is their “Identity.”
- Players receive a second card. This is your “Target.” You can only attack your target.
- If you have a Target that matches your Identity, you can attack anyone.
- If another player attacks you, for your next turn, you can attack them in retaliation.
- If you are responsible for tabling an opponent, you gain their Identity and Target cards. (these do not replace yours)
- If, by some quirk of eliminating enemies, no one can attack anyone, anyone can attack everyone.
- A third deck of cards is shuffled at the beginning of each turn, and you take your turn when your card is drawn.
- Tabled players have their cards removed from this deck so that the player who tabled them don’t get multiple turns.
- If you are involved in a melee with the current player, you get to fight.
———————————————–
Bozeman – Azure Flames
- Captain Edgard of the 3rd Company, Power Fist, Combi-Melta, Salamander Mantle, Rites of War
- Tactical Squad x5, Power Fist, Combi-Melta, Lascannon
- Apothecary
- Dreadnought, Twin Lascannon, Heavy Flamer
———————————————–
Setup:
Players get one octant. Set up anywhere in this square, but you must remain more than 3″ from an enemy.
As you can see I hid out in the blue-gray building. To my left, Dan playing Mordians (who had my card, unbeknownst to me). To my right, Nathan, whose card I had! In front of me, another Salamander player… who… had my card? That’s odd…
I moved up and to my right, to try to nonchalantly get closer to Nathan and hide in the trees…
…only to be attacked by the other Salamander player!
Meanwhile, Nathan turned on the Crimson Fists, whittling them down quickly.
Annoyed at being shot, my Dreadnought charges! This led to a chain of events which led me to completely table the other Salamander player! I received his target card… only to realize it wasn’t mine! The cards are literally gloss black on matte black, and he mistook the Jack for the Joker… Sadly, this left me open to be targeted by other players…
Dan charged my lord with his combat unit, and other players (some with their own cards!) took pot shots.
Meanwhile, the Crimson Fist Primaris Lieutenant takes all comers, valiantly making a last stand against Nathan’s Guard!
My forces were shot down to the characters. A Tactical Squad charged the Mordians, but that proved fatal as Mordians hit on a 5+ on Overwatch!
Finally, Captain Edgard stood alone, charged by 30 Mordian Conscripts. They rolled 4 wounds… and I rolled 1, 1, 2, 2!
Eliminated, I watched the other players slug it out. They eventually decided on a 4 way tie as it was getting past 2am.
Soon: more 8th ed and painting!
1500 Ambush (post dated)
Two weeks ago, I battled Nathan again, but I was busy and didn’t write up the batrep. So, it’s time for one of my truncated battle reports, just to clear out my camera’s memory card.
———————————-
Mission: Ambush
I was the defender, so I deployed in a 12″ wide column, and Nathan deployed around me. I needed to get models off the far table edge.
Nathan started with an OLD FASHIONED PRELIMINARY BOMBARDMENT! Just like in 3rd edition! Meeeeeeeemories…
Anyway, there’s a new mechanic where you can essentially become pinned and get a 4+ save against the damage of the bombardment. I did not do this. I RECOMMEND YOU DO THIS AND I WILL DO IT IN THE FUTURE because there is a 1CP Strategem which lets you become un-pinned.
Further shooting eliminated two of my dreadnoughts, and Thunderfire Cannon!
One of my Tactical Squads charges an Armored fist squad to try to distract them…

Assault Squad and Chaplain charge a squad, but the Captain didn’t get the charge off.
Sadly, the Assault Marines took so much damage that the survivors ran away!
Survivors charge the Leman Russes
The fight rages on as model after model escapes…
————————————————————-
In the end, my Captain, Chaplain, Thunderfire Cannon Techmarine, and Dreadnought escaped. This was several points short of the threshold for victory… had the Assault Marines or one of the Whirlwinds escaped I’d have won! But the traffic jam of the Leman Russes prevented the Whirlwinds from driving through. In addition, had I saved a few of the wounds on the Ironclad caused by the preliminary bombardment, it would have been a VERY different game.
Also, I made my list to be the attacker, but so did Nathan, and so I drew the short straw. The Scouts were awful. Sniper rifles look great on paper in 8th edition, but good lord they are expensive and don’t do much unless you specifically have a character to snipe. Careful players avoid this.
Next: PARANOIA 40K with a SEVEN PLAYER KNOCKDOWN DRAG OUT!
1500 Cloak and Shadows, Azure Flames vs. Imperial Guard
The other night I got to experience how Maelstrom of War worked in 8th edition, thanks very much to a frequent opponent of mine: Nathan. Amazingly, Nathan and I figured out that this whole time that I’d been playing against him, he was one of my former students from when I was a teacher!
We put together a game to help introduce me to how Maelstrom missions transferred over to 8th edition. We played Cloak and Shadows, and it was a blast!
———————————————
Bozeman – Azure Flames
- Captain Antonius of the 4th Company, Armour Indomitus, Power Axe, Plasma Pistol, WT: Rites of war (auto pass Morale within 6″)
- Librarian Ory-Hara, Force Sword, Smite, Veil of Time, Might of Heroes
- Tactical Squad x10, Combi-Flamer, Power Fist, Flamer, Multi-Melta
- Rhino
- Tactical Squad x10, Combi-Flamer, Power Fist, Flamer, Multi-Melta
- Rhino
- Scouts x10, 9x Sniper Rifle, 1x Missile Launcher
- Assault Squad x10, Jump Packs, 2x Flamer, Power Fist
- Devastator Squad x10, 4x Lascannon
- Ironclad Dreadnought, Ironclad Assault Launchers, Chainfist, Meltagun, Hurricane Bolter, 2x Hunter Killer Missile
Nathan – Imperial Guard
- Company Commander, WT: (on giving an order, on a 4+ can issue another order)
- Tank Commander in Leman Russ with Battle Cannon, Lascannon, 2x Heavy Bolter
- Leman Russ with Punisher Gatling Cannon, 3x Heavy Bolter
- Command Squad, Vox-Caster, Lascannon
- Chimera, 2x Heavy Bolter
- Infantry Squad, Plasmagun, Lascannon
- Infantry Squad, Plasmagun, Lascannon
- Infantry Squad, Plasmagun, Lascannon
- Veteran Squad, Plasmagun, Lascannon
- Chimera, 2x Heavy Bolter
- Armoured Sentinels, 3x Hunter Killer Missile, 2x Plasma Cannon, 1x Lascannon
- Hellhound, hull Heavy Flamer
- Hellhound, hull Heavy Flamer
- Basilisk
———————————————
Mission: Cloak and Shadows (shooting over 18″ is at -1 to hit, each player generates up to a maximum of 3 Maelstrom objectives at the start of each turn)
Deployment: Hammer and Anvil (short board edges, 24″ deployment zone)
Setup: Our setup was not pictured. I fortified scouts, and 1/2 the devastators in a large building, while the other Devastators and the characters sheltered in another. One Rhino went up each side. The Dreadnought hid in some ruins. Nathan created a gunline with most tanks in the front.
———————————————
Turn 1 – Azure Flames
Rhinos and Ironclad advance and pop smoke. Antonius falls back toward objective 3 near my board edge, and secures it till the end of the game (eventually scoring 3 points doing this). Assault Squad deep strikes. Librarian uses Might of Heroes and Veil of Time on the Assault Squad, but they can’t charge, even with a re-roll! Other shots do a wound or two here and there to some tanks.
Turn 1 – Imperial Guard
Shooting kills eight Assault Marines, and the rest flee. The central Rhino is destroyed. Pot shots put a wound on the Ironclad.
Turn 2 – Azure Flames
Tactical squad charges the Sentinels, one goes down. Other tactical squad charges one of the Hellhounds, putting 8 wounds on it. Fire from other sources is surprisingly ineffective due to miraculous saves and rolls of 1 to wound all around.
Turn 2 – Imperial Guard
Hellhounds drive away from combat and the Tactical Squad is destroyed. One more Sentinel bites the dust. Fire strips all but one wound from the Ironclad.
Turn 3 – Azure Flames
Ironclad charges a Chimera full of veterans. Poor rolls reduce the surviving veterans to 2. Sentinels are taken out and the Tactical squad consolidates into the Leman Russes. Librarian charges the wounded Hellhound and whiffs. Lascannon fire puts 10 wounds on the un-damaged Hellhound. To score points, Devastator squad charges to kill it in close combat. 4/5 Devastators die, and the last one is locked with the Hellhound, unable to hurt it.
Turn 3 – Imperial Guard
Leman Russ tanks retreat from the Tactical Squad. Ironclad is wrecked. Librarian finishes off the Hellhound and advances into the forest.
Turn 4 – Azure Flames
Tactical squad charges around the corner to try to kill the Commander for an objective, but power fist whiffs keep him alive. Librarian charges the Leman Russ and even with comand point re-rolls just barely dies. Scouts come out of the building and assault the Hellhound, killing it.
Turn 4 – Imperial Guard
Commander dies, even though the surviving veterans try to charge to save him. Shots kill a bolter Devastator and a few scouts.
Turn 5 – Azure Flames
Pistol fire the close combat in the shooting phase kills the sergeant of the Veteran squad, and then the Tactical Squad charges another Guard squad. Overwatch reduces them to the Sergeant, who kills one guardsman. Devastator Sergeant moves 1″ to control objective 4.
Turn 5 – Imperial Guard
Fire eliminates the Devastators and reduces the Scouts. Combat against the Tactical Sergeant ends with one more dead guardsman. Game over.
———————————————
Final Score:
Azure Flames: 11 plus Linebreaker and Slay the Warlord = 13
Imperial Guard: 5 plus First Blood = 6
———————————————
Final thoughts: Maelstrom still rewards mobile armies over gunlines. Of all of the objectives I generated, less than a quarter were unattainable. The rest were possible if not even fortuitous.
In the end I had Antonius, a Bolter from a Devastator Squad, 3 Scouts, and a Tactical Sergeant, while Nathan’s army was mostly intact. Yet, I still won by more than twice his points. Maelstrom is all about getting shit done. Nathan DEFINITELY killed stuff. He was VERY good at that. But he didn’t move out to claim objectives or accomplish anything else. For example, Leman Russes that move less than 1/2 their movement can fire their turret gun twice and because they are Cadians, re-roll 1s if they stay still. The Punisher Leman Russ pumped out 40 shots re-rolling 1s which killed several things. But it didn’t score points.
Soon: More painting and games, plus more Big Game 6 fiction!
It’s about time; 8th Edition Debut! 1000pt Relic Azure Flames vs. Blood Angels
I haven’t been in too good of a financial way recently, and my car is not in the best shape, but last night I got a break. I went back to my local game store, AFK games, and played my first game of 8th edition! Yes, it’s a bit late, but I haven’t had any time with my new job and such.
One of the regulars at AFK was Chris, who played Blood Angels and was nice enough to show me the ropes in a 1000pt game.
However, before the game begins, I’d like to do a quick musing on the new Space Marine Codex. Because Big Game 6 is coming up in 5 months, I asked Chris if we could play with points instead of power levels, as that is what we’ll be doing during the Big Game for balance issues. Making an army with points is now a bit harder, as (except for special characters) no model in the game comes with their weapons. You must buy all weapons separately. Most common weapons (Bolters, Chainswords, Frag Grenades, etc.) are free, so it’s not like you have to do math for each individual trooper. However, tanks come with no guns, that you must pay points for (it’s required) instead of including those guns in the tank’s points value. This is a bit clunky. The rationale is that they can release Chapter Approved updates each year to tweak points values so that balance can be addressed, but it makes it harder to use points to make a list.
Enough griping. Here’s my first batrep of 2018!
————————————————————————–
Bozeman – Azure Flames (Salamanders)
Battalion Detatchment
- Leonidas, Captain of the 1st Company (counts as Vulkan He’Stan)
- Ory-Hara, Chief Librarian of the Azure Flames (Librarian), Salamander Mantle, Force Sword, Smite, Veil of Time, Fury of the Ancients
- Tactical Squad x9, Power Fist, Combi-Flamer, Flamer
- Rhino, Storm Bolter
- Tactical Squad x9, Power Fist, Combi-Flamer, Flamer
- Rhino, Storm Bolter
- Tactical Squad x10, Meltagun, Multi-Melta
- Rhino, Storm Bolter
- Attack Bike x1, Heavy Bolter
Chris – Blood Angels
Battalion Detatchment
- Captain in Power Armour, Power Sword, Plasma Pistol
- Sanguinary Priest, Chainsword, Inferno Pistol
- Scouts x5, 4x Sniper Rifles, Missile Launcher, Camo Cloaks
- Tactical Squad x5, Combi-Plasma, Heavy Bolter
- Razorback, Lascannon with Twin Plasma Gun
- Tactical Squad x5, Storm Bolter, Heavy Bolter
- Razorback, Lascannon with Twin Plasma Gun
- Assault Marines x10, Power Sword, Plasma Pistol, 2x Flamers
————————————————————————–
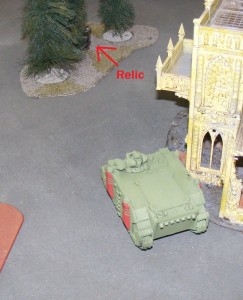
Eternal War Mission 6 – The Relic
An objective (the Relic) in the middle of the table can be picked up if a model moves over it. This model carries the Relic until it flees or is slain. If a player has a model carrying the Relic at the end of the game, that player wins a major victory. If no one is carrying it, the player with the closest model wins a minor victory. If both players are equally close, it is a draw.
————————————————————————–
Setup
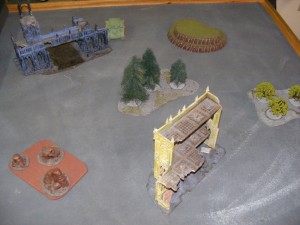
The Azure Flames, mounted in Rhinos, deployed in cover. Blood Angels Scouts took a vantage point in a high ruin, while the Tactical Marines mounted up in their Razorbacks. The Blood Angel Captain and Sanguinary Priest took cover in a forest.
Turn 1 – Azure Flames
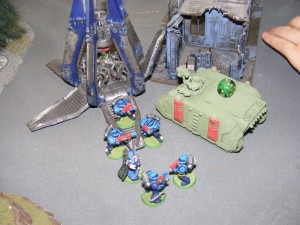
Leonidas’ Rhino and the Attack Bike advance behind a statue for cover, as Ory-Hara’s Rhino and the other Tactical Squad’s Rhino advance towards the Relic and pop smoke. The Attack Bike puts a wound on the Sanguinary Priest.
Turn 1 – Blood Angels
Smoke causes one of the Razorback Lascannons to miss Ory-Hara’s Rhino, but the other Razorback puts 5 wounds on it. The Captain and Sanguinary Priest move off to prevent being sniped at.
Turn 2 – Azure Flames
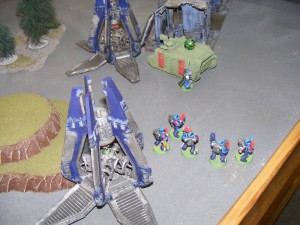
Ory-Hara and his squad disembark. Ory-Hara casts Veil of Time on the squad and rolls boxcars! Perils of the Warp does only one wound to him. Smite blasts three wounds off of the Razorback. Ory-Hara and the squad charge the Razorback. Before the squad can attack, Ory-Hara unleashes his Force Sword and cuts the Razorback apart by himself! It EXPLODES, killing three Marines and doing one more wound to Ory-Hara, and killing three Blood Angels! The Marines, unable to attack, pile in to the second Razorback. The other Tactical Squad advances, running to get the Relic as their Rhino advances to cover them. Leonidas’ Rhino and the Attack Bike advance to join the fight.
Ory-Hara opens the Razorback like a can of sardines!
Turn 2- Blood Angels
Assault Squad swoops in from a passing Thunderhawk and assaults the wounded Rhino, finishing it in close combat. Snipers reduce Ory-Hara to one wound, and shots from the surviving squad finish him. The other squad piles out of their beleaguered Razorback and charge the Azure Flames squad, reducing them to two with the help of the Sanguinary Priest.
Turn 3 – Azure Flames
Leonidas and his squad pile out to provide cover for the other Tactical Squad that advance 9″ away with the Relic. Their Rhinos and the Attack Bike advance to form a partial wall.
Turn 3 – Blood Angels
Mostly bad rolls all around reduces the Azure Flames squad in combat to its Sergeant with no other casualties. The Assault Squad charges the Azure Flames squad with the Relic, and lose two of their number to Melta Overwatch fire thanks to Leonidas’ re-rolls! The fight is brutal, with three Azure Flames and four Blood Angels going down! The Relic is dropped by a casualty! Sniper fire kills three of Leonidas’ squad.
Heroic last stand!
The Relic is down! Retrieve it!
Turn 4 – Azure Flames
Leonidas’ Tactical Squad grab the Relic and run off as Leonidas joins the battle with the Assault Squad. The Attack Bike charges in as well. In the fight with the lone Sergeant, the Sanguinary Priest goes down! The squad with the Relic continues to advance.
Turn 4 – Blood Angels
Pistols in the shooting phase take out the lone Sergeant, and the remaining combatants charge the Rhino. The Assault Squad is wiped out.
Turn 5 – Azure Flames
The Attack Bike charges to save the Rhino as the Relic continues to move away.
Turn 5 – Blood Angels
The Captain finishes off the Attack Bike.
Turn 6 – Azure Flames
Fire from the Tactical Squad kills the Storm Bolter Sergeant. This frees Leonidas to charge the Blood Angel Captain, killing him. The Tactical Squad also charges, but their attacks are wasted as the Captain is gone. The Relic moves out of sight behind a building. Game ceded.
————————————————————————–
Analysis
Azure Flames recovered the Relic – Major Victory!
First, let me say that 8th ed is still 40K. Here’s some musings that I had while playing:
- Advancing during the movement phase is a more elegant solution that running in the shooting phase.
- Because of the flat to-hit rolls, anything that gives a +1 or -1 modifier is a HUGE DEAL. Blood Angels don’t get any sort of extra STRENGTH on the charge, they get +1 to WOUND, so they’re wounding a TANK on a 4+.
- Spitting fire doesn’t break the game and should have been around since 3rd edition.
- Sniper weapons generate an additional Mortal Wound on a wound roll of a 6, but the other wound still stands, and is separate, so they can kill two models with one shot which is weird.
- Pistol weapons can be fired in the shooting phase while in close combat, so you get an extra round of attacks. This is also weird to me.
- Vehicles are now much cooler, despite not having facing or line of sight issues. Multiple people at the store explained this as “well vehicles are constantly moving.” This excuses it but doesn’t make it less weird that a vehicle can draw line of sight for its gun from its bumper.
- Not having templates is faster. There, I said it.
- 40K is still fun in 8th.
- Just like in all previous editions, play to the mission and keep your eyes on the prize.
- Characters are weird and need to be managed, but kick ass.
Next, I hope to get some painting done and play more games!
40k 8th edition, or is it 4th?
A long time ago, I wrote a contradictory piece about how every edition of 40K is broken. It detailed all the editions before 7th and why they had been unbalanced. But, there was a problem.
I was wrong.
Not about the unbalanced aspects of the various versions of 40K, but about the numbers. For example, this upcoming edition of 40K is branded as 8th edition.
But what makes an edition? Can a little tweak like Entanglement or Flyers really change the way the whole game is played?
In my opinion, no. What makes an edition is the framework of the rules. The “engine” of the game, so to speak. Honestly, the update in the assault rules from the main 3rd edition rulebook to the revised assault rules for 3.5 released in White Dwarf was a bigger change than the change from 3.5 to 4.
Think about it. How do you do things in 40K? In 3, 3.5, and 4 you move troops 6″. You shoot using the same rules. But, from 3 to 3.5 you fight in assault differently. The process was streamlined. And, with a few tweaks, that system stayed around in 4th.
How much change happens between editions. From Rogue Trader to 2nd, there was structure added. More rules to make it a 1v1 game. From 2 to 3, the to-hit grid and to-wound grid was added. Units had rules based on Type, such as Infantry or Beasts. Distances and ranges were always a multiple of 6″. But, then from 3rd to 7th, these rules remained. Sure, the Psychic Phase, Flyers, and D strength weapons were added, but if you add a room to your house, is it still the same house? It calls to mind the Ship of Theseus. Philosophers may debate and say the ship is different, but it looks the same and still has Theseus tooling around on it.
It’s very telling that the 8th edition book is coming with a slate of source books replacing all the other codexes. The last time this happened was…
…you guessed it. 3rd edition with the “black codex” rules in the very back for all of the previous armies.
Here in 8th, every rule has been changed. Movement brings back the movement characteristic. Shooting no longer uses the old 1-10 BS system, but instead a flat roll as a characteristic for each model, right in its statline. Modifiers are back. Cover saves are gone. Just like shooting, Assault is a flat roll, abandoning the to-hit grid. Vehicles are now glorified monstrous creatures. Points have changed drastically, or have even been replaced entirely by Power Rating.
It’s a big change.
The third big change.
Making this 4th edition.
Whether this edition is good, or I like the fluff, big things are happening.
Let’s get into it.
Coming up soon: A big announcement from me and Lexington! A new workstation for my painting! Stay tuned.
40K Combat Patrol Trio at AFK!
Good news, I just got a new place! Expect to see a modeling setup post soon, once I get everything moved in.
Because of all the rigamarole in purchasing a house, I took this week off, which means that I was able to go back to AFK and get some 40K, which I have been sorely missing. When I arrived, I met Bradley, the employee of AFK who is organizing the Combat Patrol 40K campaign. Combat Patrol is as follows:
- 400 pts
- Modified Combined Arms Detatchment
- 0-1 HQ
- 1-3 Troops
- 0-1 Elites
- 0-1 Fast Attack
- 0-1 Heavy Support
- All armour values 13+ are reduced to 12
- All vehicles with 4+ hull points are reduced to 3
- All Monstrous Creatures are reduced to 2 wounds
- No named characters
- Psykers can only take Warp Charge 1 powers (re-roll all others)
- Board size is 48×48″
- All reserves are rolled for one turn early, but arrive when they normally would (giving you one turn notice for when reserves arrive)
- Other monthly restrictions (changes each month)
Bradley needed to test out the rules for this format in some rapid-fire games. Here’s what we did!
——————————————————
Bozeman – Azure Flames (Salamanders)
- Ory-Hara the Silent, Chief Librarian of the Azure Flames
- Librarian Lv2, Pyromancy
- Tactical Squad x5
- Veteran Sergeant, Power Fist, Combi-Flamer, Flamer, Auspex
- Drop Pod
- Tactical Squad x5
- Veteran Sergeant, Power Fist, Combi-Melta, Melta
- Drop Pod
Bradley – Dark Angels
- Tactical Squad x10, Power Sword, Plasma Gun, Heavy Bolter
- Rhino
- Nephilim Jetfighter (games 1 and 2 only)
- Ravenwing Darktalon (game 3 only)
——————————————————
Mission 1 – Assassinate
Deployment – Table edges, 12″ in from edge
Objective – The first player to slay the enemy Warlord gains 2 victory points. If simultaneous, award goes to current player.
Secondary objectives – Slay the Warlord (yes, you get another one for this!), Linebreaker, First Blood
Deployment
Azure Flames – Turn 1
Ory-Hara and the Melta squad deep strike. Bad to-hit rolls immobilize the Rhino.
Dark Angels – Turn 1
Two combat squads pile out of the Rhino. After shooting and terrible armour save rolls, Ory-Hara stands alone, his squad gone. Turn not pictured.
Azure Flames – Turn 2
Flamer squad arrives via drop pod. Shooting and psychic powers from Ory-Hara wipe out the Dark Angels marines. Game ceded.
Conclusions: It was at this point that Bradley realized that Drop Pods could seriously ruin the game balance of a game this small. On to game 2!
——————————————————
Mission 2 – Follow and Support
Deployment – Table edges, 12″ in from edge
Objective – Slay enemy Warlord for 2 points, or destroy any unit for 1 point. Capture the Relic (similar to Main Rulebook mission 6) yields no VPs, but is important for campaign points.
Secondary objectives – Slay the Warlord, Linebreaker, First Blood
Deployment
Dark Angels – Turn 1
Rhino moves forward, drops off Tactical Squads. One runs towards the objective. Turn not pictured.
Azure Flames – Turn 1
Flamer squad with Ory-Hara moves in. Psychic powers and shooting kill some Dark Angels, breaking the Sergeant’s squad and damaging the other one.
Dark Angels – Turn 2
Shooting at the Azure Flames is ineffectual. Nephilim Jetfighter unloads some missiles, but fantastic cover saves protect the Tactical Squad. Turn not pictured.
Azure Flames – Turn 2
Flamer Squad arrives, wipes out smaller Tactical squad. Ory-Hara’s squad moves up to capture the Relic.
Dark Angels – Turn 3
The Jetfighter, unable to maneuver, flies off toward the board edge. Remaining squad menaces the Flamer squad.
Azure Flames – Turn 3
Ory-Hara moves up with the Relic, to stay away from the Jetfighter. Shooting kills the Dark Angels sergeant. Game ceded.
Conclusions: The Nephilim Jetfighter did not arrive in the first game. Bradley ceded due to the fact that rolling for reserves a turn early meant he knew the Jetfighter would not show (despite a +1 to reserve rolls!) In this game, the fighter showed up, but its lack of maneuverability hampered it. It got one turn of good shooting and then was forced to fly around the board like an idiot. In our next game, Bradley swapped the Jetfighter for a Ravenwing Darktalon, which can hover!
——————————————————
Mission 1 – Assassination (see first game, above)
Deployment
Azure Flames – Turn 1
Despite seeing rear armour, two Meltaguns and Ory-Hara’s psychic powers can only glance the Rhino once!
Dark Angels – Turn 1
Tactical Marines pour out of the Rhino and harm the Azure Flames squad
Azure Flames – Turn 2
Flamer squad and psychic powers kill all but two Tactical Marines
Dark Angels – Turn 2
Ravenwing Darkstar arrives in Hover mode, and drops a Vortex shot, but it misses. All its other guns wipe out Ory-Hara and the rest of his squad.
Azure Flames – Turn 3
Flamer squad charges the Darktalon, destroying the Vortex gun, but leaving it alive.
Dark Angels – Turn 3
Darktalon hovers away and fires, but insane armour save rolls protect the Azure Flames. Turn not pictured.
Azure Flames – Turn 4
Tactical Squad charges and kills the Rhino. Turn not pictured.
Dark Angels – Turn 4
Darktalon zooms and bombs the Tactical Squad, causing no casualties but reducing its WS and I to 1.
Azure Flames – Turn 5
Tactical squad moves up and shoots the remaining two Dark Angel marines.
Dark Angels – Turn 5
Darktalon hovers again, killing 3 of the 5 Azure Flames left. Turn not pictured.
Azure Flames – Turn 6
Darktalon is destroyed in close combat. Tabled.
Conclusions: Bradley is seriously considering nerfing the Drop Pod Assault rule for the Combat Patrol campaign. In a 1500 pt. list, you can take things to deal with an all-drop army, but it’s very difficult in a 400 pt. list. Bradley, myself, and Dan, the owner of AFK discussed how best to combat an all-drop army, and hopefully they will have a successful campaign.
——————————————————
As always, there were other awesome games going on!
More Combat Patrol wackiness with Nathan, a long time Four Strands ally!
HUGE game of Warhammer 30K: Sons of Horus vs. Imperial Fists! Forge world EVERYWHERE and AMAZING paint jobs!
There was even a strong Warmachine contingent! Some of my old friends from the days of 21st Century Comics and Games were throwing down. Alex played Menoth (top) while Matt played Trolls (bottom).
What a night! Next: look forward to seeing how I get my new paint setup ready!
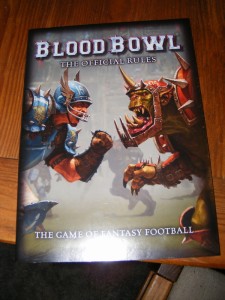
Blood Bowl – 5th Edition vs. LRB, or cha-cha-cha-CHANGES
Got my main rulebook open, and I have the pdf of the old LRB on my laptop as I type. It’s time to see what 5th edition has changed, rules wise. Here’s a running tally as I find them:
- Handoff and Foul are not in the actions in the Basic Rules; they are instead in the Advanced section, later in the book. This explains why they’re not on the quick start guide cards. They are mentioned, though. (it wasn’t an oversight)
- Under causes for a turnover, the four minute time limit is GONE! No more hourglasses or stopwatches! This assists new players. I bet it will make a comeback in an advanced book later. EDIT: It is in the Advanced section of the rules.
- Minor change: several of the rules use the genderless “they” or “themselves” to refer to players, when identical wording in the old book is “him” or “himself.” I think this is for teams with female players, such as Amazons, who will hopefully be included in a later rules set (if only for the die-hard Amazon players!)
- Rules for team building do not include Skill Types for normal and doubles. This is corrected in the Death Zone supplement.
- Human Catchers reduced from 70,000gp to 60,000gp.
- Assistant Coaches, Cheerleaders, and Apothecaries/Necromancers are no longer listed during team creation.
- Each player gets Special Play cards, randomly decided (1:1 card, 2-5:2 cards, and 6:3 cards). A Magic Item deck is mentioned, but not present in the box set (expansions ahoy!)
- Because a D16 is added to the box set, you don’t need to draw chits from a mug! Not that you needed to in the past, but you had to buy your own D16…
- Obviously, Cheerleaders and Assistant Coaches are not mentioned in the Cheering Fans and Brilliant Coaching results on the Kickoff Table.
- The Skills section is MUCH shorter. Skills for teams that are not out yet have been omitted. (for example, Prehensile Tail is not listed as Lizardmen or other tail-having races have not been re-released) EDIT: most missing skills are in Death Zone.
- League rules are omitted, as they are in Death Zone. On that note…
The following is a list of things from the League supplement, Death Zone:
- Skaven Gutter Runners now have the Weeping Dagger skill, which lets them hurt people better.
- Nurgle Warriors are renamed Bloaters in the Nurgle Teams, but are identical.
- Beasts of Nurgle are renamed Rotspawn, identical as well.
- “Elf Teams” are renamed Elven Union Teams.
Wood Elf Treemen now have a new Extraordinary Skill: TIMMM-BER! Knocked down models with this skill receive a +1 to the roll to stand up, if MA is less than 3. A roll of 1 always fails. Assisting models can’t be in enemy tackle zones (just like assisting a Block or Foul). This extra skill does not alter the Treeman’s cost!EDIT: This rule has been invalidated by errata, see the bottom of the post.- MVP is now LESS RANDOM! This is an incredible advance on the old rules. Now, select 3 players from your team and roll a D3 to decide which is MVP! No more handing out MVP to dead players, or giving MVP to a useless player who already has too many SPP or can’t benefit from another skill.
- Under Inducements, Petty Cash as a concept is gone (which is good, because it was always confusing!) Instead, the coach with the higher team value can purchase Inducements with their gold, then the opposing coach gets gold = team value difference and can spend it.
- Without the Petty Cash rule, a lower team could spend any amount in their treasury on inducements without penalty. In the old Blood Bowl, Petty Cash added to your Team Value, and so lower valued teams could only spend their Inducement money and no more, unless they transferred to Petty Cash an amount GREATER THAN the Inducements, because Petty Cash added to their Team Value, and thus Inducements would be reduced by the amount of Petty Cash, making it useless.
- In additon, higher value teams can now spend away, not giving their opponent any additional Inducement money! This can mean that a rich team could go into each match with a bunch of expensive inducements.
- Bloodweiser Babes are now Bloodweiser Kegs.
- Halfling Master Chefs are gone…
- Igor is gone…
- Wizards are reduced to 100,000gp from 150,000gp.
- Special Play cards are changed, so that instead of drawing randomly, you draw X, keep X-1, and X increases as the value of the higher team increases. You can also purchase Special Play cards, which increase the value of X for you by one (not your opponent!)
- EXPENSIVE MISTAKES are a new addition to the post-game sequence! Now, if your treasury exceeds 100,000gp, your players tend to do stupid and/or expensive things. The larger your treasury, the stupider they act, as the money goes to their heads! You roll on a table and lose no GP if you avert the crisis, but if there is an incident, you lose some GP, sometimes most of it! Hoarding GP is no longer a good idea! Too bad for teams that have expensive “big” players that don’t buy them during Team Creation… Saving up for them is risky!
- Skills are all back, but skills listed below are in the LRB but not in this supplement:
- Animosity
- Ball & Chain
- Bloodlust
- Bombardier
- Chainsaw
- Diving Tackle
- Fan Favourite
- Multiple Block
- Piling On (note: this IS in the book, but is listed as optional, as it’s been reported as OP)
- Stakes
- Titchy
- In addition, these skills are in Death Zone but not the LRB:
- Monstrous Mouth (similar to Sure Hands)
- Timmm-ber! (described above)
- Weeping Dagger (if this model causes an injury of 11-38: Badly Hurt, roll a D6. On a 4+, that injured player also suffers a Miss Next Game)
- COACH MODELS HAVE AN IN-GAME EFFECT! When a player is sent off, roll a D6. On a 6, the call is reversed! On a 1, your coach is sent off, and you cannot argue again for the game, plus you get a -1 to Brilliant Coaching rolls!
- Assistant Coaches, Cheerleaders, and Apothecaries are back.
Note: Death Zone is a proper softcover book with a strong cardstock cover; much more sturdy than the main rulebook, which is a double-stapled booklet! (/print nerd)
…and that’s it! I might try the App next. Who knows?
EDIT: It seems there are three errata documents already! You can find them here, at the bottom of the page. Here’s an analysis of these documents.
-Blood Bowl Main Rulebook FAQ
Most of these FAQs are straight from the LRB, some of which are even identically worded. One notable exception is the first one: a player who is sent off for a foul, who then has their coach roll a 6 and reverse that call, still causes a turnover.
-Teams of Legend Supplemental Document
SQUEEEEEEEEEEEEEEEEEE!
HOLY CRAP! ALMOST ALL PREVIOUS TEAMS, PLUS A COUPLE NEW ONES ARE CONTAINED HEREIN! The Konquata Monitors are now legal and ready to play! Here’s a list of new stuff, including teams:
- New Chaos Renegades team: A team of up to 12 human linemen who can get the Mutation skills on a NORMAL ADVANCE ROLL. IN addition, the team can have 0-1 of EACH the following: Goblin, Skaven, Dark Elf, Troll, Ogre, Minotaur. Bring a Troll, Minotaur, and Ogre for three big guys on the front line, throw in a Goblin for Right Stuff plays.
- QUICK THOUGHT: If a Chaos Renegades team has an Ogre (Throw Team-mate), a Troll (Throw Team-mate) and a Goblin (Right Stuff), can the Ogre move up in one turn, and then on the next turn, the Troll throw the Goblin, have the Goblin land next to the Ogre, and have the Ogre throw the Goblin for a double throw? Such a play would be risky, but could potentially see a goblin go all the way across the field in one turn!
- New Underworld Denizens team: Skaven with Goblins instead of Gutter Runners, and a Troll instead of a Rat Ogre.
- Amazons have some name changes for their positions, but are otherwise the same.
- Chaos Dwarfs also name changes but nothing else.
- Skills, such as Animosity, Bombardier, etc. that apply to these teams are listed here, if they are not in the main rulebook.
- Chaos Teams are now called Chaos Chosen teams, and have a few name changes.
- Halflings are back, and underneath them the Halfling Master Chef is back! Oddly, the Halfling’s Treemen have the Timmm-ber! skill, while it is purged from Wood Elf Treemen in the Death Zone FAQ (see below). An oversight? Perhaps the FAQ needs an FAQ?
- Khemri are now Khemri Tomb Kings, and have name changes.
- In addition, Igor is back as an inducement, and can work for teams with undead players!
- Lizardmen have very minor name changes.
- Norse Werewolves are now called Ulfwerenar.
- Necromantic teams are now Necromantic Horror teams, and have minor name changes.
- Both Necromantic Horror and Shambling Undead (see below) gain a Necromancer instead of a coach, that can give your team free zombies! This is not new though.
- Undead teams are now Shambling Undead teams, minor name changes.
- Ogre Teams now have “runts” instead of Snotlings, so you can use Snotlings, Knoblars, or anything else thematic. This makes the Ogre team canon with Ogre Kingdoms from Fantasy.
- Vampire teams have minor name changes.
-Death Zone Season 1 FAQ
Minor changes to skills, including the purging of any use of the Timmm-ber! skill from Wood Elves’ Treemen.
…and that’s all folks!


