Age of Sigmar demo: Beer and Pretzels minus math equals…?
Ian, a regular at the Highland Library 40K club recently landed a sweet job as a Manager of the brand new Games Workshop store in Ann Arbor. (GW, if you’re reading this, BRING BACK THE NOVI STORE YOU BASTARDS) As part of his getting paid to come to club, he demoed the new successor to Warhammer Fantasy. That’s right, the oft maligned Age of Sigmar.
So, I tried it.
It was fun, let’s see what happened!
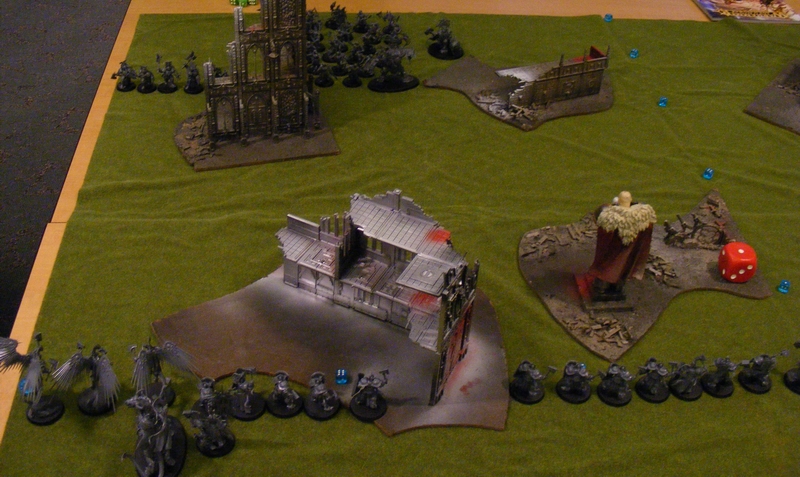
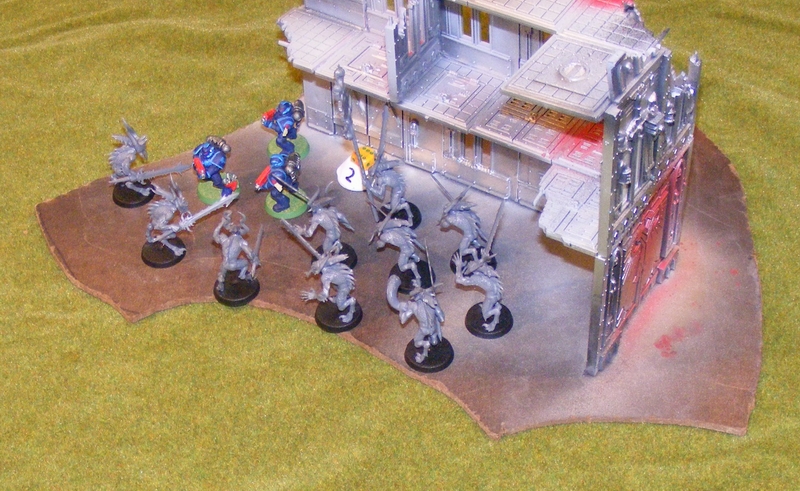
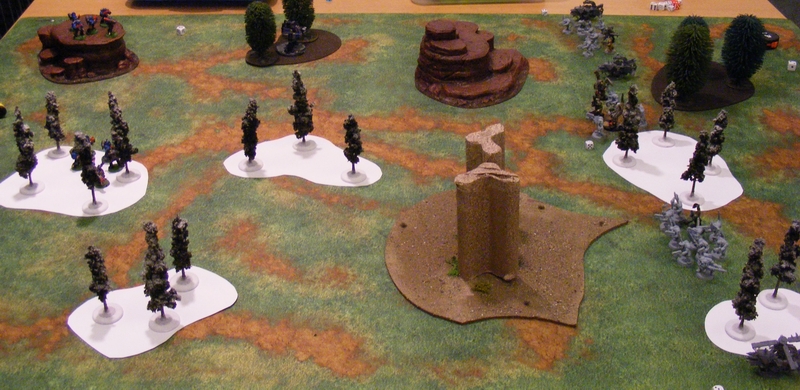
I was playing the Stormcast (foreground), versus Paul who had a horde of Khornate warriors (rear).

I pulled off to my right to deny the flank.

Paul advances.

My Stormcasts charge a Khorne monster. However, their charge brings them to within 3″ of the Marauders, who get to pile in! In AoS, combats can swarm and engulf units not associated with the original charge. All hits and wounds from a unit are always the same rolls in AoS, so my Stormcasts manage to do some damage to the monster. However, great saves prevent a lot of this damage.

More charges end the Stormcasts, however the fight spills over into my other squad, who smash a Bloodstoker because his whip got within 3″ of them!

Meanwhile, another Stormcast squad charges some Khorne warriors. In AoS, combat is resolved one unit at a time, so because my other Stormcasts were fighting for their lives, they went first. The Khorne Warriors got to swing first at these Stormcasts, and did some serious damage! Order of combat is a really important tactical decision in AoS.

The rest of my army charges. My lord riding a dragon-horse-thing does a ton of damage.

In the end, my forces smashed through the Khorne forces.
————————————————————————–
Final Thoughts:
AoS is easy and streamlined. To hit and wound is easy, and toughness is now all about saves and number of wounds. However, it still remains a game without a balance system. You have to figure that out for yourself. Is it fair? Well, you decide what’s fair. Is that a cop out? Yeah. Is it fun? Also yeah. Try a demo of AoS for yourself. If you like it, play it.
Tanksgiving at White Lake, and a defense of Maelstrom, in battle report form.
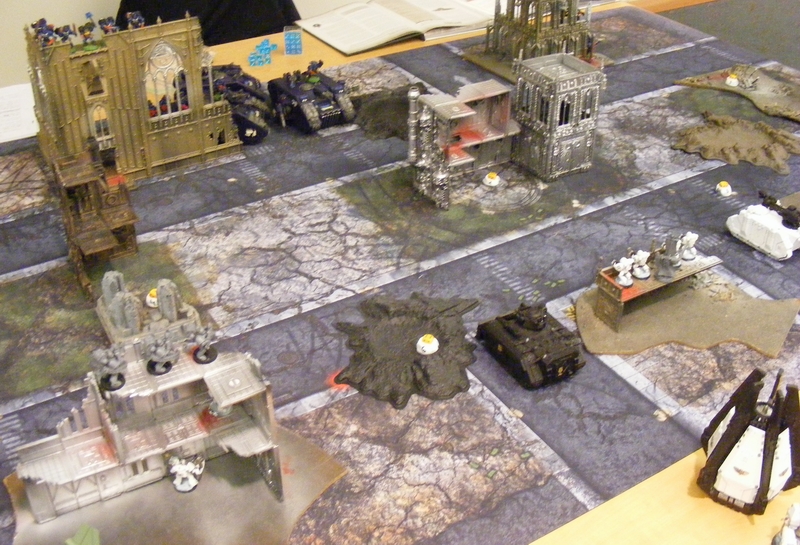
Happy Tanksgiving everyone! Here is an obscene amount of vehicles beating the tar out of one another!


Andrew and Kyle threw down with their entire vehicle collections. The pile of dead tanks was literally more than a foot high, not even carefully stacked.
After this, I wanted to play a game with Paul. I mentioned my distaste for Maelstrom of War missions. Paul and Ian (the new manager of GW Ann Arbor!) defended Maelstrom as a legitimate method of play. Their argument? Maelstrom discourages small armies with invincible death stars, and rewards fast tactical armies with lots of options. It was a pretty good argument, so much so that Paul and I played a Maelstrom mission! Will we regret it? Let’s find out!
———————————————————————————–
Bozeman – Azure Flames (Salamanders Space Marines) 1850 ps
- Demi Legion Formation
- Chaplain, Jump Pack
- Tactical Squad x 10, Veteran Sergeant, Power Fist, Bolter-Melta, Meltagun, Multi-Melta
- Drop Pod
- Tactical Squad x 10, Veteran Sergeant, Power Fist, Bolter-Melta, Meltagun, Multi-Melta
- Drop Pod
- Tactical Squad x 10, Veteran Sergeant, Power Fist, Flamer, Lascannon
- Razorback, Twin Linked Lascannon
- Assault Squad x 10, Veteran Sergeant, Power Fist, 2x Flamer
- Devastator Squad x 10, Veteran Sergeant, 4x Plasma Cannon
- Razorback, Twin Linked Lascannon
- Whirlwind Suppression Force
- Land Speeders x3, 3x Mulit-Melta
- Whirlwind x2
———————————————————————————–
Paul – Dark Angels Daemon Summoning with Grey Knights Battery (Unbound) 1850 ps
- Dark Angel Chaplain, Bike, Mace of the Unforgiven, Plasma Pistol
- Dark Angel Librarian, Level 2, Bike, Conversion Field
- Dark Angel Librarian, Level 2, Bike, Conversion Field
- Ravenwing Command Squad x6, 4x Plasma Talon, 2x Grenade Launcher, Ravenwing Banner
- Dark Angels Drop Pod
- Dark Angels Drop Pod
- Grey Knights Librarian, Lv 2
- Torquemada Coteaz
- Grey Knight Purifiers x5, 4x Daemon Hammer, 1x Nemesis Force Halberd
- Grey Knight Purifiers x10, 9x Nemesis Falchion, 1x Nemesis Force Halberd
- Grey Knight Terminators x6, 2x Daemon Hammer, 3x Nemesis Fachion, 1x Nemesis Force Halberd
———————————————————————————–
Mission: Maelstrom of War #6 – Deadlock
Setup:


Night Fight occurred on turn 1
———————————————————————————–
Dark Angels / Grey Knights – Turn 1
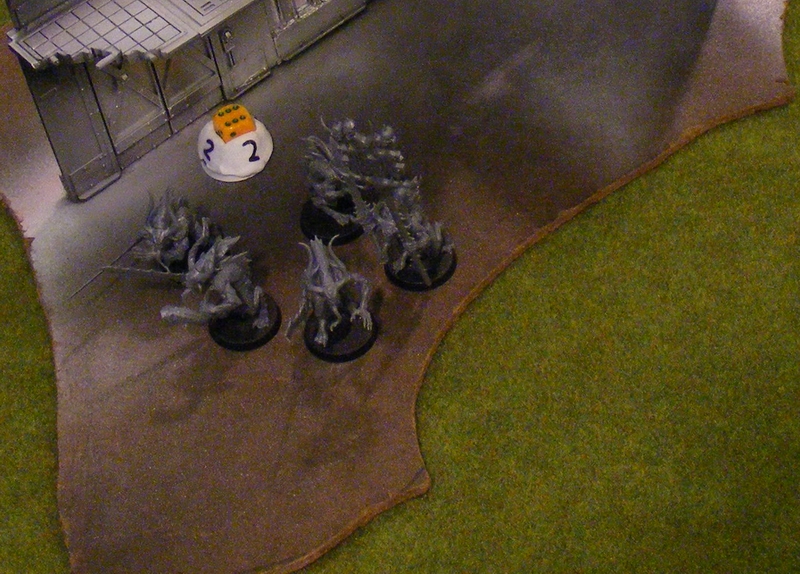
After a scout move, the Ravenwing bikes with all bike characters attached fire on the Assault combat squad with the Chaplain. The Chaplain’s Rozarius saves the day, preventing the squad from being wiped out! One of the Librarians summons some Khorne Bloodletters into the building by objective 2, and loses a wound to Perils. The 5-man Purifier squad with Coteaz and the GK Librarian drop pods next to the Land Speeders, and force a Jink. Paul scores 2 points for Harnessing the Warp.

The first of many Daemons arrives to… help? The Dark Angels and Grey Knights? Ok…

Summoning Daemons is perilous work, as this librarian can attest! Plasma Talon fire kills a lot of the Assault Squad, but the Chaplain bravely stands in front of the worst of it. Meanwhile, the Purifiers blast the Land Speeders.
Azure Flames – Turn 1
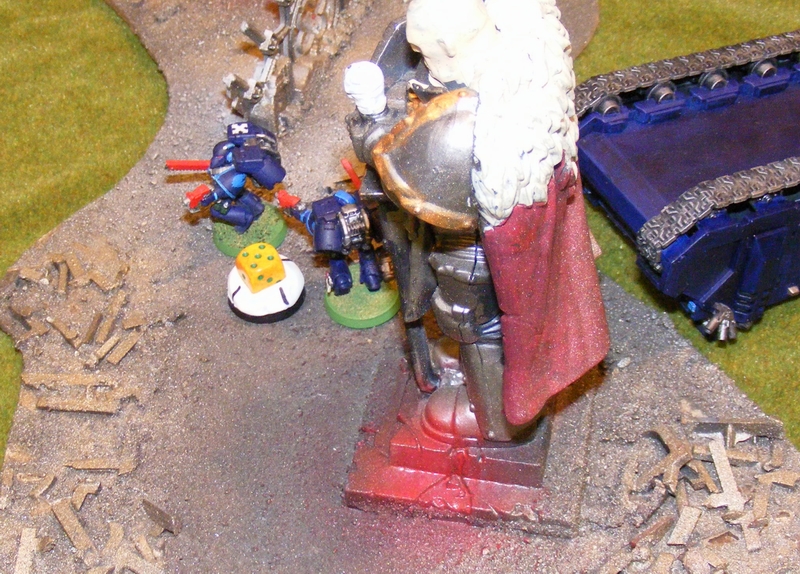
Whirlwinds blast a bunch of the Bloodletters, and the Chaplain and one Assault Marine charge, declaring a challenge for a point. One of the Tactical Squads drop pods in, combat squads, and takes objective 2 and blasts the Terminators, killing three! Combat squad in the Razorback takes objective 1. Razorback blows up Drop Pod for First Blood, while the Plasma Cannon Devastators kill everyone but one Grey Knights Librarian who goes to ground! ACHIEVEMENT UNLOCKED: I scored all 6 of my objectives for 7 points!

Brave Chaplain challenges the lead Bloodletter. Combat squad takes the objective.

Thanks to Tactical Doctrine, the melta squad kills THREE Terminators! NOICE.

Plasma Cannons are efficient at removing tightly bunched squads.
Dark Angels / Grey Knights – Turn 2
The Bloodletters finish off the Chaplain for Slay the Warlord. Ravenwing Command blows away the squad in the middle, and a Librarian suffers a wound from Perils, but summons a squad of Pink Horrors! 10-man Purifier squad drop pods in, combat squads, and a Nova kills half the Devastators, one Whirlwind, and one Razorback! Worse, the Devs break! Remaining 3 Terminators charge the melta tacticals, and lose one but kill three. Paul scores 4 points for a total of 6 so far.
You need more than faith when you’re this outnumbered…

Nothing can stop the Ravenwing Command Squad, except perhaps the Perils! Even so, more daemons arrive to “help.”
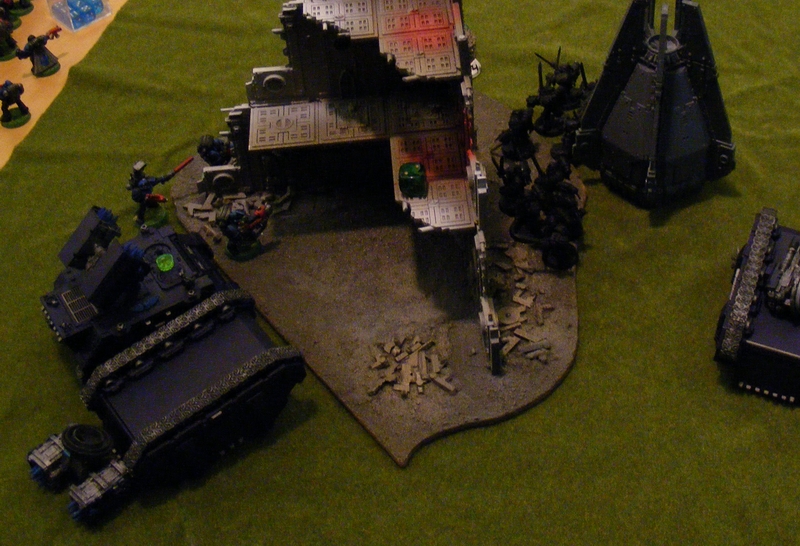
The Purifiers drop like a bomb, blowing up half my backfield!
Azure Flames – Turn 2
5-man Bolter squad charges the Bloodletters for a point, lose two, and wipe them out due to Daemonic Instability! Remaining Terminators keep fighting, whiff, and lose one guy, but stay. Surviving Whirlwind kills 7/10 of the Pink Horrors. Land Speeders waste the Grey Knight Librarian. Plasma Cannon Devs destroy one 5-man Purifier squad, while the Assault Marines jump back across the board and kill the 2nd squad down to 2 guys. I score 2 more points for a total of 9.

Gutsy charge pays off! Bloodletters are eliminated!

This fight has gone poorly for the Grey Knight Terminators.

The Pink Horrors feel horror from the Whirlwind, while the Grey Knight Librarian is melted by Melta.

Thanks to Assault Doctrine, the Assault Marines actually stood a chance against the Grey Knights!
Dark Angels / Grey Knights – Turn 3
The Assault Marines finish off the Purifiers. Due to horrible rolling, the Ravenwing Command AND the 3-man Pink Horrors BOTH fail a “One Eye Open” test, and can’t do anything! Terminator kills one Tactical marine.

These Assault Marines accomplished more that they should have! Good job, guys!

“Hey guys, I know we, like, summoned you, but screw you.” “Well, screw you too!”

This fight continues…
Azure Flames – Turn 3
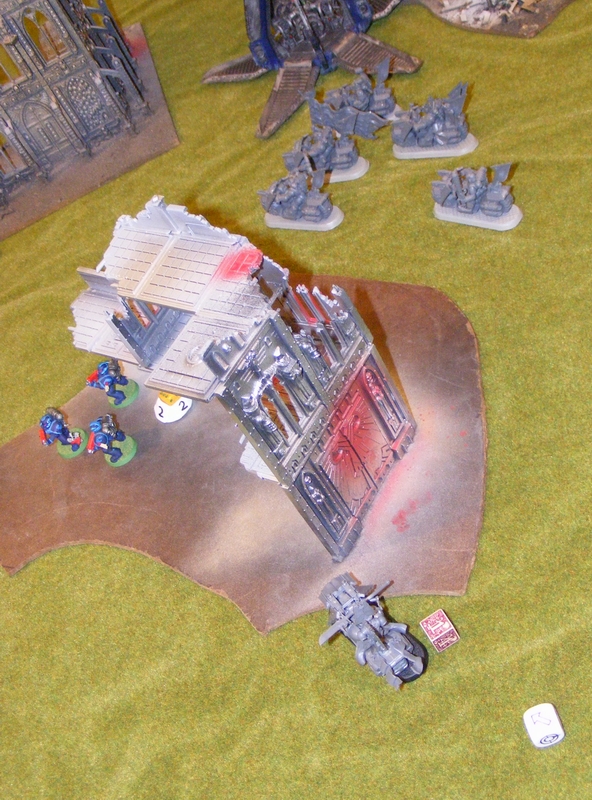
Land Speeders move Flat Out to gain objective 6. Combined bolters from various sources wipe out the Pink Horrors. Razorback tries to get objective 1, but is immobilized! Lascannon from same Razorback, one thrown Krak Grenade from a Tactical marine, and assault from the 2-man Assault Squad kills the Drop Pod in close combat, fulfilling 2 different objectives! Power fist sergeant luckily kills the last Terminator!

Zoom for an objective!

An unlikely convergence of rolls kills the Drop Pod! This gives me a vehicle kill for a point, and a kill in close combat for a point!

Who would have thought that a 5-man Tactical squad would have wiped out 6 Terminators?
Dark Angels / Grey Knights – Turn 4
Librarians and Chaplain split off from the Ravenwing Command. The Ravenwing annihilate the Land Speeders, who fail ALL their jink saves! One Librarian summons 10 more Pink Horrors on Objective 3, perils, but gets a 6 and is a SUPER BEAST, killing the Razorback in a charge! The other Librarian perils and drains all remining Warp Charges, but lives. Due to all objectives being identified, Paul scores 2 points.
Not shown: 3 dead Land Speeders.

*throws 10 Pink Horrors into building* Whatever. They’re in there.
Azure Flames – Turn 4
Second Tatsquad FINALLY arrives! A bad Whirlwind scatter kills some Horrors, but also two Bolter marines! The rest of their combat squad breaks and flees! Melta squad tries to shoot the Chaplain, to no avail. Assault Squad charges the remaining Horrors, killing the squad down to 2.

3-man Bolter squad flees from friendly fire, as a huge amount of firepower bounces off the invincible Chaplain. 3+ re-rollable jink? Ugh…
Dark Angels / Grey Knights – Turn 5
Librarian summons 10 Plaguebearers, but Perils himself to death! Other Librarian summons 10 Bloodletters, but also Perils to death! Chaplain engages the Devastators. Ravenwing shoot a Drop Pod to death and menace the sergeant. Assault Squad finishes the Pink Horrors and beat feet towards the center.

Plaguebearers arrive, at the cost of a Librarian. Chaplain gets up in the Dev’s faces.
Rawr.

Oh, hey guys… Nice bikes…

The Assault Marines prepare for a mad dash toward the center to get one last point on my turn.
Azure Flames – Turn 5
Assault Marines get objective 1 for a point. Whirlwind and tatsquad blow up some Plaguebearers. Sergeant foolishly charges the bikes and dies to overwatch. Thanks to Objective Secured, the 3-man Tatsquad holds objective 2 for a point, despite a bunch of angry Bloodletters! Game ends.

Plaguebearers go boom as the Chaplain mops up the Devs.
Someone give these guys a medal!

Objecive secured allows these Marines to give the Bloodletters the finger.
———————————————————————————–
Final Score
Azure Flames 14 + First Blood = 15
Dark Angels / Grey Knights: 8 + Slay the Warlord and Linebreaker = 10
———————————————————————————–
OK, I am beginning to warm to Maelstrom a bit. Consider a stand-up game with a kill the enemy objective. I would have done jack and squat to the Ravenwing, who could have destroyed anything they touched. With Maelstrom, I had things I could go do, even though I could not hurt this invincible nightmare squad. Maelstrom punishes death stars because they are expensive and small.
That said, summoning daemons is GREAT. I only did as well as I did because of my all-star Whirlwinds, who accounted for at least 30 daemons killed! The two Assault Marines also saved the day multiple times and scored 3 points BY THEMSELVES.
Next: a seperate post from the same day, where I demo Warhammer: Age of Sigmar. Is it as bad as people on BOLS forums complain it is? Or, is it the next step in model gaming? Stay tuned!
Lexington teaches me Infinity!
Lexington has a problem. He can’t quit getting me into model games. Warmachine. Epic. Gothic. Necromunda. He always does this. He plays a little demo game with me and then I can’t stop.
He does this on purpose.
Because gaming is AWESOME.
Anyway, he’s been bugging me to get into Infinity for a while. Infinity is a futuristic heavily detailed skirmish game, where factions from Earth’s future battle for dominance.
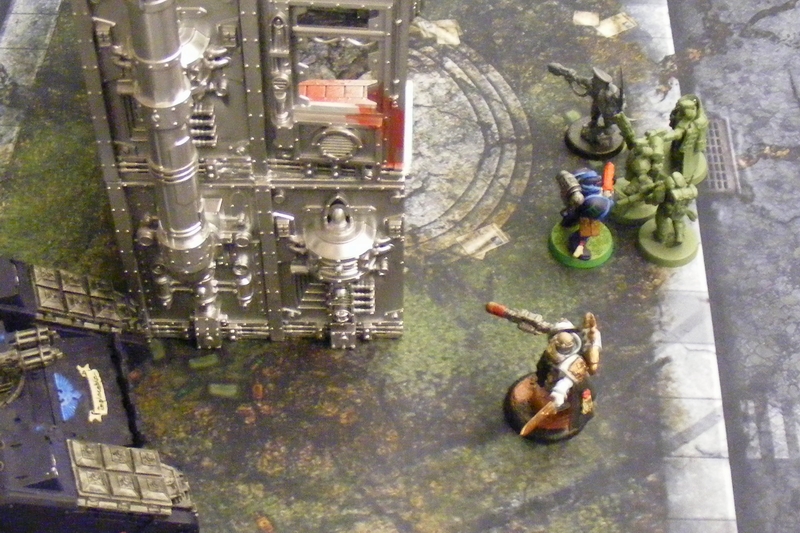
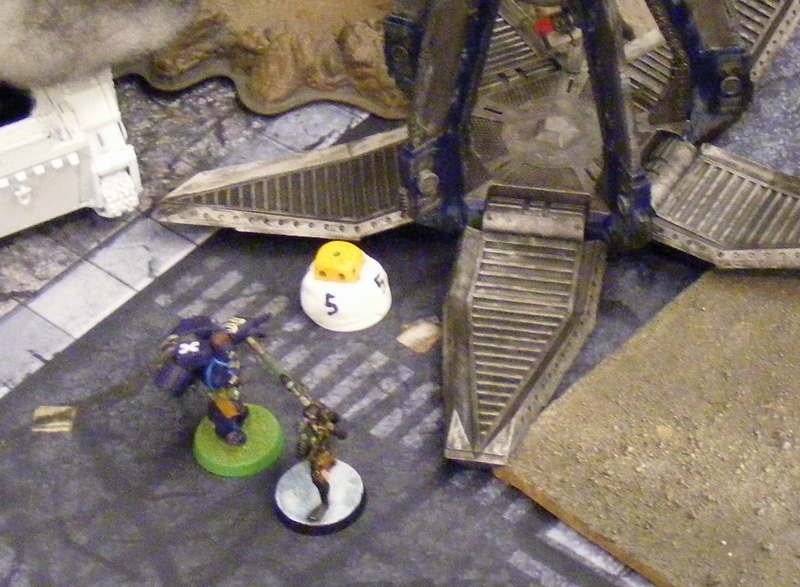
In this demo game, we didn’t have enough terrain, so books stood in for buildings. Brian had three Metros from the Ariadna faction, while I had three Alguaciles from the Nomads.
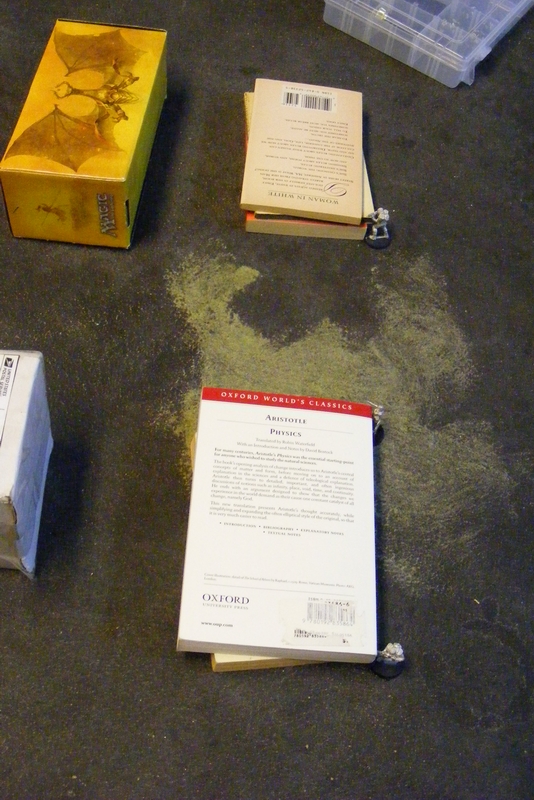
Here, my Alguaciles take cover behind some low structures, possibly depositories for… something…

Lexington’s Metros set up in a similar situation across the board.
Turn 1 – Ariadna
Because Lexington had three Metros, he generated three orders. His first order was to have the Metro near the bottom move up twice. Orders can have two parts. Enemies that see you take orders can react. I got a lucky reaction shot, and the first Metro takes a hit! The Metro has an armor save of 14, so Lexington has to roll a 15 or higher, but fails! The Metro goes down!

Lexington’s second order is for the central Metro to shoot one of my Alguaciles. He got three shots and I got one. We all missed. In Infinity, you can spend orders on any of your troops, even ones that get to shoot! He shot at me again and I dodged this time. I failed to dodge, but he failed to hit again.
Hitting is hard from range. To hit, you must roll a D20 equal to or under your Ballistic Skill. If you roll EXACTLY, you get a critical hit! If an enemy is in cover, you get a -3 to your BS, and long ranges can give you a further -3. Lexington’s BS was 10, so with a -3 and another -3, he needed a 4 or less on a D20 to hit. Unlucky that he didn’t get it with six dice.
Turn 1 – Nomads
Because the enemy can react, I order one of my Alguaciles to wait for the first half of her turn, and Lexington shoots at me. Because all parts of an order are resolved simultaneously, I take the second 1/2 of my order to fire a three round burst. My BS is 11, so with a -3 for range, and -3 for cover, I need a 5. I roll a 1, which hits! The Metro goes down!

I take another order on the same Alguacile to fire on the last Metro, and one of my dice comes up 5, which is a critical hit! Enemies don’t get an armor save against criticals, so Lexington’s entire force is wiped out on turn 1!
———————————————————————————-
Wow. Lexington has never seen a turn 1 wipe like this, and he’s done a lot of demos. He has a huge group in the Twin Cities devoted to Infinity, and it’s easy to see why. Infinity is a complicated system, but it has a lot of flexibility and strategy involved.
Next: Age of Sigmar demo at White Lake!
Eldar Debut: Blockade Run 1000 pts
I’ve played against John and his Eldar, with few successes. Now that I have an Eldar fleet, can I have the same result? Let’s find out!
Mission: Blockade Run
Battlezone: Deep Space
——————————————————————-
Bozeman – Attacker – Corsair Eldar Late Gothic War Fleet (500 points)
- Eclipse Class Cruiser Argent Nebula
- Nightshade Class Destroyer x3 Chisels of Vaul
- Hemlock Class Destroyer x3 The Rememberers
——————————————————————-
Stephen – Defender – Segmentum Obscurus Gothic Sector Fleet (1000 points)
- Fleet Admiral (Ld 8, aboard the Torpedo Dauntless)
- Retribution Class Battleship
- Overlord Class Battlecruiser
- Dauntless Class Light Cruiser (Lances)
- Dauntless Class Light Cruiser (Torpedoes)
- Sword Class Frigate x2
- Sword Class Frigate x2
——————————————————————-
Setup:


The Overlord and two Swords deployed to my left, the Retribution and two Swords to the center, and both Dauntlesses to my right. I set up behind an asteroid field to shield me in case I did not get first turn. Luckily I did get the first turn.
——————————————————————-
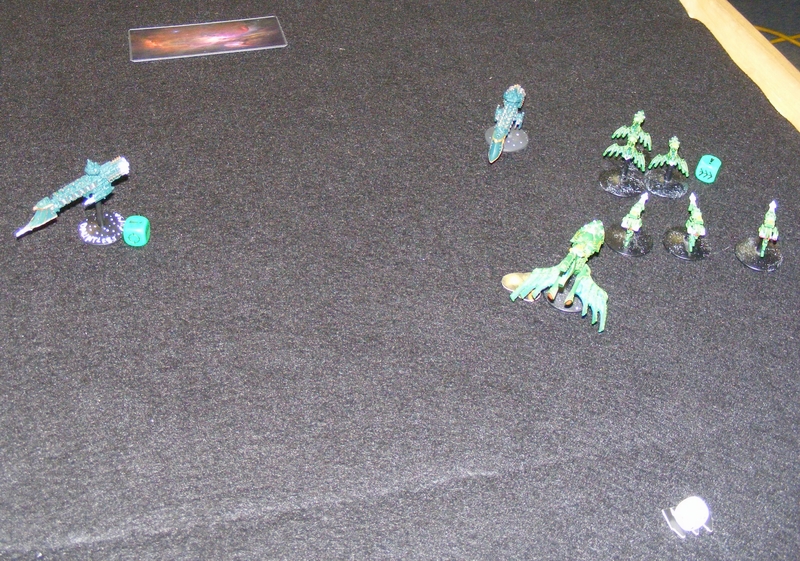
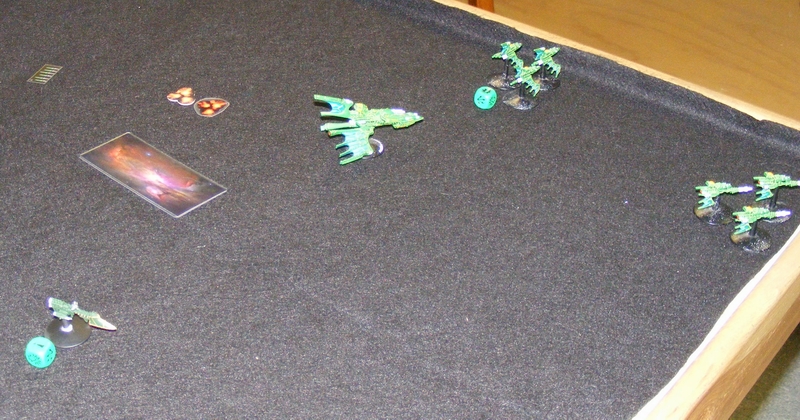
Turn 1 – Corsair Eldar
My fleet moved up. Most guns were out of range, but torpedoes fired from the Chisels of Vaul do two damage to the lance Dauntless and cause a Brace. The Argent Nebula launches 3 bombers and a fighter.
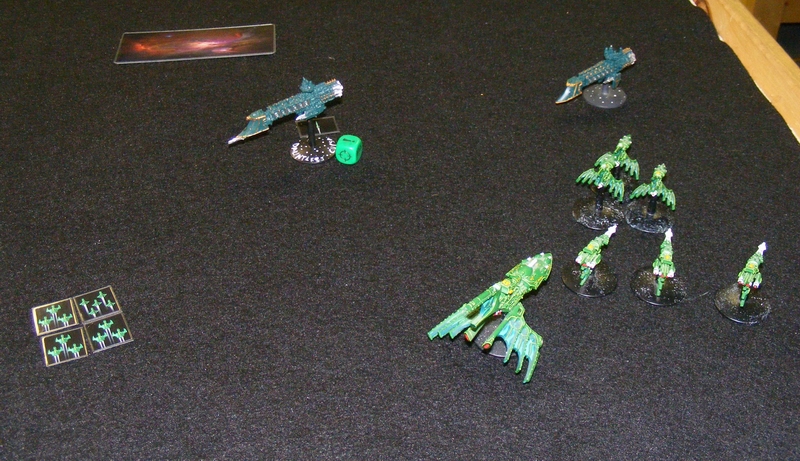
The fleet makes for the weakest flank, tring to punch through.
Turn 1 – Imperial Navy
Battery fire from the Torpedo Dauntless forces a brace on the Chisels of Vaul. The same ship fires torpedoes at the Argent Nebula and a terrible Holofield roll causes two damage! The Overlord battleship goes on All Ahead Full to try to get into the fight.
Fantastic attack from the Admiral’s personal ship!
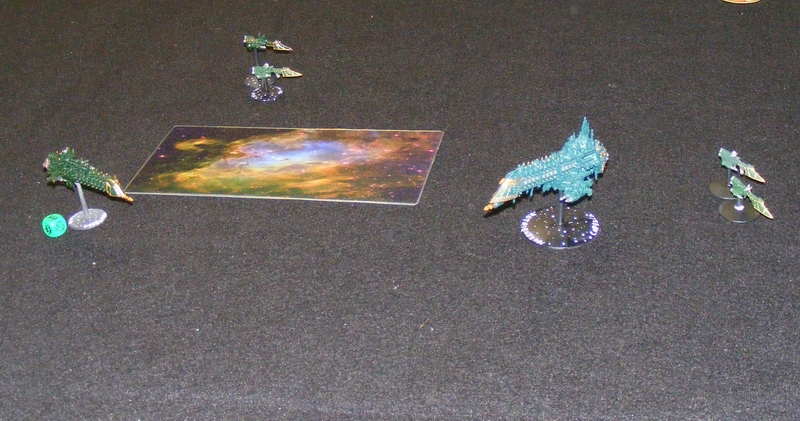 I’m a comin’!
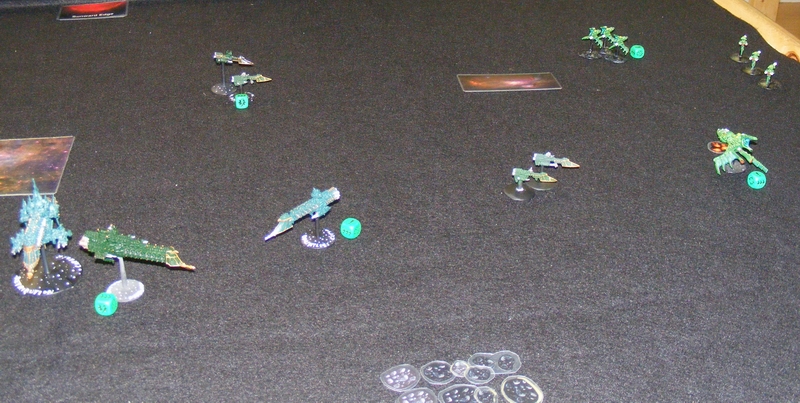
Turn 2 – Corsair Eldar
The Chisels of Vaul, unable to reload, tack and move up. The Rememberers and the Argent Nebula combine firepower and destroy the Torpedo Dauntless, leaving it a drifting hulk!
 Pulsar Lances are absolutely terrifying on a good turn.
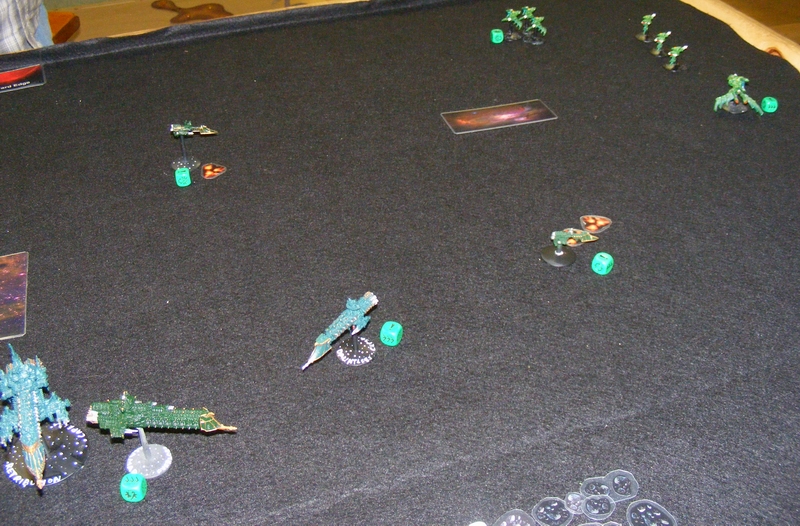
Turn 2 – Imperial Navy
The drifting hulk moves through a blast marker, takes a damage on a 6, rolls on the Catastrophic Damage chart, and suffers a WARP DRIVE IMPLOSION! The Argent Nebula braces for impact and barely avoids damage! Two Swords move up, and damage the Argent Shroud, crippling it and shredding the mainsail, leaving it unable to move in the ordnance phase.
 Batteries: don’t leave home without them.
Turn 3 – Corsair Eldar
In a stunning display of hit-and-run, the Rememberers fire on one of the Sword squadrons, killing one. The Chisels of Vaul fire on the other, killing one. The Argent Nebula makes for the safety of the board edge.
 Eldar escorts pack a wallop!
Turn 3 – Imperial Navy
The remaining Swords move up to desperately keep pressure on the Eldar as the rest of the fleet wheels. The Argent Nebula takes two more damage and fails to Brace, causing a Mast Severed result that limits it to 90 degree turns. Crippled lance Dauntless disengages.

The Argent Nebula is taking a beating.
Turn 4 – Corsair Eldar
The Chisels of Vaul reload and fire torpedoes at a Sword! They never make it, as the Argent Nebula gets in a good Pulsar Lance volley and kills it before the torpedoes arrive. The Rememberers fire at the other Sword and whiff, then turn and run.
Pulsar Lances are absolutely worthless on a bad turn.
Turn 4 – Imperial Navy
Overlord goes on All Ahead Full as the Sword tries a suicidal dash toward the Argent Nebula. Lucky brace saves prevent destruction.

Last Sword just can’t do one last damage.
Turn 5 – Corsair Eldar
The Chisels of Vaul fire batteries at the last Sword, killing it, and then the entire fleet flees off the board edge. Turn not pictured. Game ends.
——————————————————————-
Final Score
Bozeman – Corsair Eldar: 582.5
Stephen – Imperial Navy: 62.5
——————————————————————-
Blockade Run is a tough one for the Imperials, with their short ranges and being so slow. If Stephen had put the Retribution along one of the edges, facing the center, it could have fired on close enemies, or gone on All Ahead Full to get across the board fast. Leave the fast, maneuverable escorts and Dauntlesses in the center, ready to go any direction. Anchor the other side with the Overlord.
Next: hopefully painting!
Highland October 2000 pts Azure Flames vs. Star Phantoms Space Marines
Kyle and I were the only ones to show up at first, so we got out the big guns. 2000 points, Maelstrom 4, The Spoils of War.
——————————————————————————————————–
Bozeman – Azure Flames (Salamanders Space Marines)
- Demi-Legion Formation
- Chaplain, Jump Pack (Warlord Trait: Storm of Fire, one friendly unit within 12″ gets Rending on all shots)
- Tactical Squad x10, Veteran Sergeant, Bolter-Melta, Power Fist, Meltagun, Multi-Melta
- Drop Pod
- Tactical Squad x10, Veteran Sergeant, Bolter-Flamer, Power Fist, Flamer, Multi-Melta
- Tactical Squad x10, Veteran Sergeant, Bolter-Flamer, Power Fist, Flamer, Multi-Melta
- Assault Squad x10, Jump Packs, Power Fist, 2x Flamer
- Devastator Squad x5, 4x Heavy Bolter
- Ironclad Dreadnought, Ironclad Launchers, Heavy Flamer, Chainfist
- Drop Pod
- Land Raider Spearhead
- Land Raider (Phobos Pattern)
- Land Raider Crusader, Multi-Melta
- Land Raider Redeemer, Multi-Melta
——————————————————————————————————–
Kyle – Star Phantoms Space Marines
- Demi-Legion Formation
- Chapter Master, Power Sword, Bolter-Melta, The Armour Indominus
- Tactical Squad x6, Combi-Grav, Power Sword
- Tactical Squad x6, Combi-Plasma, Plasma Gun
- Razorback, Twin Linked Lascannon
- Tactical Squad x6, Combi-Melta, Meltagun
- Drop Pod
- Assault Squad x5, Jump Packs, 2x Lightning Claws, Melta Bombs
- Devastator Squad x5, 4x Heavy Bolter
- Ironclad Dreadnought, Seismic Hammer, Ironclad Launchers, 2x Hunter-Killer Missiles
- Inquisitorial Detatchment
- Hereticus Inquisitor, Power Armour, Force Sword, Condemnor Boltgun, Psychic Lv2
- Henchman Band (various henchmen, 2 Plasma Guns, Arco-Flagellant, 3 Servitors, etc.)
- Chimera, Psybolt Ammunition
- Militarum Tempestus Detatchment
- Commissar, Plasma Pistol, Power Sword
- Militarum Tempestus Scions, 2x Hot Shot Volley Guns, Med Pack
- Valkyrie
- Officio Assassinorum Detatchment
- Vindicare Assassin
——————————————————————————————————–
Mission: The Spoils of War (Maelstrom, 3 objectives, can’t discard numerical objectives, can steal opponent’s numerical objectives)
Setup

Two of my Tactical Squads with Flamers got into the Crusader and Redeemer.
Turn 1 – Star Phantoms
Melta squad drops in, and puts one penetrating hit on the Redeemer (the Weapon Destroyed result is ignored thanks to the formation special rules). Razorback advances, and the other Tactical Squad snake-eyes a Difficult Terrain test and have to run to move through a small building. Inquisitor and squad move up in the Chimera. Heavy Bolters put the hurt on the Chaplain and his squad. Due to Mission rules, I score one point from Kyle’s Tactical Objective for Objective 1.

Melta doesn’t pop a Land Raider.

Squads getting into position.

The Chaplain takes a wound, and two Assault Marines bite the dust.
Turn 1 – Azure Flames
Chaplain Advances. Land Raider Redeemer kills the Melta squad that drop podded in. Land Raider Phobos kills the Inquisitor’s Chimera, and the Heavy Bolters kill some of his squad. Assault combat squad with Sergeant pops the Razorback. Melta Tactical Squad drops in, combat squads, and shoots some of the Tactical Squad in the small building and the Inquisitor’s squad. The Chaplain fails to charge. Turn not pictured.
Turn 2 – Star Phantoms
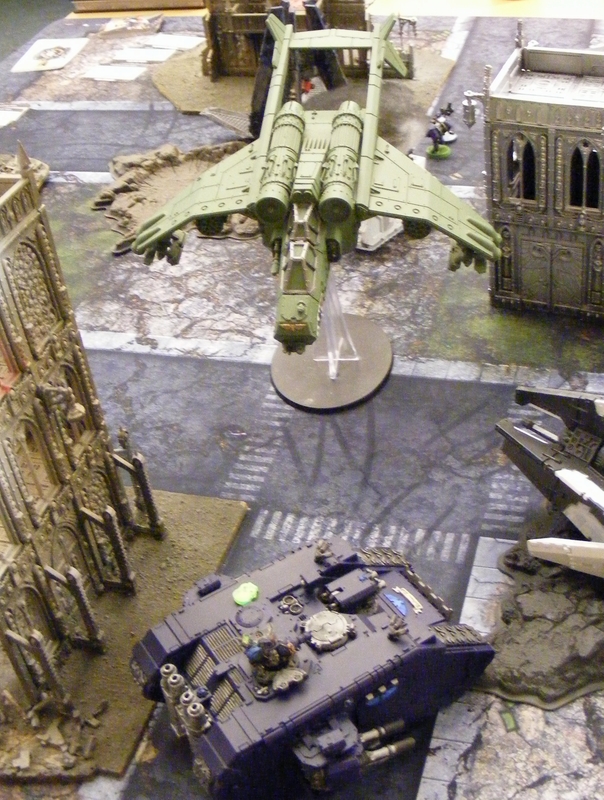
Ironclad drops in and Melta shot does one hull point to the Crusader. Heavy Bolters hit the Azure Flames Heavy Bolters, killing the sergeant and one Heavy. Assault Squad deep strikes just outside of the Devastator’s line of sight. Inquisitor’s Squad makes for Objective 4 in the small ruin to gain a point. Plasma Squad kills 3 Assault Marines, then charges. They lose one to zero, break, are caught, and stay. Valkyrie comes in, fires on the Melta squad leaving only the Meltagun alive.

Ironclad drops are contagious for a reason! They are scary!

You can’t see us, nyah nyah!

The Inquisitor gets Objective 4.

Shooting was much more effective than charging.
Turn 2 – Azure Flames
The combat with the Assault and Tactical squad continues, with one Star Phantom going down. Tactical Squad in the Crusader shoots the small Tactical Squad, reducing them to 2 and breaking them. Land Raider Redeemer kills 3 of the Assault Squad with a Flamestorm Cannon. Devastators fire on the Inquisitor, killing all of his squad and wounding him once. I gain 2 more points. Land Raider Phobos puts two pens on the Ironclad, but it survives minus one Hunter Killer missile!

The fight drags on.

Objective 2 is claimed for a point.

The Assault Squad threat is still there, but less so.
Turn 3 – Star Phantoms
Assault Squad jumps into the building, fires a bolt pistol, kills a Devastator, and they break and flee, out of assault range! One more tactiacl marine goes down in the small fight by the wrecked Razorback. Space Marine Chapter Master, attached to the Militarum Scion squad with Commisar, grav-chutes in! Combined fire from that and several other sources reduces the Flamer squad to the sergeant and one bolter! Surviving Inquisitor assaults the five bolter marines, whiffs, killing only one. I score that point because the five bolter marines have Objective Secured. Ironclad charges the Land Raider Phobos, does one hull point.

This fight is taking a while…

A Chapter Master in good company. How is HE taking orders from a COMMISSAR? Don’t know, but it works.

The Inquisitor assaults with a fist full of ones.
Turn 3 – Azure Flames
Land Raider Redeemer finishes off the last of the Assault Squad as the Devastators move back up to Objective 1. Land Raider finishes the Ironclad. My Ironclad drops in and kills one of the remaining squad that regrouped earlier. The Inquisitor kills all but one of the bolter Marines. The lone Meltagun Tactical Marine puts a hull point on the Valkyrie in hover mode, and then charges but misses.

The Assault Squad couldn’t stand up to two turns of fire.

Ironclad is finally dealt with.

The fight is finally over!

The Inquisitor steps up his game as the lone Melta tries to blast the Valkyrie.
Turn 4 – Star Phantoms
Inquisitor uses Gate of Infinity to try to score a point by being in my deployment zone. Stormtroopers charge the remaining tactical squad, kill the Sergeant in a challenge, and then whiff leaving one bolter marine. The Chapter Master breaks off and shoots his Combi-Melta at the Crusader, but misses. Two different one-man bolter squads charge the Assault Marines. One dies to Overwatch, the other dies in combat. The Valkyrie tries to hurt the Land Raider Phobos but fails.
*sound of Star Trek transporter*
The last bolter is in a pickle as the Chapter Master’s meltagun whiffs.

That went well.
Turn 4 – Azure Flames
Ironclad Dreadnought charges the Imperial Guard, killing them all. Assault Squad moves and runs to get objective 2 for a point. The Land Raider Crusader does one wound to the Chapter Master with a bolter. Then, it does three wounds with the Assault Cannon and Kyle rolls 3 1’s, taking him out! Squad in the Redeemer pops out and kills the Inquisitor. Every other thing around them fires at the Valkyrie and misses.

The center is cleared by a lot of firepower and one really bad Armour Save roll. The Chapter Master goes down in a flurry of 1’s!

The Inquisitor is taken down by flamers as the Valkyrie dodges several shots.
Turn 5 – Star Phantoms
Vindicare Turbo Penetrator round kills the Ironclad in ONE SHOT. Heavy Bolters kill one surviving bolter marine.

One shot, one kill. Vindicator takes down a Dreadnought.

The Heavy Bolter squad has been the star of the game. They have been laying down a withering hail of fire all game.
Turn 5 – Azure Flames
Lone Meltagun hides behind the Crusader as it advances, killing 2 Devastators. Tactical squad charges the Drop Pod, killing it. Redeemer kills the other Pod. Assault Marines move up and despite Assault Doctrine can’t get the range to assault the Vindicare.

Eep.

Two pods down.
 Just can’t charge, even with a re-roll!
Turn 6 – Star Phantoms
Valkyrie tries yet again to hurt a Land Raider and fails. To gain a point, the Vindicare pops an Assault Marine and assaults the Sergeant, but both of them whiff.
Make yourself useful, Valkyrie!
Both players have an objective to kill a unit in close combat, so the winner will earn a point.
Turn 6 – Azure Flames
Vindicare kills the Sergeant for a point. Land Raider goes Flat out and other units move or run to give me all 6 objectives for FOUR POINTS! Game ends.
Vindicare earns a point by beating up the Assault Sergeant.

Mad dash…

…for FOUR POINTS!
——————————————————————————————————–
Final Score
Azure Flames: 15 + Linebreaker, Slay the Warlord and First Blood for 18
Star Phantoms: 5 + Slay the Warlord for 6.
——————————————————————————————————–
The above explanations don’t show how Kyle rolled abysmally in critical situations. He’d have had another couple points if the Inquisitor had killed the bolters on objective 2. He also had some bad penetration rolls and shots that he needed. The Land Raider should have died from the Ironclad, but got off light with one hull point. This was a game lost on dice rolls.
Next: I’m going to try to get some time off to paint. Back to the grindstone.
September Highland Game Club belated report.
Due to my new job, I totally forgot to write up the batrep from last month’s Highland Game Club! As such, I’ve forgotten the context of the battle, and only remember the highlights.
First, I squared off with a new player who didn’t even have his own models! He borrowed the Orks owned by the club from the Black Reach box set. I tried to match the Space Marine contingent of the Black Reach set as faithfully as I could.
 In the end, one half of a tactical squad and the Captain were all that was left on the board! Close game and taught the basic funamentals!
—————————————————————————————————————-
Later, Andrew and I squared off with 1750 points. We both took Space Marines with a Demi-Legion. Andrew also took a Knight Titan…
Here are some pics:

Andrew refused the flank! I should have seen that coming. I’m getting old.

Andrew’s Titan accounted for half the army and was able to kill multiple units per turn. It was not very fun, as I had nothing to deal with it.

I dropped into Andrew’s backfield to cause havoc. It did a lot but I couldn’t stop his whole army.
 I took a Whirlwind/Land Speeder formation that did quite a lot! The second whirlwind even stood up to two rounds of shooting from a Knight after it’s sibling was destroyed early on.
In the end, Andrew won 14 to 8. Ugh. Knights are the worst. I need to make a Sternguard squad that has 10 combi-meltas.
Next, the battle report from this month!
Blood Bowl time at Highland!
Highland Gaming Club got a good taste of Blood Bowl today! To demo Blood Bowl I follow three rules:
1. The first person to say “yes” gets to pick their team.
2. Only one half is played, and the team that kicks off gets 1/2 of a point, so that they win ties.
3. Both players have me tell them what to do for the first turn, and from then on, have me only make general suggestions.
Let’s take a look at the highlights!

Here, Paul (left, Monitors) contemplates how to set up to receive a kick from Ian (right, Scrappaz). Paul brought a strong first drive, scoring quickly, but Ian pushed hard and got a lucky Throw Team-Mate touchdown, despite three turns of turnovers stopping him. In the end, Ian was victorious.

Justin, playing the Scrappaz here, got a turn 1 touchdown thanks to some good rolls! Sadly, his luck did not hold as Bill, a newcomer to Highland, smashed his early lead and scored two touchdowns to Justin’s one!
It’s interesting to note that both players that lost these demo games are veteran players of the Blood Bowl video game, which (barring a couple botched skills that don’t work right) is the same game!
Time for a slightly off topic rant! The current Blood Bowl video game does not capture the whole feeling of the original. Here’s what you miss out on with the PC version:
1. No face-to-face interaction with an actual human being.
2. Cannot build a team from scratch using 1,000,000 gold pieces.
3. No option for special play cards (even though no one uses them)
4. Cannot customize players to the extent you can with real minis. Want purple skeletons? Too bad!
5. Some skills don’t work right.
6. To really get a handle on the rules, you have to read the pdf anyway, so you might as well read the regular board game rules.
7. Not all Star Players are present.
Blood Bowl II will be coming out soon, so hopefully some of these issues are addressed. However, from the promotional material, it seems that some races are in-game purchases. Want to play Lizardmen? That’ll be an extra fee, get out your credit card.
The point is: the board game is fun and gives you a lot more freedom! Give it a try!
Next: more Gothic? Perhaps Space Marines?
Battlefleet Gothic batrep: Surprise Attack 1000 pts: Space Marines vs. Imperial Navy
Stephen and I finally got our work schedules to sync up, and we got some long-awaited Gothic action at AFK Games in Holt!
——————————————————————————-
Mission: Surprise Attack (1000 pts)
Region: Inner Biosphere
——————————————————————————-
Attacker: Stephen – Imperial Navy Segmentum Obscurus Bastion Fleet
- Solar Admiral (Ld 10), 2 additional re-rolls (aboard the Enif)
- Avenger class Grand Cruiser Enif
- Dauntless class Light Cruiser Cursa (Lances)
- Dauntless class Light Cruiser Stevo (Torpedoes)
- Squadron of 4 Firestorm class Frigates
- Squadron of 3 Sword class Frigates
- Squadron of 2 Cobra class Destroyers
——————————————————————————-
Defender: Bozeman – Azure Flames Space Marine Dominion Fleet
- Master of the Fleet Ranidan Piers (Ld 10), 2 re-rolls (aboard His Hammer II)
- Battle Barge His Hammer II
- Strike Cruiser Vigilance, Extra Shield
- Strike Cruiser Courage, Extra Shield
- Wrath Squadron, 5x Hunter class Destroyers
- Minefield
- Minefield
- Orbital Mine
- Orbital Mine
——————————————————————————-
Setup

Shown above, the two Strike Cruisers are squadroned together. Battle Barge His Hammer II is on standby; all other ships are on full alert.
——————————————————————————-
Turn 1 – Imperial Navy
The entire fleet arrives via the sunward edge (far edge in pictures below). The Stevo, the Cursa, and the Firestorm squadron arrive to the left and go after the Strike Cruisers. The Enif, the Cobra squadron and the Sword squadron come in nearer the center.

The Stevo fires torpedoes to limit the Strike Cruiser’s options, as the rest of the fleet advances.

The rest of the fleet menaces the center.
Turn 1 – Space Marines
Wrath Squadron goes around the large minefield. The large minefield rolls two 6s to launch 2 mines at the Swords. His Hammer II uses the gravity well of the planet to turn twice and fires normal torpedoes and Thunderhawk Gunships at the Enif. The Strike Cruiser squadron fires torpedoes and Thunderhawks at the Cursa, which fails to brace for impact and is crippled. Bombardment Cannons fire on the Firestorms and destroy one.

Wrath Squadron outflanks the enemy.

Thunderhawk flights away.

Bad torpedo roll is augmented by the Cursa failing to brace for impact. A Thunderhawk causes an Engine Room effect, leaving two damage remaining.
Turn 2 – Imperial Navy
The left side of the fleet closes in, and fires on the Strike Cruisers, doing one damage to the Courage. Torpedoes from the Cobras are stymied by resilient Thunderhawks. The torpedoes and Thunderhawks hit the Enif, which takes two damage. An orbital mine kills one of the Swords.

The only actual damage was caused by a torpedo fired by the Stevo.

Ordnance hits home, doing serious damage to the Enif.
Turn 2 – Space Marines
A daring double-boarding action by the Strike Cruisers yields mixed results. The Space Marines win both actions. The Cursa is reduced to a drifting hulk. The Stevo takes one damage, but in return causes a critical effect to the Courage, causing a hull breach and doing 3 damage, crippling it! His Hammer II reloads, and launches more ordnance. Wrath Squadron also fires, with boarding torpedoes. All of this ordnance does four more damage to the Enif, crippling it and causing a Fire.

Boarding actions are where Space Marines shine, but they are always a gamble!

Space Marines can really pump out a lot of high quality ordnance.
Turn 3 – Imperial Navy
Enif disengages. The Firestorms and Swords go after His Hammer II, but do no damage. The Stevo fires on the Vigilance.

The escorts pour it on to His Hammer II, but they don’t have enough gun.

Dauntless Light Cruisers can’t put out a lot of firepower in their side arcs.
Turn 3 – Space Marines
Abysmal leadership rolls by His Hammer II fails an Ld 10 check, TWICE! Courage disengages. Vigilance does two damage to the Stevo. The rest of the fleet kills one more Sword, but the last one barely survives with some fantastic Brace rolls.

It’s become a one-on-one duel between the Vigilance and the Stevo.

Lucky Sword manages to hold on, preventing the destruction of the squadron!
Turn 4 – Imperial Navy
Stevo disengages. Sword disengages. Firestorms, however, fail to disengage even on a modified Ld 10! They advance and kill one Hunter.

Stevo gets out of here.

Desperate and unable to flee, the Firestorms put the hurt on the Hunters!
Turn 4 – Space Marines
The Vigilance goes on Come to a New Heading to go after the last Firestorms. The rest of the fleet pour it on, but one Firestorm survives.

Once again, one survives to save the squadron.
Turn 5 – Imperial Navy
Last Firestorm disengages. Game ends.
——————————————————————————-
Final Score
Azure Flames: 329.75
Imperial Navy: 50
——————————————————————————-
Final Thoughts: After the game, I convinced Stephen to re-make his Avenger class Grand Cruiser into a Vengeance class because the Avenger has been completely useless for him. The Vengeance has much longer range and a good variety of guns, as opposed to the Avenger which is all short range batteries. Hopefully it does better for him in the future.
Next: Blood Bowl and 40K in Highland!
Blood Bowl Weather Flip Display
Tired of trying to remember what the weather is during your Blood Bowl games? Well, worry no more!


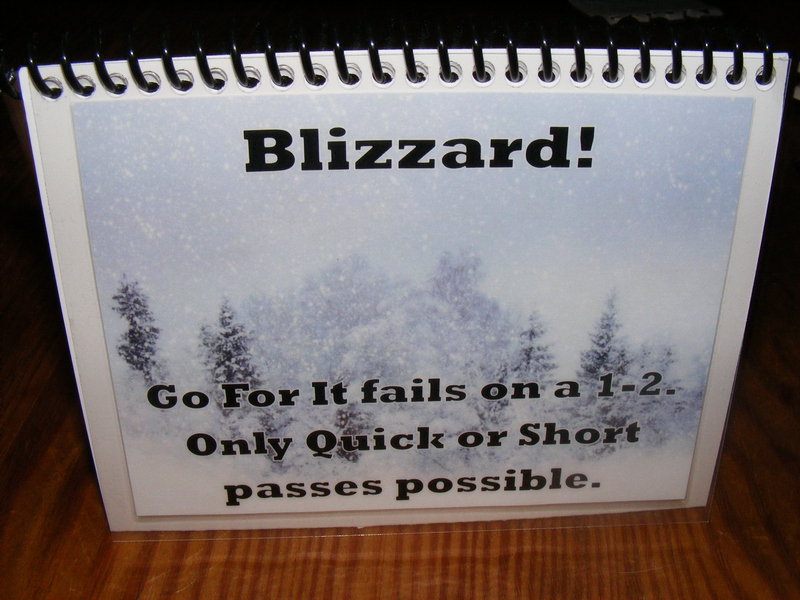
With this handy flip display, both players can see what the weather is, and the effects that weather has on the game. The display shows on both sides so both players can see it easily. The base is made to be slim, so that the display stands up and takes up little space on the tabletop. It’s easy to change and stands up well.
Find the file and instructions for printing in the Blood Bowl Compendium page!
Next: Ork Blood Bowl coach, and support staff!
Highland Library Golden Rhino Tournament 7-28-15
It’s TOURNAMENT TIME! All the prep I’ve been doing will either pay off or fail dismally. How did I do? Read on to find out!
Spoiler alert: due to an overly long lunch and other factors, we only played three 2 hour games instead of 4. Sadly, this means we did not get to play mission 4 which was my favorite of the 4.
Before we begin, here’s the goodie bag I got for entering:

Included in the bag: a bunch of White Dwarf magazines, some Age of Sigmar promo stuff, and two balls of fluff, painted and embedded with a tea light to make it look like smoldering wreckage! Also, six sculpey-clay numbered objectives that hold a die to mark Mysterious Objectives and another objective that looks like a brain! NEAT!
————————————————————————————————
Here is the list I took in all three games. Remember, I am trying to win in an anything goes tournament with a Combined Arms detachment Highlander list.
Bozeman – Azure Flames Space Marines (Salamanders) – 2000 pts
-Leonidas, captain of the 1st company (counts as Vulkan He’stan)
-Librarian, Level 2, Space Marine Bike, Melta Bombs
-Dreadnought, Extra Armour, 2x Twin Linked Autocannons
-Ironclad Dreadnought, Ironclad Launchers, Chainfist, upgrade Storm Bolter to Heavy Flamer
—Drop Pod
-Bike Squad x8 with Attack Bike, Veteran Sergeant, Power Fist, Melta Bombs, 2x Meltaguns, Multi-Melta
-Tactical Squad x10, Veteran Sergeant, Power Fist, Combi-Melta, Meltagun, Multi-Melta
—Rhino, Extra Armour
-Tactical Squad x10, Veteran Sergeant, Power Fist, Combi-Flamer, Flamer, Multi-Melta
—Rhino, Extra Armour
-Scouts x5
—Land Speeder Storm, Multi-Melta
-Assault Squad x5, 2x Flamer
—Drop Pod
-Land Speeder Squadron x3, 3x Multi-Melta
-Predator Destructor, Heavy Bolter sponsons
-Thunderfire Cannon
All missions have: 2 ruins, 2 craters, 1 impassable LOS blocking terrain, 1 river or water feature, 2 forests, and 1 armor 14 building. Each mission also has the special rule At Any Cost: You may target the building, even if it is friendly.
Wins give 3 tournament points, ties 2 and losses 1. Ties at the end of the tournament are settled via # of victory points total for all 3 games.
———————————————————————————————
Mission 1 – Command and Conquer
Dawn of War Deployment, 3 objectives in neither player’s deployment worth 3VPs and 1 in each deployment zone worth 5 VPs.
Opponent: Chris – Eldar Harlequins with Craftworld Eldar allies.
Quick Breakdown: Chris started with a brutal Alpha Strike. I was unable to do much at first. The lead Harlequin charged the bikes with the Librarian, killing everyone but the Librarian. The Librarian cast Sunburst in a brutal Nova, killing a large amount of the Eldar force that had bunched up. Leonidas and the Assault Squad deep struck out of position and did little damage. A Solitaire killed most of the Assault Squad and dashed away. Most of my remaining forces on the left side of the board died, but Leonidas and the surviving Sergeant ran on turn 4 to deny objectives. Due to time limits the game ended after 4 turns. Final score: Azure Flames 7, Eldar 5.

Our setup

Alpha Strike kills the bikes and land speeders!

The Librarian survives against the odds, and pulls off a devastating Sunburst.

The left side of the board goes poorly for me.

The Solitaire leaves combat after wounding Leonidas and killing 4/5 of the assault squad.

On the right side, Chris killed everything except this Rhino with a Tactical Squad inside, who dutifully sat on the objective all game.

Endgame: Leonidas scores objecive 3 while the Assault Sergeant contests objective 1, snatching victory from the jaws of defeat!
Postgame: I should not have won, but the time limit saved me. Chris was less than pleased. On to the next game!
————————————————————————————————–
Mission 2 – Recover the Standard Template Construct!
Hammer and Anvil Deployment, carryable objective similar to the Eternal War mission 6: The Relic.
Opponent: Stephen – Chaos Daemons of Nurgle with Death Guard Chaos Space Marine allies.
Quick Breakdown: Stephen’s army moved forward in a wave on turn 1. His Daemon Prince of Nurgle summons some Nurglings… and Perils of the Warp removes the Daemon Prince as a Caualty! Amazingly, the Daemon did this in Stephen’s previous game. Leonidas deep struck and with him and the Thunderfire Cannon, half of the Zombies are removed. Stephen bolsters the remaining zombies by enfeebling Leonidas and his squad with a Great Unclean one… AND PERILS REMOVES THE GREAT UNCLEAN ONE AS WELL! This is the most unlikely thing I’ve seen in a game, and I’ve played against Lexington. A Helldrake arrived and killed half the bikes and half a Tactical squad before re-rolling Melta brought it down. Leonidas and the Assault Marines whittle down the zombies until another Great Unclean One finishes them. The objective, held by Nurglings, is dropped as a Tactical Squad charges them. Both sides throw everything they have at each other. In the end, no one holds the objective. Final score: Azure Flames 9, Chaos 7.

Stephen’s setup

My setup, with the objective circled.

Centered in this picture: the empty hole where a Daemon Prince was sucked back into the warp. Papa Nurgle ANGRY.

Not pictured: 15 zombies that burned or exploded.

Upper left: a Great Unclean One is killed by Perils, while on the bottom a Helldrake incinerates four bikes.

A last-ditch charge dislodges the objective and confounds the Nurglings!

Typhus and his Terminators arrive… a bit too late to salvage the objective.
Postgame: In baseball you win 1/3 and you lose 1/3, it’s what you do with the other 1/3 that counts. This game was a gimme. Stephen lost around 600-700 points from Perils of the Warp, and amazingly lost the same Daemon Prince twice in two games! Other than that, I just tried to win by Kill Points which worked pretty well.
————————————————————————————————–
Interlude
Lunch was catered by a fancy Hamburger joint and was worth all the money the Highland Library paid AND MORE! After lunch, the Painting Competition was scored. Franklin, who was not participating in the tournament, won first. I won second, but when you see Franklin’s Necrons you will see why:

Absolutely stunning.
——————————————————————————————————
Mission 3 – The Deadline
Vanguard Strike Deployment, Maelstrom of War objectives. All tables generate the same Objectives, and objectives 11-16 are from the main book, not from your codex. Each round, any objective that is not scored or discarded is COUNTED NEGATIVE to your score! At the end of the game, your total cannot be less than zero.
Opponent: Ian, event co-ordinator – Sisters of Battle with Inquisitorial and Knight allies and Legion of the Damned, in addition to a giant Plasma Obliterator.
Quick Breakdown: Ian stole the initiative! I went 2nd in all three games this tournament. Ian pinned down my forces with some heavy firepower. Sadly for him, his objectives were un-scorable while mine were easy. I got off to an early lead, as a good round of shooting killed Ian’s Warlord: Uriah Jacobson. Ian’s Knight Titan stomped all over the left side of the board, wrecking unit after unit. The Legion of the Damned arrive, kill the Predator, and hold Objective 1 which Ian had to secure several times in the game. Land Speeders and Bikes remove Ian’s tanks one by one. Outflanking Sisters botch a Meltagun wave, sparing the Thunderfire, who cuts them down in return. An overheat in the Plasma Obliterator kills the Inquisitor manning it! Objectives go back and forth in a frenzy. Final Score: Azure Flames 19, Sisters and Allies 9.

The Azure Flames advance slowly on the right side of the board.

The Ironclad removes Uriah Jacobson’s Immolator, and the rest of the army blows the squad inside away.

Nothing can stop the Knight Titan!

The Sororitas recieve Aid Unlooked For…

The Sisters fail to remove the Thunderfire Cannon, and the Thunderfire and Dreadnought cut them down, while the Tactical Squad removes their Immolator.

To score a point, Ian blows up the bunker. Why? Because Maelstrom.

The Plasma Obliterator overheats, killing the poor Inquisitor inside!
Postgame: This was the most fun game of the three I played. Although I took an early lead, Ian got some good turns later and I was on the edge of my seat thinking that I could have a bad turn to screw it up. Luckily that didn’t happen. Knight Titans are still such a big problem. I have no idea how to kill one without buying a whole new Sternguard squad full of meltaguns.
——————————————————————————————————-
Conclusion:
I tied with Loki (see previous posts for prep game against Guard), but because I got more VPs total over all 3 games, I WON THE TOURNAMENT! WITH A HIGHLANDER COMBINED ARMS! WOOOOOOO! Oh man, I feel great! 40K has problems, as it always has, but IT IS OFFICIALLY STILL FUN!


I also won this absolutely sweet book bag:


In the end winning and painting got you raffle tickets. Here’s what I won with mine:

A 6th edition Dark Angels codex (cost me one ticket!) A tile with Lord of the Rings models superimposed on it. Games Workshop dice cube. Finally, a custom made Doctor Who dice bag, made by the significant other of Event Organizer, Ian! My fiancee, who sews and is openly critical of bad sewing, declared it to be of very high quality. Her exact words were: “She’s got sewing game!”
Finally, we all took a picture:

This was the best time I’ve had playing 40k in a LONG TIME. Second best to Big Game V. Truly awesome. The Highland Library 40K club is a wonderful group, and if you are even REMOTELY close, check them out on the last Tuesday of every month at the Highland Library. Finally I’d like to say thanks to Dawn, who let me into the Library before it was open to use the restroom. Seriously, thank you.
Next: I don’t know! I’m pretty tired. Perhaps Tau Battlefleet Gothic, Blood Bowl Ork helper models, or Necromunda Escher? Stay tuned!