Space Marines vs. Imperial Guard/Marines 1500 Big Guns Never Tire
Went back to Highland, got a 1500 pt. game with Michael, who was trying out a new Imperial Guard list. Let’s go!
—————————————
Bozeman – Azure Flames Space Marines (Salamanders)
- -Demi-Company
- Leonidas, captain of the 1st company (counts as Vulkan He’Stan)
- Tactical Squad x10, Veteran Sergeant, Power Fist, Combi-Melta, Meltagun, Multi-Melta
- Drop Pod
- Tactical Squad x10, Veteran Sergeant, Power Fist, Combi-Melta, Meltagun, Multi-Melta
- Drop Pod
- Tactical Squad x10, Veteran Sergeant, Power Fist, Combi-Flamer, Flamer, Multi-Melta
- Rhino, Extra Armour
- Assault Squad x5, 2x Flamers
- Devastator Squad x10, Veteran Sergeant, 4x Missile Launcher, 4x Flakk Missile upgrade
- Whirlwind Suppression Force
- Whirlwind x2
- Land Speeders x3, Multi-Melta x3
- Librarius Conclave
- Librarian, Lv2, Terminator Armour, The Shield Eternal, Dominate, Terrify, Psychic Shriek
- Librarian, Lv2, Invisibility, Terrify, Psychic Shriek
- Librarian, Lv2, Fiery Form, Fire Breath, Flame Breath
—————————————
Michael – Imperial Guard with Space Marine Allies (unbound)
- Imperial Guard
- Leman Russ Exterminator x3, Plasma Cannon Sponsons, Lascannon, Heavy Stubber, Camo Netting, Fire Barrels
- Commander Pask (Warlord)
- Wyvern x3, Camo Netting, Fire Barrels
- Guardsman Squad x10, Medic, Banner, Krak Grenades
- Guardsman Squad x10, Medic, Banner, Krak Grenades
- Guardsman Squad x10, Medic, Banner, Krak Grenades
- Tempestus Scion x10, Tempestus Prime
- Lord Commisar
- Lord Commisar
- Vendetta Gunship, 2x Heavy Bolter Sponson
- Techpriest Enginseer
- Leman Russ Exterminator x3, Plasma Cannon Sponsons, Lascannon, Heavy Stubber, Camo Netting, Fire Barrels
- Space Marine Allies
- Tactical Squad x9, Plasma Cannon
- Tactical Squad x9, Plasma Cannon
- Fortification
- Aegis Defense Line
—————————————
Mission – Big Guns Never Tire (D3+2 objectives, we rolled 3. Heavy Support choices killed give 1VP)
Deployment – Vanguard Strike
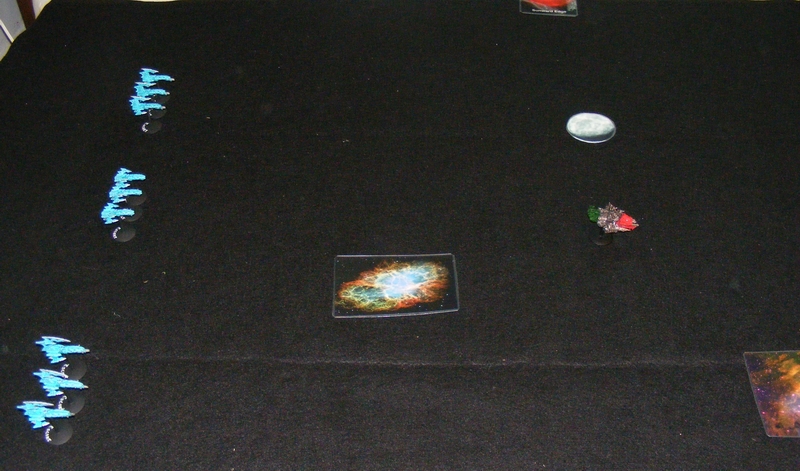
Setup:


—————————————
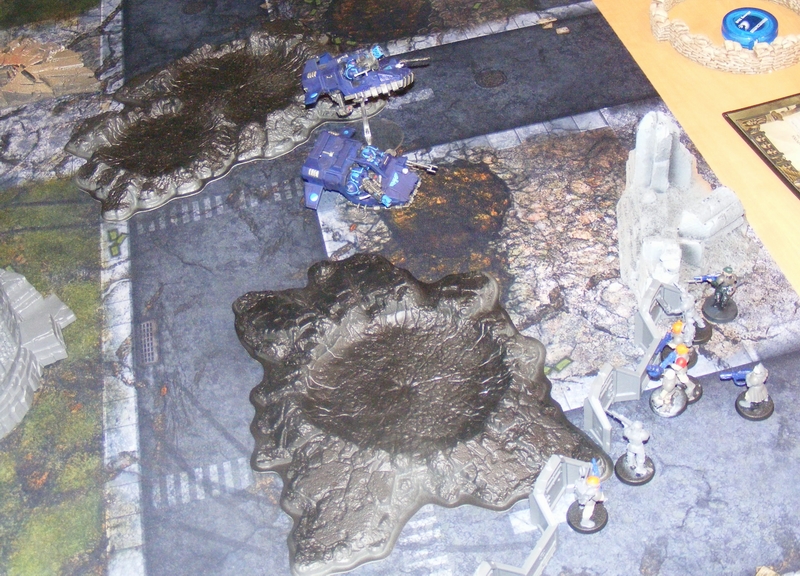
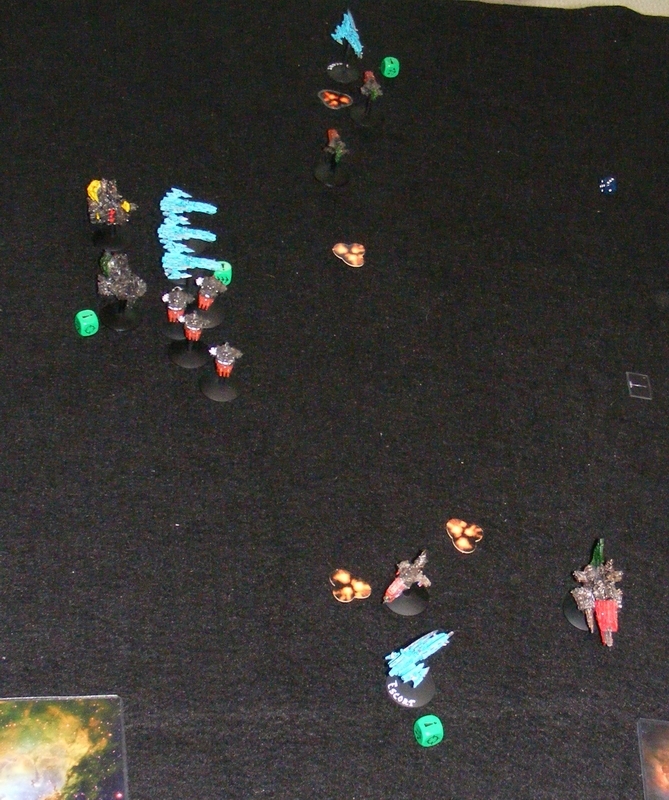
Turn 1 – Azure Flames
Leonidas and the three Librarians join the Assault Squad and they deep strike behind enemy lines, as does one of the melta Tactical Squads. Despite primo back armour melta shots, camo netting saves the Leman Russes with minimal damage. The Librarians cast Invisibility, Terrify, and fire breath. Flamers and heavy flamer then eat into the 30 man guard squad, but a ridiculous amount of Feel No Pain saves reduces the casualties significantly. Land Speeders move flat out as Whirlwinds blast the 10 man guardsman squad doing a few casualties. Devastators lay into the Leman Russes, but cover saves negate their shots.
 Drop Pod Blitz behind enemy lines! Waves of fire and melta shots! …less effective than I’d have liked.
 Move out!
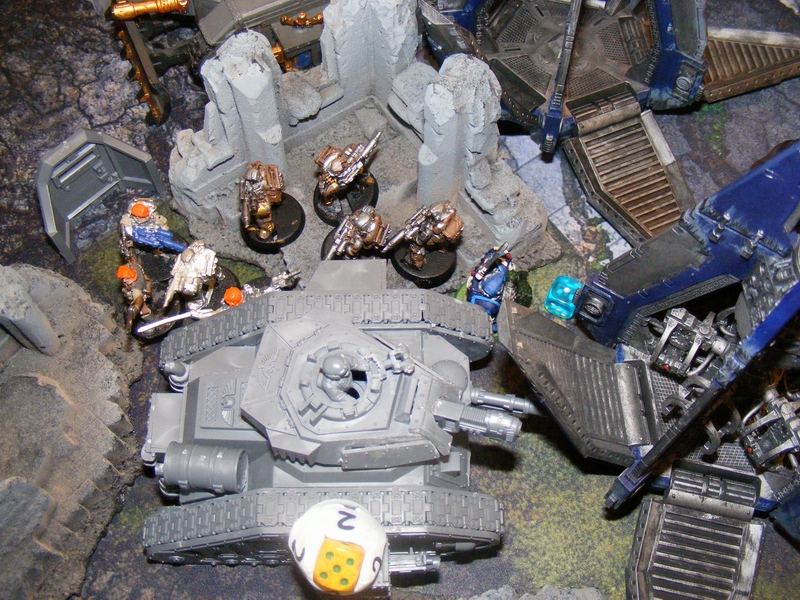
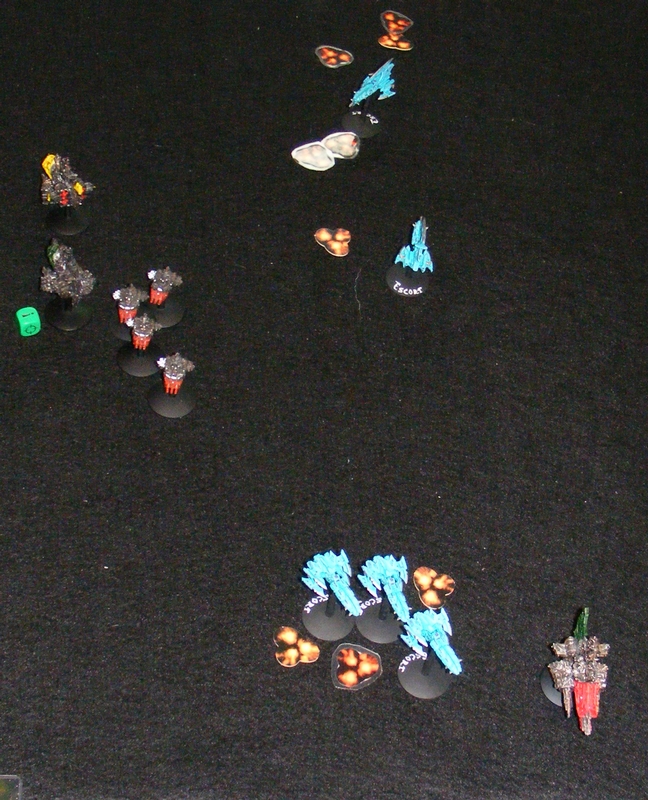
Turn 1 – Imperial Guard
The entire Imperial Guard army fires on the non-invisible portion of the army, and the Invisible portion takes a walloping. All but one of the Assault Squad and the entire tactical squad go away. Despite jinking, one Land Speeder explodes and one is immobilized.
 Eerily accurate plasma makes a big dent in the blitz!
 Land Speeders take a beating.
Turn 2 – Azure Flames
Leonidas, all alone, charges the large Guard squad and challenges the Commisar, killing him outright and taking two guardsmen with him. The Guard hold despite Terrify. The Librarians all split off and charge separate targets, two of the Wyverns and the Tempestus Scions. One of the Wyverns is immobilized, and the Scions lose a few members, but not much else happens. Rhino advances on objective 3. Sadly, the last Assault Marine charges one of the Wyverns and Fire Barrels kill him!
 Leonidas goes after the guardsmen alone!
 Tempestus Scions get charged. Overwatch does a wound to the Librarian, and several are cut down in return.
 Objective 3 obtained!
Turn 2 – Imperial Guard
Combat with the Tempestus Scions and the Librarian continues. The lower Wyvern backs up, and with good rolls kills one of the Librarians, but the immobilized Wyvern was still in combat with the Terminator Librarian so the Terminator Librarian finishes the Wyvern which explodes! Leonidas kills some Guardsmen, they break, and are cut down as they flee! Small guard squad leaps over their Aegis defense line and assault the immobilized Land Speeder, wrecking it. Rhino is destroyed, and all 10 men inside take wounds, losing 3. Other shots take two more, leaving the squad at half strength.
 The Scions gang up on the Librarian!
 The fight goes well for Leonidas!
 With nothing left to lose, the Guardsmen charge the helpless Land Speeder!
 What’s left of the Tactical Squad clings to the objective.
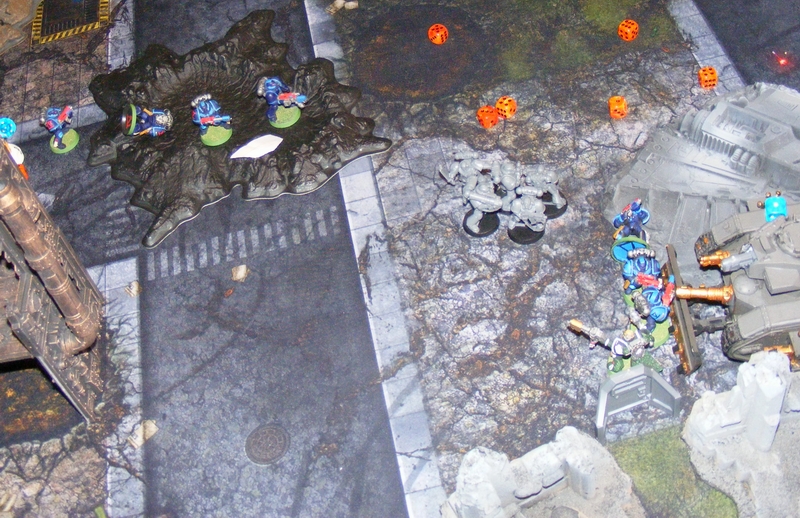
Turn 3 – Azure Flames
Second melta squad arrives and explodes one of the Leman Russes, killing two Tempestus Scions in the explosion! Cover saves manage to protect Pask’s Leman Russ from the other combat squad and other shots. Leonidas charges into the Tempestus Scions and clears them with the Librarian’s help. Terminator Librarian charges the other Wyvern but does no damage. Whirlwinds kill half of the squad that took out the Land Speeder.
 Objective 2 is cleared by a huge explosion!
 Whirlwinds don’t forgive the Guardsmen. Half of them are taken out.
Turn 3 – Imperial Guard
Vendetta arrives, and drops off one of the Tactical Squads, who put the hurt on the Melta squads. The other Tactical Squad walks on from the board edge, and combined fire with the Wyverns put one wound on the Terminator Librarian. Note to self: USE INVISIBILITY EVERY TURN. Small guard squad order Go! Go! Go! to run toward enemy lines.
 Vendetta gives the Tactical Squad a lift, and they unload on the melta squad. (Vendetta is alive despite it’s appearance, it was purchased secondhand)
 The Librarian has some new company…
 Fantastic effort from the guardsmen.
Turn 4 – Azure Flames
Remains of the melta squad charge Pask’s Leman Russ, knocking off a Plasma Cannon. Leonidas can’t charge the Tactical Squad. On an unrelated note, have I mentioned that I hate random charge ranges? The Terminator Librarian charges the newly arrived Tactical Squad. Flakk missiles that I purchased for the Devastators work for the first time since they were introduced in 5th edition and shoot down the Vendetta. Seriously, first time Flakk missiles were not a complete waste of points.
 Good news: Flakk takes out the Vendetta. Bad news: Leonidas fails to charge the Tactical Squad.

The Terminator Librarian fights for his life.
Turn 4 – Imperial Guard
The fight with the Terminator Librarian goes well, as he kills two Marines and they break and flee off the board! The Tactical Squad charges Leonidas which was, really, the only thing they could do.
 Librarian chases the Tactical Squad off the board.
 These are very sad Tactical Marines.
Turn 5 – Azure Flames
Leonidas finishes the Tactical Squad and consolidates onto objective 2. Librarian chareges a Wyvern and knocks off… the Heavy Stubber. Great.
 Objective 2 is held by Leonidas, all alone.
 Charge does very little.
Turn 5 – Imperial Guard
 The whole remaining army fires on Leonidas, taking one wound.
Turn 6 – Azure Flames
Devatators cause one final glance on Pask’s Leman Russ, wrecking it. The Terminator Librarian perils and dies!
 Pask finally takes one missile too many!
Turn 6 – Imperial Guard
Fire against Leonidas does not kill him.

Turn 7 – Azure Flames
Missile fire from the Devastators does nothing to the last Leman Russ. Turn not pictured.
Turn 7 – Imperial Guard
Leonidas loses one more wound, but lives to fight another day.
———————————
Final Score
Azure Flames – 3 objectives plus Slay the Warlord = 10
Imperial Guard – First Blood = 1
———————————
Michael rolled like a god this game. He rolled more Hits than Scatter results. He wounded 10 Marines on a 4+ when their Rhino exploded. He saved at least 10 out of 17 FNP5+ rolls. Why then did Michael not do better?
He got nowhere near the objectives. He held objective 2 for a while, but the all-tank strategy didn’t help much. He also went for a Razorback with a squad when he could have fought the Devastators or Whirlwinds to try to take objective 1. The 30 man Blob squad was a big (admittedly tough) target, but it couldn’t get any objectives.
Keep your eyes on the prize, kids.
Next: hopefully some painting if I can get 5 minutes.
Azure Flames vs. Imperial Navy – Escalating Engagement 1500pts
Stephen and I have played pretty much every mission, except Escalating Engagement. We dropped 1500 points. Who’s gonna come out on top?
———————————
Bozeman – Azure Flames Space Marines (Space Marine Crusade Fleet)
-Master of the Fleet Zeraf Antonius, Ld 10, 3 re-rolls (aboard the Honor)
-Strike Cruiser Honor, Extra Shield
-Strike Cruiser Vigilance, Extra Shield
-Strike Cruiser Courage, Extra Shield
-Strike Cruiser Sacrifice, Extra Shield
-Strike Cruiser Duty, Extra Shield
-Nova Frigate x5, Light Squadron
-Hunter Destroyer x4 Wrath Squadron
-Hunter Destroyer x4 Vengeance Squadron
———————————
Stephen – Imperial Navy Segmentum Obscurus Bastion Fleet
-Admiral, Ld 9, 1 re-roll (aboard one of the Gothic class cruisers)
-Lunar class cruiser, Nova Cannon
-Lunar class cruiser, Nova Cannon
-Gothic class cruiser
-Gothic class cruiser
-Gothic class cruiser
-Dauntless class light cruiser, lances
-Dauntless class light cruiser, torpedoes
-Firestorm x3
-Cobra x2 and Sword x1
———————————
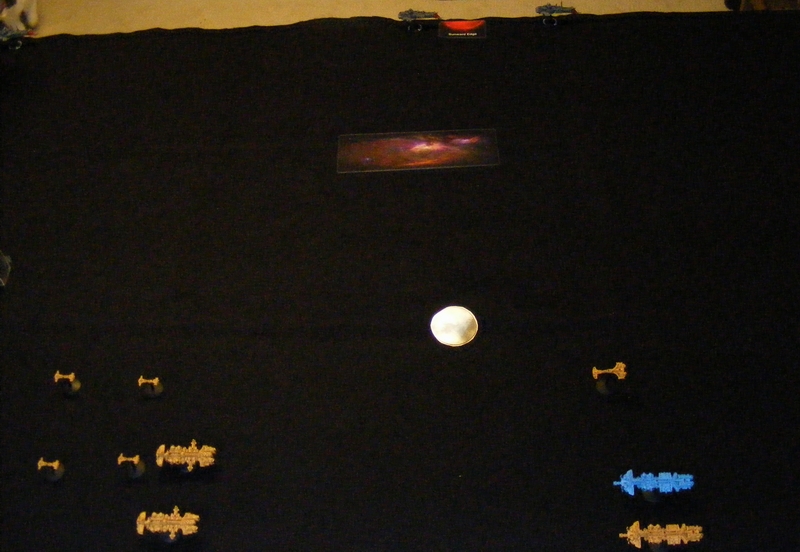
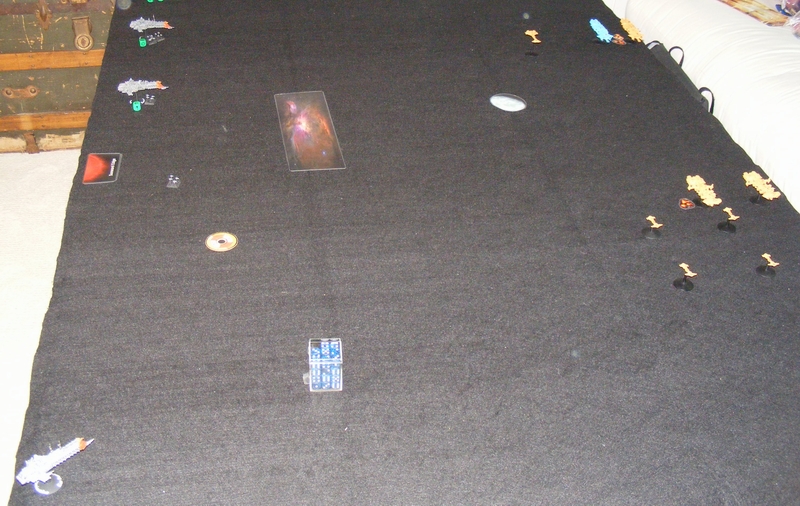
Mission: Escalating Engagement
Battlezone: Flare Region
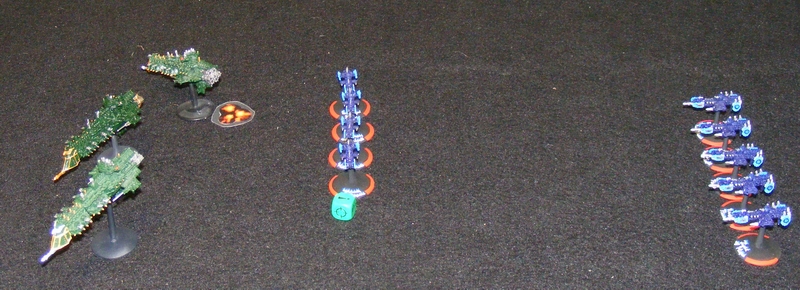
Setup:

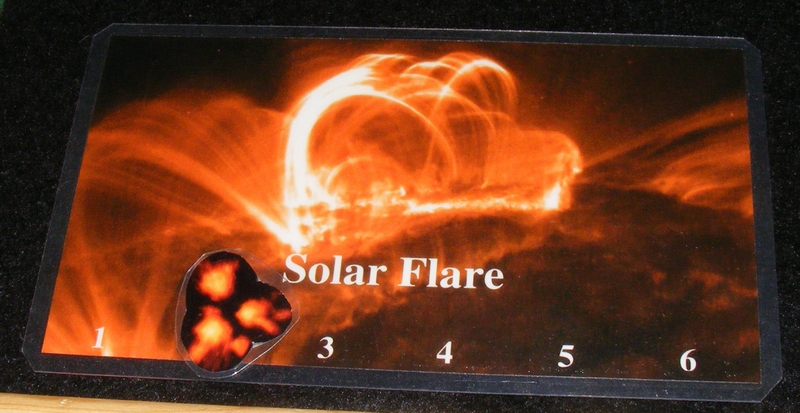
We rolled 2 Solar Flares, so terrain was scarce on the board.
———————————
Turn 1 – Azure Flames
Wrath Squadron goes on Burn Retros in order to hide behind the asteroids.

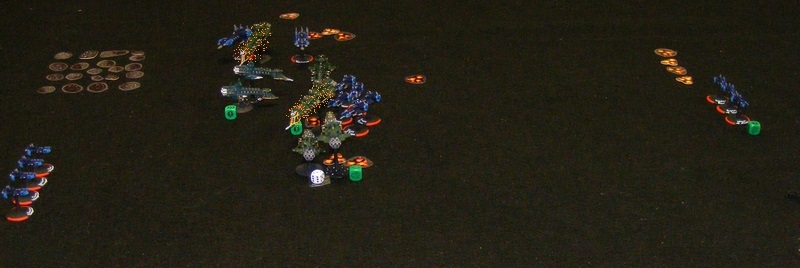
Turn 1 – Imperial Navy
Squadron of 3 Gothic cruisers advances.

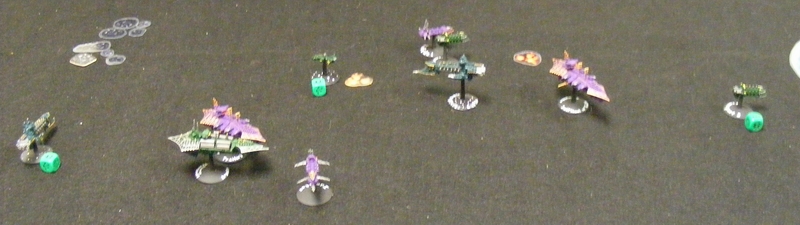
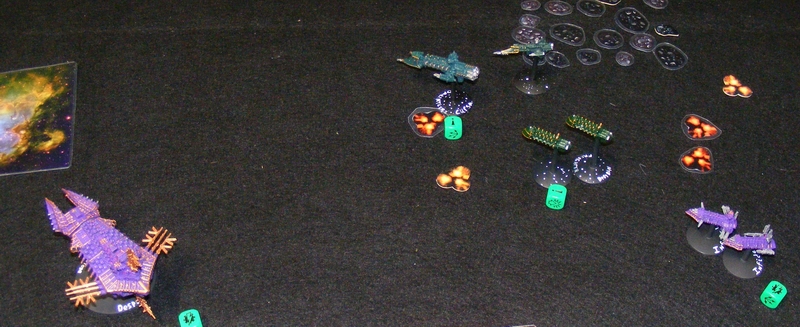
Turn 2 – Azure Flames
Light Squadron appears on the right board edge, but fails to go on All Ahead Full. Wrath Squadron, unable to Burn Retros again, pops out and fires batteries and torpedoes at the Gothic class ships. The Gothics Brace for Impact. Batteries take down one shield, but then the torpedoes die in the resulting blast marker! Note to self: cool it on the crappy batteries when the badass torpedoes are on the line.

Turn 2 – Imperial Navy
The Gothic ships come forward and fire, but the most incredibly awful rolls followed by the most incredible Brace Saves by Wrath Squadron keeps all of them alive!

Turn 3 – Azure Flames
Wrath Sqaudron flies through the Gothics and takes down one of their shields. Light Squadron tries to go on All Ahead Full again and fails again.
Turn 3 – Imperial Navy
SOLAR FLARE OCCURS! Gothic ships go on Burn Retros because Blast Markers make Come to a New Heading useless. They barely stay in formation. A few lance shots take out one of Wrath Squadron. Turn not pictured.
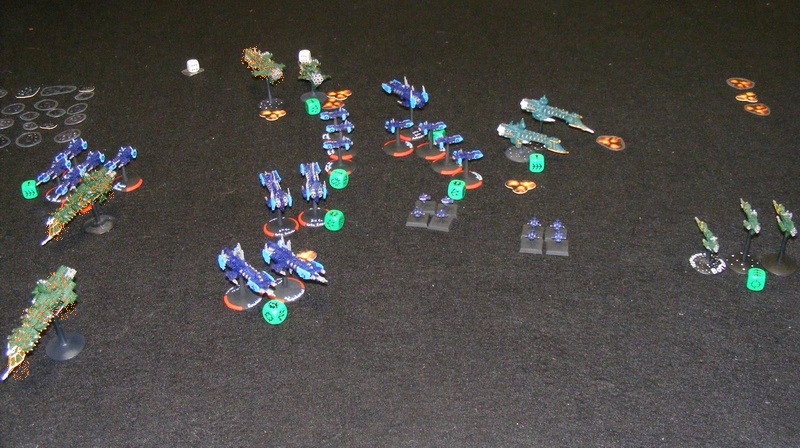
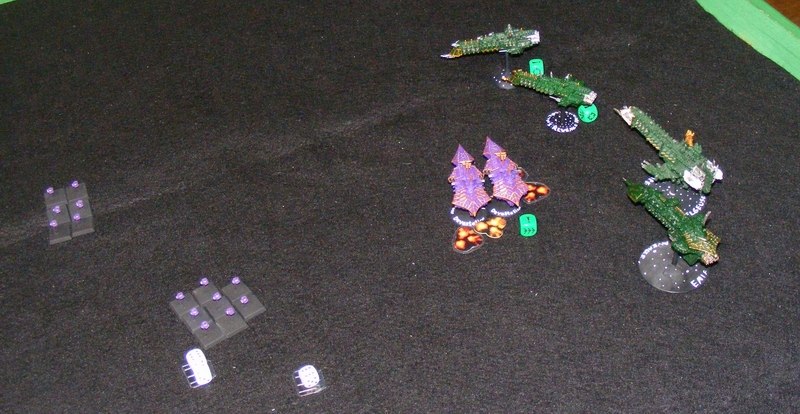
Turn 4 – Azure Flames
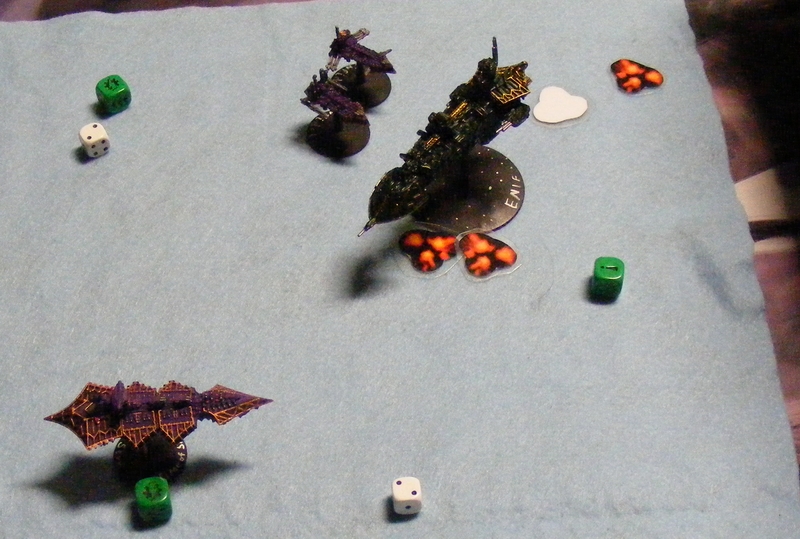
Squadron of Vigilance and Courage comes in from the far long edge, fires torpedoes and Thunderhawks, doing serious damage to one of the Gothics, and doing a bit to the other two. Light Squadron takes a big risk by flying into blast markers and blasting the Gothics, crippling one, thanks to Lock On.

Turn 4 – Imperial Navy
Squadron of 2 Dauntlesses arrives on the left board edge, goes on All Ahead Full. Squadron of 2 Lunars arrives and peppers the Strike Cruisers with Nova Cannons. Poor rolls take down one shield. The crippled Gothic tries to disengage, but fails.

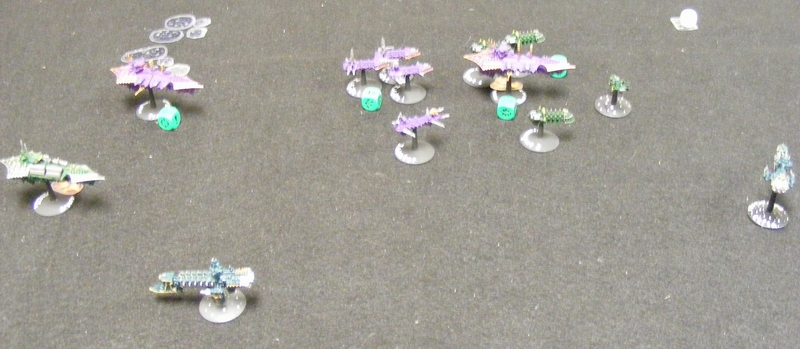
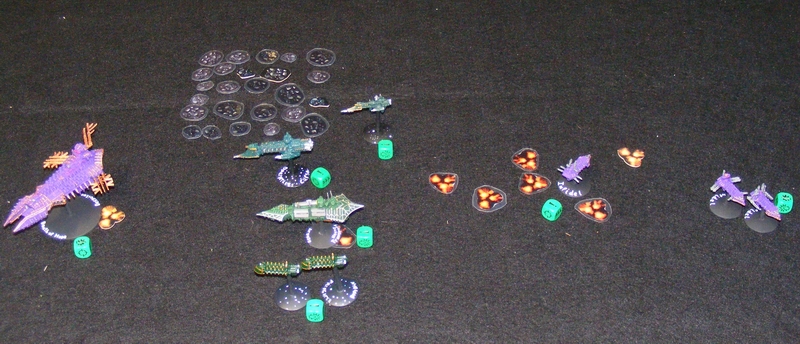
Turn 5 – Azure Flames
Vengeance Squadron arrives via the left board edge, and does some damage to the Lunars who fail to Brace. Light Squadron finishes off the lower Gothic, and the Strike Cruisers board the higher Gothic, turning both into Drifting Hulks! Wrath Squadron finally Reloads Ordnance after several turns of bracing.
Turn 5 – Imperial Navy
The fleet tries to regroup, but Brace orders and being a bit out of position do very little for the Imperials. Turn not pictured.
Turn 6 – Azure Flames
Squadron with Sacrifice and Duty arrives, fires torpedoes and Thunderhawks that cripple the last Gothic. Honor arrives as part of the same marker and goes on All Ahead Full to launch Thunderhawks to stifle the Dauntlesses. Vengeance, and the other Strike Cruisers POUR ON the torpedo damage, crippling one of the Lunars. Light Squadron, on Brace from last turn, fly around to regroup.

Turn 6 – Imperial Navy
The Lunars try to harm Light Squadron, but a gutsy decision to not Brace pays off as the crippled, braced ships can’t put out a lot of fire. Squadron of Firestorms arrives from the lower board edge. The Dauntlesses force a Brace on Wrath Squadron, and fire batteries at the Honor, but fails. The Gothic with the Admiral disengages.

Turn 7 – Azure Flames
Vengeance Squadron reloads and torpedoes the Dauntlesses, crippling one. Torpedoes from the Sacrifice and the Duty turn one of the Lunars into a Blazing Hulk. Two flights of Thunderhawks wait till next turn.
Turn 7 – Imperial Navy
Cobra/Sword squadron arrives from the right board edge and fires on Light Squadron, causing a Brace but no casualties. Firestorms cause a brace on Vengeance Squadron. Dauntlesses try to come about. Lunar tries to disengage and fails. Ordnance causes the hulked Lunar to explode!


Turn 8 – Azure Flames
Despite Brace for Impact, Light Squadron destroys the Cobras and Sword. Thunderhawks do one last damage to the Lunar, destroying it. Torpedoes and Thunderhawks take out the Dauntlesses. Batteries and Bombardmant Cannons finish off the Firestorms. Tabled.
———————————
Final score:
Azure Flames: 1466
Imperial Navy: 0
———————————
OK, so the past few games have been a bit unbalanced. Let’s do an autopsy on this one. Why was the margin so huge? Here are some reasons why I think this happened.
Unbalanced Fleets: Being a Specialist Game, Battlefleet Gothic doesn’t really have overpowered fleets (I’ve changed my mind on the Necrons, they are actually a bit fragile thanks to their low HP count and no ordnance). Some fleets are better at some scenarios than others. Space Marines are fast and speed is key for Escalating Engagement. That said, the Imperials can make a decent showing with escorts and Dauntlesses. Sadly, Stephen only owns two Dauntlesses, and eschewed more escorts for the Gothics in order to punch though Space Marine armour. Oddly, this didn’t hurt him, as the capital ships came in before the escorts! Despite the initial unbalance, fleets didn’t cause this.
Tactics: Stephen’s ships bunched up in the center of the board. This made them prime targets for multiple torpedo waves. Stephen also had no fighters to protect against my torpedoes which did the lion’s share of the damage in this fight. Stephen also turned the Gothics different directions, limiting their effectiveness.
Luck: UGH. Stephen failed SO MANY TURRET ROLLS. Those torpedoes would have been way less effective with turrets doing their jobs. He also got several Brace saves that failed in key situations. Die rolls are always a big factor. Plus, Stephen’s escorts failed to come in on a 4+ for like three turns.
My final verdict, Stephen bunched up in the middle, couldn’t stop torpedoes, and had some really terrible rolls.
Next: some more action at Highland!
A Typical Day
“It’s so good to have someone who will just listen.” Poindexta Smartyskull said to Loudmouf Sneakilla. Loudmouf nodded in reply, as his loudener speakers were switched off. Loudmouf gestured towards some black smoke coming from the Gargant known as Da Gentul Teddy Bear, and shrugged his shoulders.
“Ah,” Smartyskull answered “Manik must be hard at work again. It’s good to know that he keeps my Gargant in good condition. I hope that during this maintenance that no one steals his bike again. Last time I lost two perfectly good trukks and…”
*K-ponk*
Smartyskull was interrupted by an object striking him in the side of the head. It bounced harmlessly off the rusty steel of his mega-armour, and hit the ground with a squelching noise. Reluctantly, Smartyskull looked down to see what had struck him and to his amazement, found that it was an Ork head wearing a Stormboy’s helmet. Smartyskull struggled the right arm out of the sheath that held his Big Shoota, and reached down to pick up the head. It was Jobba. Surprisingly, the still form of the head jerked to life as Smartyskull looked into Jobba’s eyes. Jobba’s lips formed the words “Hiya Boss!” though no sound came out. Jobba’s eyes then darkened and he stopped moving. Smartyskull flung the head behind him, put his arm back in his armour, and turned to Loudmouf.
“Loudmouf, if you would, please get me Rukkstud.” Loudmouf beamed, and turned on his speakers. Before Smartyskull could stop him, he bellowed
“RUKKSTUD!”
The wave of Loudmouf’s shout hit Smartyskull like a Wreckin’ Ball. His Ork instincts made him try to reach out and smash Loudmouf across the jaw. Being dazed, he missed, and fell over. As Loudmouf helped him to his feet, he began to regain his senses. Just in time for another loud boom followed by the hiss of pistons.
“Yer wanted ta see me Boss?” Rukkstud shouted. Smartyskull opened his eyes, blinked several times, and was finally able to make out the form of Rukkstud, awkwardly saluting with one of his gigantic adamantium piston arms, and awkwardly balancing on the other arm, and his choppa. The choppa was being held at a ridiculous angle by a hand protruding from Rukkstud’s pant leg. Smartyskull sighed.
“Rukkstud, you know that I approve of your leadership style. You are one of the few in this camp that appreciates military structure and discipline.”
“Sir! Yessir! Boss! Sir!” Rukkstud shouted.
“However, if I am pelted by another piece of your soldiers, I will conclude that you cannot keep proper discipline, or that your aim is too poor, and I will assign you to being a Deffdread. Do I make myself clear?”
“Sir! Yessir! Boss! Sir! Sir! Boss!”
“Dismissed.” Smartyskull make a waving action with his power klaw, and with that, Rukkstud bounded into the air on a column of acrid gray smoke. Smartyskull held his breath and walked away from the site, followed closely by Loudmouf. “One day.” He muttered under his breath so that Loudmouf would not hear. “One day without… this. Is that too much to ask, Mork?”
Belated Highland Deathwatch Camapign: Round 1 – MST3K Name Ripoff Extravaganza!
Ian, manager of the brand new Games Workshop store in Ann Arbor, MI put on a Deathwatch campaign for us.
I decided to join in at least for the first round, using proxies from my own list. The rules for creating a kill team are from the internet. Here’s mine, in all its copycatted glory:
Kill Team Roll Fizzlebeef
-Bob Johnson, Ultramarines Chaplain: Terminator Armour, Bolter-Melta, Crozius Arcanum, Rosarius, Combat Doctrines, Zealot, Rampage, Hammer of Wrath
-Buff Drinklots, Space Wolf Rune Priest: Plasma Pistol, Force Axe, Rune Armour, Frag Grenades, Krak Grenades, Counter Attack, Acute Senses, Night Vision, Hit-and-run, Stealth
-Gristle McThornbody, Blood Angels Apothecary: Power Sword, Narthecium, Melta Bombs, Frag Grenades, Krak Grenades, Furious Charge, Feel No Pain (5+), Rampage
-Smoke Manmuscle, Salamanders Sternguard Heavy: Heavy Flamer, Master Crafted Bolt Pistol, Frag Grenades, Krak Grenades, Special Issue Ammunition, 4+ Feel No Pain vs. Flamer Wounds, Flamer Weapons gain Shred, Tank Hunter
-Reef Blastbody, Dark Angel Sternguard Heavy: Lascannon, Bolt Pistol, Frag Grenades, Krak Grenades, Special Issue Ammunition, Stubborn, Overwatch at BS2, Night Vision, Stealth
——————————————————-
Together with other Deathwatch Kill Teams, they blast heretics and aliens at the behest of an insane inquisitor!
Below, our first battle, in which a planetary governor and a Tau commander’s meeting is disrupted and the leaders captured and brought to the Inquisitor for torture!

Next, Daemons are summoned to protect the traitorous governor’s plans! Will the Deathwatch come out on top? NO. We were beaten badly. One character even got killed PERMANENTLY which isn’t supposed to happen often.
 Next: More Gothic batreps and possibly more Deathwatch! Stay tuned!
Convoy – Chaos vs. Imperials
Stephen and I finally got to play the Convoy mission we’ve wanted to for more than a month. Life kept getting in the way. Convoy is the weirdest mission, because it’s all random.
Convoy – Mercurial Zone
————————————————————–
Defender: Stephen – Imperial Navy
-Dauntless Light Cruiser (torpedoes)
-Dauntless Light Cruiser (lances)
-Firestorm x3
-Cobra x2
-Transport x2
-Transport x2
-Transport x2
-Heavy Transport
————————————————————–
Attacker: Bozeman – Chaos 13th Black Crusade (7 rolls on the Convoy Attacker Chart)
-Slaughter class Cruiser Swiftboat of Truth, Chaos Lord +1Ld
-Slaughter class Cruiser Traitor’s Blade, Chaos Lord +1Ld
-Infidel x3, Rampagers
-Idolater x3, Oathbreakers
-Idolater x2, Followers of Darkness
-Deadfall Torpedo or Attack Craft Cluster x2
-Deadfall Torpedo or Attack Craft Cluster x1
————————————————————–
Setup:

————————————————————–
Turn 1 – Imperial Navy
At the beginning of the turn, we rolled for Solar Flares and it went off! There were no ships on the board, so nothing happened. Stephen moved his entire fleet on. Contact Marker #7 revealed itself as a Deadfall Torpedo wave of 8! It was shot and destroyed before it could endanger the fleet.

Turn 1 – Chaos
Marker 1 is revealed as the Traitor’s Blade which promptly fails to go on All Ahead Full, and merely advances toward the enemy.

Turn 2 – Imperial Navy
All of the fleet except for the Cobras go on All Ahead Full. Contact markers near the fleet reveal as the Swiftboat of Truth and the Followers of Darkness. Cobras fire torpedoes as the Swiftboat of Truth, doing one damage.

Turn 2 – Chaos
Because the enemy was on special orders, two markers reveal as the Rampagers and Oathbreakers. The fleet closes in, and two Transports are destroyed. The Heavy Transport takes one damage from torpedoes from the Rampagers. A teleport attack from the Traitor’s Blade takes out the prow weapons of the Lance Dauntless.

Turn 3 – Imperial Navy
Torpedo Dauntless unloads on the Oathbreakers, and poor brace saves mixed with good torpedo rolls kill all three! Transports all fire on the Followers of Darkness, but miss. The Lance Dauntless repairs its prow.

Turn 3 – Chaos
Most of the fleet fire on the Heavy Transport, crippling it. The Traitor’s Blade causes a Brace on one of the Transport squadrons. Final marker is revealed as two waves of two bombers.


Turn 4 – Imperial Navy
Due to a blast marker, the Rampagers have no shields and so Brace when fired upon by the Firestorm, which saves them. The rest of the fleet move to protect the transports.

Turn 4 – Chaos
The Swiftboat of Truth moves through asteroids, fails a Leadership check, takes 2 damage and then suffers a Hull Breach, crippling it! Semi-effective fire does one more damage to the Heavy Transport. Bombers approach the Transports.

Turn 5 – Imperial Navy
One of the Cobras suicides into the bombers, taking out a wave! The other wave hits a transport and fails dismally. The rest of the fleet continues to cover the transports.

Turn 5 – Chaos
Rampagers Reload, fire on some transports, but amazing brace saves protect them. The crippled Swiftboat of Truth goes on Lock On, but even with that does no damage. Lucky shots from the surviving Followers of Darkness kill a transport.
Turn 6 – Imperial Navy
Heavy Transport goes on All Ahead Full. Torpedo Dauntless Reloads and fires on the Traitor’s Blade, doing one damage. Remaining Cobra Reloads and kills one of the Rampagers. Lance fire from the Lance Dauntless does one damage to the Swiftboat of Truth, starting a fire!

Turn 6 – Chaos
Traitor’s Blade boards the Heavy Transport, turning it into a drifting hulk. Each surviving Rampager boards one of the Transports. One wins, but gets a Critical Hit in return and dies. The other ties! Swiftboat of Truth can’t hurt the fleeing transport.
Turn 7 – Imperial Navy
Lance Dauntless causes a Brace on the Traitor’s Blade. Transport manages to kill the last of the Rampagers! Torpedo Dauntless fires on the Traitor’s Blade, doing no damage. One transport flees past the planet.
Turn 7 – Chaos
Remaining ships kill the second to last transport. Turn not pictured. Game ceded.
————————————————————–
Convoy is rarely a balanced matchup. However, it’s what you do in a mismatch that shows what kind of decisions you can make. Splitting up can help. However, when the attacker has as much as I did, there’s not much you can do.
Next: hopefully painting and Highland!
Highland Tournament Overview
16 people, making 8 teams. Each with 1000 points, unbound.
THEY FIGHT.


(I didn’t pay attention to the group and didn’t know this was happening, so I didn’t participate, but it was cool to see)
Next: more batreps and hopefully once I shake this head cold, some painting!
Xmas Gothic with John – Part 2 – Fleet Engagement
Time for the second battle report with John, this time a Fleet Engagement.
————————————————————–
Bozeman – Imperial Navy Segmentum Obscurus Gothic Fleet List
- Fleet Admiral (Ld8), two re-rolls
- Saratoga, Mars class battlecruiser, left shift, extra turret
- Forthright, Lunar class cruiser, Nova Cannon
- Kar Durniash, Dominator class cruiser
————————————————————–
John – Tau Kor’vattra Fleet
- Il’fannor (Merchant) class ship, Ke’lshan configuration, +2HP
- Il’fannor (Merchant) class ship, Ke’lshan configuration, +2HP
- Lar’shi (Hero) class ship, Tolku configuration
- Lar’shi (Hero) class ship, Tolku configuration
- Kass’l (Orca) gunship x4
- Skether’qan (Messenger) class starship
————————————————————–
Setup: Map B
Turn 1 – Imperial Navy
The Saratoga and the Forthright go on Come to a New Heading. All three ships fire their Nova Cannons. One of the Hero class ships takes two damage, and one of the Merchants takes three, crippling it. The Saratoga fires four fighters that go on CAP for the fleet.
Turn 1 – Tau
The crippled Merchant disengages. The rest of the fleet comes about.

Turn 2 – Imperial Navy
Nova Cannons fire, one Hero loses a shield.

Turn 2 – Tau
Fleet advances.

Turn 3 – Imperial Navy
All three Nova Cannons miss, but dorsal lances from the Saratoga destroy the Messenger.

Turn 3 – Tau
Hero class ships launch missiles and bombers. Fire from the Orcas do one damage to the Kar Durniash.

Turn 4 – Imperial Navy
Nova Cannon does one damage to the blue Hero. Kar Durnish damages the other Merchant and its batteries kill an Orca.

Turn 4 – Tau
All ships fire, but no damage.

Turn 5 – Imperial Navy
Nova Cannons at short range cripple the yellow Hero and the remaining Merchant. Turn not pictured.
Turn 5 – Tau
All Tau ships disengage.
————————————————————–
Final Score:
Bozeman – 147.5
John – 0
————————————————————–
The Tau are slow as hell. I took a big risk taking a small fleet with a lot of Nova Cannons. John was also stubbornly against Bracing for Impact for some reason. The Tau Kor’vattra list is also crippled by needing to take Merchant class ships which suck. The Orcas make up for it just a little bit though. Also, another quirk of the Tau list is that you are not required to take an Admiral until your fleet is LARGER than 750 pts. The Tau need more missiles to flood the board. Perhaps dropping Orcas for torpedo boats.
Next: A visit to Highland!
Xmas Gothic game with John – Part 1 – The Bait
John came to visit me! After several beers, we decided to play two games of Battlefleet Gothic. Here’s the first game, where we played The Bait.
————————————————————————————-
Bozeman – Dark Eldar (pursuers)
- Razors of Virtue – Corsair Escort x3, Phantom Lances
- Red Teardrops – Corsair Escort x3, Phantom Lances
- Shadow’s Touch – Corsair Escort x3, Torpedoes
————————————————————————————-
John – Ork Clanz Fleet (pursued)
*note, John did not purchase the Clanz upgrades for allk of the ships following his warlord*
- Warlord, two re-rolls (aboard the Kill Kroozer)
- Kill Kroozer, Evil Sunz Clan, Soopa Boosters, Extra Turrets
- Lite Kroozer
- Lite Kroozer
- Brute Ram Ship x4
- Ravager x2
- Onslaught x3
————————————————————————————-
Setup:
After setup, my Mimic Engines gave me a free move. I stopped 30cm short of the Kill Kroozer.
 ————————————————————————————-
Turn 1 – Orks
All of the rest of the fleet in reserves comes on from the board edge on All Ahead Full. The Kill Kroozer goes a whopping 41 cm on All Ahead Full thanks to multiple upgrades and a good roll!

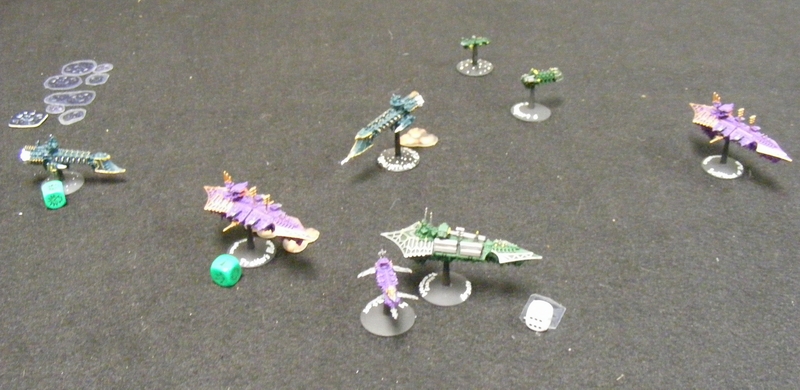
Turn 1 – Dark Eldar
Due to an inability to catch the Kill Kroozer, the fleet moves out.

Turn 2 – Orks
Fantastic torpedo rolls from the Lite Kroozers take out one of the Razors of Virtue. Ravagers fire torpedoes to harass the Red Teardrops.

Turn 2 – Dark Eldar
The Lite Kroozers Brace as the Shadow’s Touch fire Leech Torpedoes and cause only one Leech effect to the yellow ship, and then kill one of the Onslaughts. Red Teardrops kill one of the Ravagers.

Turn 3 – Orks
Red Teardrops and Razors of Virtue are reduced to one by enemy fire. Shadow’s Touch make an impressive amount of Brace saves as the Lite Kroozers open up.
Turn 3 – Dark Eldar
The remaining lance Corsairs take out the Onslaughts while Shadow’s Touch boards the last Ravager, destroying it.
Turn 4 – Orks
Despite a valiant effort, Ork fire in ineffective thanks to the best Brace saves I’ve ever rolled!

Turn 4 – Dark Eldar
Time to flee! If the Dark Eldar disengage, they win. Shadow’s Touch disengages. The last of the Red Teardrops disengages… and… the last of the Razors of Virtue fails to disengage! Uh oh!

Turn 5 – Orks
Batteries make short work of the last of the Razors of Virtue. Game over.
————————————————————————————-
Final Score
Dark Eldar: 195
Orks: 206
————————————————————————————-
Wow, close game! This is the third game I’ve lost for not being able to disengage a ship. It’s also the second loss for my Dark Eldar against John’s Orks. My Dark Eldar have never won a game. I need to get better with them. John also needed to take a 2nd Warlord, and change around his escorts as the minimum squadron size is 3.
Next: second battle report and a trip to Highland!
Planetary Assault 1500 pts – Return to Game Links!
Stephen and I planned a massive game a while ago that got derailed by life. Being an adult sucks. However, we finally got together back at good old Game Links in Fowlerville! This game was so long and massive, that I’m only going to show highlights (and lowlights) because otherwise it would be a novel of a battle report.
————————————————————————–
Mission: Planetary Assault (1500 pts)
Battlezone: Primary Biosphere (Medium planet)
————————————————————————–
Bozeman – Chaos 13th Black Crusade Fleet (Defender)
- Abbadon the Despoiler (aboard the Death of Hope)
- Despoiler class battleship Death of Hope, upgrade to prow torpedoes
- Styx class heavy cruiser Time of Sorrow
- Devastation class cruiser Pride of Heresy
- Devastation class cruiser Hateful
- Infidel Raiders x3, Rampagers
- Infidel Raiders x3, Lords of Sin
- Orbital Weapons Platform
- Orbital Torpedo Platform
- Defence Laser Silo
- Defence Laser Silo
- Defence Laser Silo
- Missile Silo
- Missile Silo
- Missile Silo
- Air Base
————————————————————————–
Stephen – Imperial Navy Segmentum Obscurus Bastion Fleet (Attacker)
- Admiral (Ld9), 2 re-rolls, aboard the Mars class cruiser
- Emperor class Battleship Betelgeuse
- Avenger class grand cruiser Enif
- Mars class battlecruiser
- Dictator class cruiser Haven’s Revenge
- Dauntless light cruiser Cursa, lances
- Firestorm Frigate x3
- Heavy Transport Argosy
- Transport x2
- Transport x2
————————————————————————–
Setup


I squadroned the Devastation class cruisers together and set them on patrol, but Stephen set them up right at the board edge, waiting to be picked off!

Luckily I got first turn. The Devastation class cruisers fired on the Mars and sent 8 assault boats after the Dictator, forcing braces and causing enough critical effects to turn the Dictator into a weaponless rowboat.
Stephen’s vengeance was swift, as the rest of his fleet fired and crippled the Pride of Heresy.

Meanwhile, the transports go up one side of the board, escorted by a few ships.

The Devastations provide a distraction as assault boats and boarding torpedoes from the Death of Hope plow into the Enif, causing 12 critical effects, and shutting off all the weapons, and damaging the engines to prevent turns.

Both Infidel squadrons harass the transports.

After the Pride of Heresy disengaged, the Hateful took the brunt of enemy fire. It tried to disengage, failed, and made for the board edge. Sadly, it died from battery fire from the Betelgeuse just before it got away!
Abbadon and the Death of Hope swing around to deal with the transports. The Rampagers take heavy damage from bombers, but one manages to hold on and disengage to prevent from being wiped out.

The Time of Sorrow fires on the Betelgeuse, slowing it down enough that it can’t make a turn! The Emperor class ship has a major flaw, being 15cm speed. Meanwhile, the Enif has been unable to repair ANY of its damage, despite rolling 8 dice for three turns!

Bombers from the Death of Hope attack the heavy transport Argosy, causing it to explode!
The Lords of Sin line up behind the transports, reload, and fire torpedoes until all the transports died. It took a while as they were constantly Braced for Impact.

The Enif finally gets its engines fixed, turns, and next turn goes on All Ahead Full to ram torpedoes out of the way of the Betelgeuse! This causes a Bridge Smashed critical, giving the Enif -3 leadership permanently!
In a daring move, the Haven’s Revenge goes on All Ahead Full and dives onto the low orbit table!
 Torpedoes from the Orbital Platform and fire from the Death of Hope destroy the Admiral’s Mars class battlecruiser, centimeters short of being able to go to the low orbit table!

Haven’s Revenge scores an assault point, as the remaining Firestorm goes on a SUICIDE DIVE to attack the ground defences! Haven’s Revenge is eventually killed by lance fire and bombers in later turns, but it scores a total of 3 assault points.

Bombers from the Death of Hope cripple the Enif.

In a last, desperate gambit reminiscent of Horus, Abbadon has the Death of Hope board the Betelgeuse, causing massive damage and crippling it!

The Enif makes it to the low orbit table! Can it score enough points?

The Betelgeuse finds itself unable to harm the Death of Hope, and Abbadon’s re-roll gets the Death of Hope to go on Burn Retros and perform ANOTHER boarding action, destroying the Betelgeuse!
The Enif, beleaguered, finally succumbs after scoring another assault point. Game over.
————————————————————————–
Final Score
Imperial Navy Assault Points earned on Low Orbit Table: 4
Imperial Navy victory points: 297.5, no additional Assault Points
Chaos victory points: 1500, -3 Assault Points
Final: 1 Assault Point, Defender win!
————————————————————————–
Planetary Assault is a hard one for the Imperials because they are so slow. A good selection of regular cruisers would have been better than the Emperor and the Avenger that got stuck up early on. Stephen also got really unlucky with the damage repairs on the Avenger, not repairing with a single “6” in three turns of 8 dice! Finally, the all-ordnance Chaos fleet ABSOLUTELY needs Abbadon’s re-rolls. I failed several tests, and chose not to re-roll 2 of them (on ground defences), but all that I re-rolled passed. Had this not been, I would not have been pumping out attack craft and torpedoes all over the place. Plus, Abbadon is a NIGHTMARE in boarding.
Next, some painting, I hope!
Age of Sigmar demo: Beer and Pretzels minus math equals…?
Ian, a regular at the Highland Library 40K club recently landed a sweet job as a Manager of the brand new Games Workshop store in Ann Arbor. (GW, if you’re reading this, BRING BACK THE NOVI STORE YOU BASTARDS) As part of his getting paid to come to club, he demoed the new successor to Warhammer Fantasy. That’s right, the oft maligned Age of Sigmar.
So, I tried it.
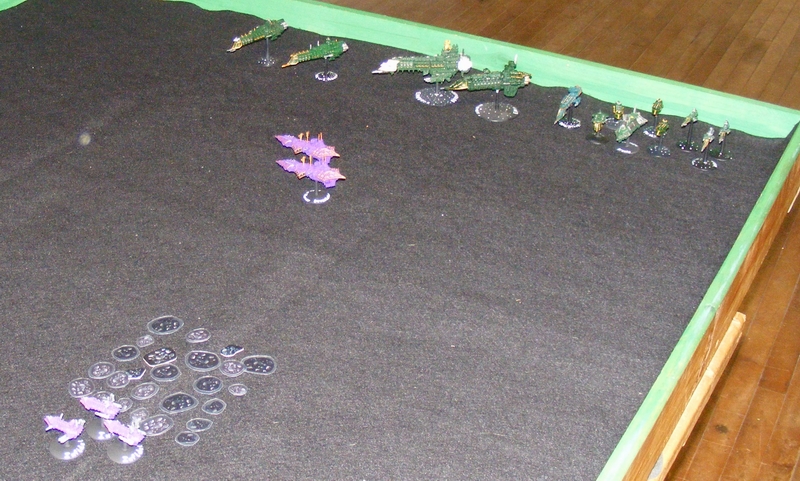
It was fun, let’s see what happened!
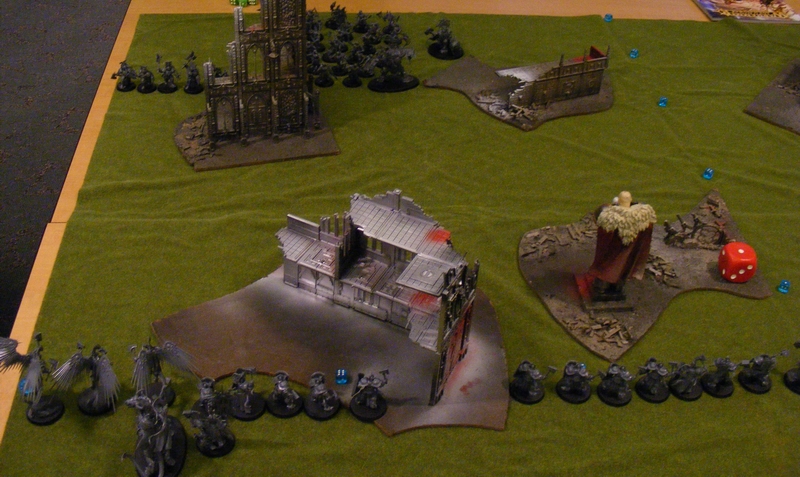
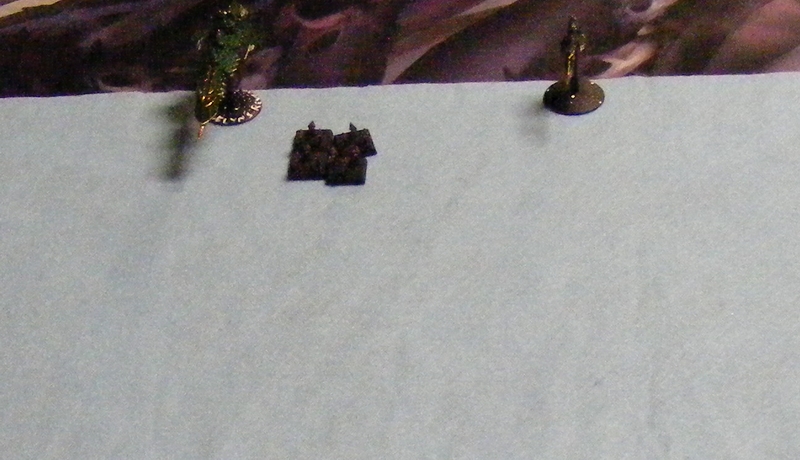
I was playing the Stormcast (foreground), versus Paul who had a horde of Khornate warriors (rear).

I pulled off to my right to deny the flank.

Paul advances.

My Stormcasts charge a Khorne monster. However, their charge brings them to within 3″ of the Marauders, who get to pile in! In AoS, combats can swarm and engulf units not associated with the original charge. All hits and wounds from a unit are always the same rolls in AoS, so my Stormcasts manage to do some damage to the monster. However, great saves prevent a lot of this damage.

More charges end the Stormcasts, however the fight spills over into my other squad, who smash a Bloodstoker because his whip got within 3″ of them!

Meanwhile, another Stormcast squad charges some Khorne warriors. In AoS, combat is resolved one unit at a time, so because my other Stormcasts were fighting for their lives, they went first. The Khorne Warriors got to swing first at these Stormcasts, and did some serious damage! Order of combat is a really important tactical decision in AoS.

The rest of my army charges. My lord riding a dragon-horse-thing does a ton of damage.

In the end, my forces smashed through the Khorne forces.
————————————————————————–
Final Thoughts:
AoS is easy and streamlined. To hit and wound is easy, and toughness is now all about saves and number of wounds. However, it still remains a game without a balance system. You have to figure that out for yourself. Is it fair? Well, you decide what’s fair. Is that a cop out? Yeah. Is it fun? Also yeah. Try a demo of AoS for yourself. If you like it, play it.