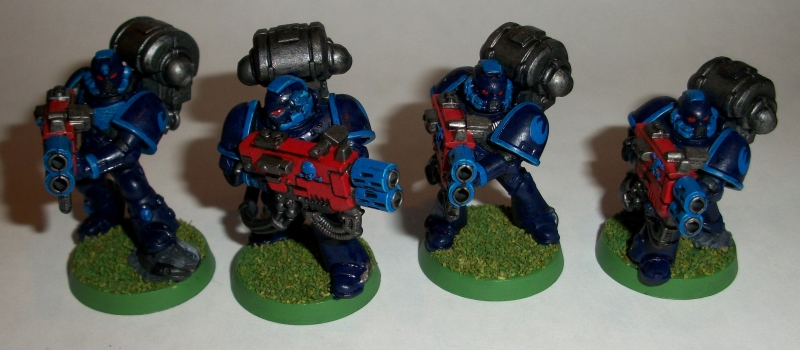
Scout Sergeants and Close Combat Scout Touchups with Decals
First, five new Scout Sergeants to round out the weapons options for Scout Squads. As I use Scouts a lot, these will be a way to maximize a squad’s effectiveness and possibly spend 5 extra points. These were kitbashed from plastic scouts and bits from the Vanguard and Sternguard veteran sets. I normally hate the Vanguard bare heads, but they’re perfect for scout sergeants! They look so 2nd ed!
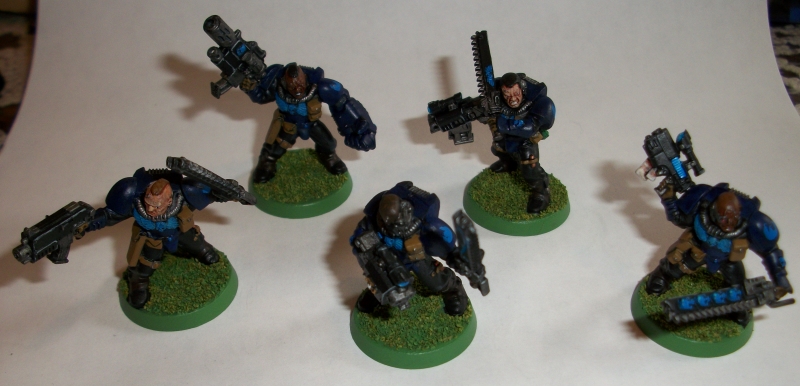
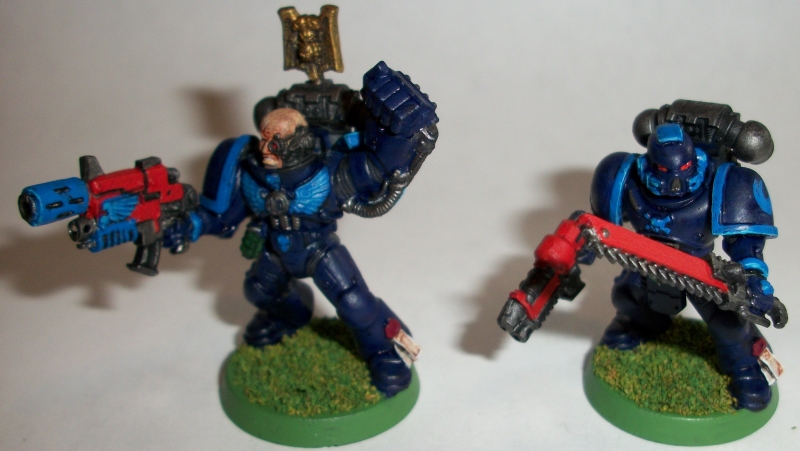
…that was the easy part. The hard part was updating my old pewter close combat scouts. Earlier, when I touched up the Sniper Scouts, I barely had to do anything because I had already stripped and re-painted them for Big Game V. As such, their paint was much closer to my current standards.
I haven’t touched these close combat models in 19 years.
Their paint jobs were not only riddled with mistakes, missed details, and irregular colors, but were also severely damaged. All had at least some pewter showing thanks to chips.
But no more! They’re ready to rumble, complete with new decals!
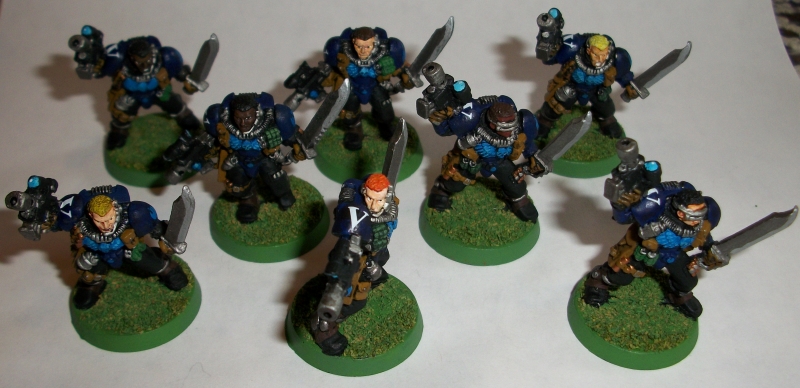
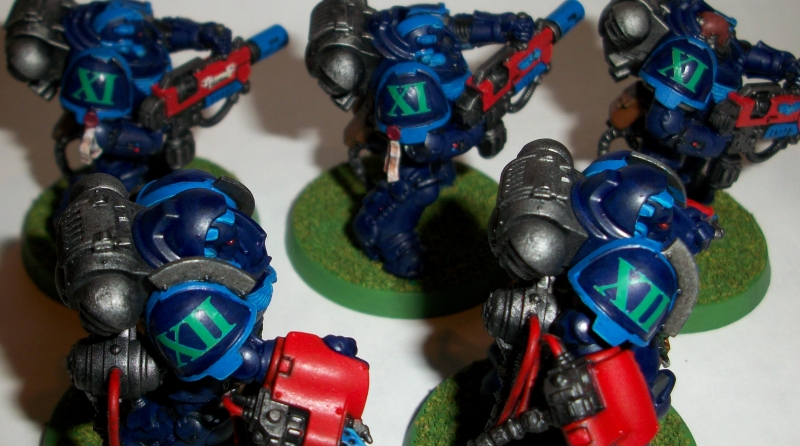
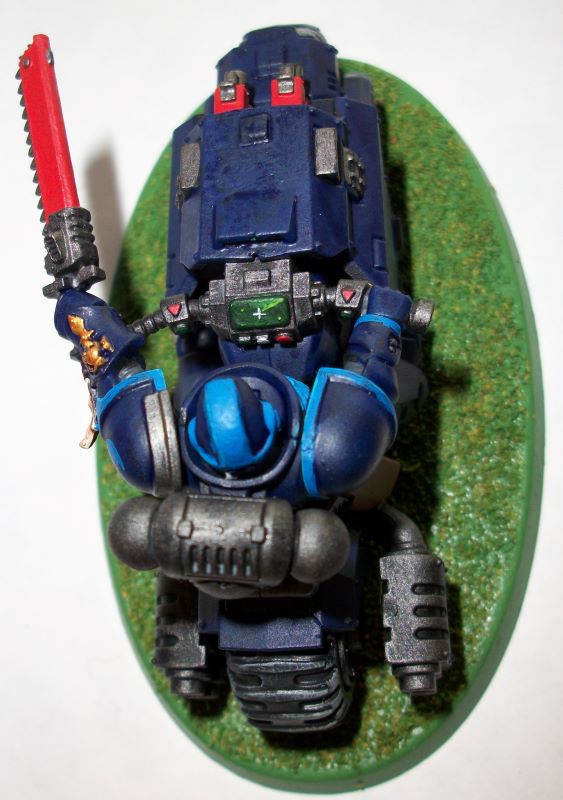
The close combat scouts have 5 poses. Two of them have the pistol up, obscuring the right shoulder pad. I had to trim the decal for effect, which worked well thanks to Micro Set/Sol.
Next: the Indominus Lieutennant, the last of the reborn Lightguard!
Indominus Bladeguard as Lightguard Reborn, and Sniper Scout Decals
The next part of my Indominus project is complete! The Lightguard are reborn as Bladeguard Veterans!


Formerly the Honor Guard of Chapter Master Perseus, the Lightguard sought permission to cross the Rubicon Primaris en route to the besieged world of Altea, where Captain Antonius, Scion of Atrus, held with the remaining Primaris recruits from the Indominus Crusade. Arriving just in time to save Antonius, the Lightguard pledged loyalty to him, and officially joined the 4th Company (shoehorned into the 20th squad slot).
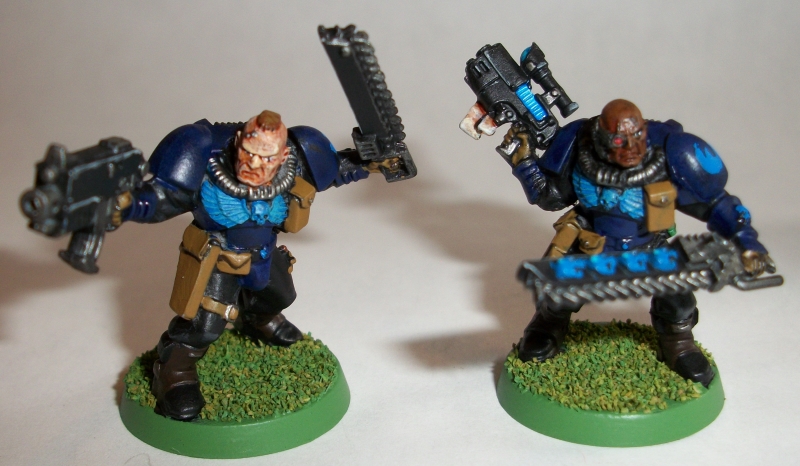
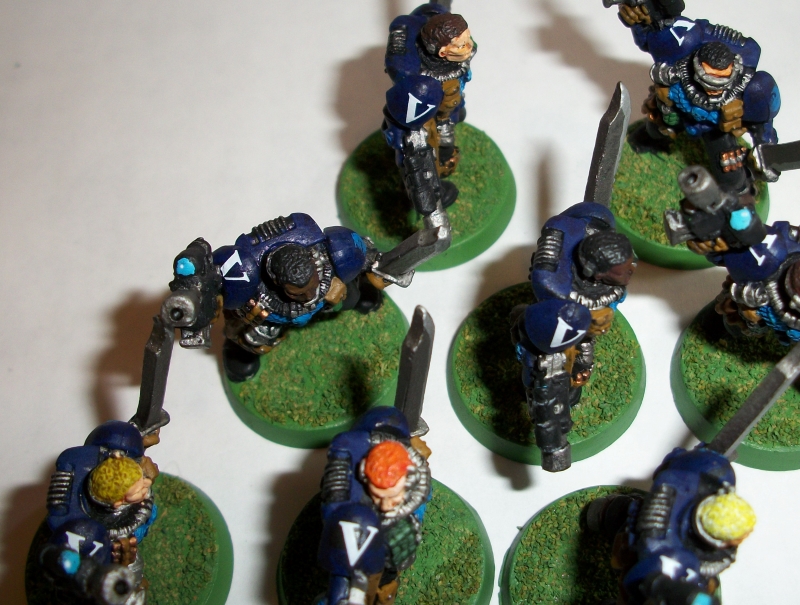
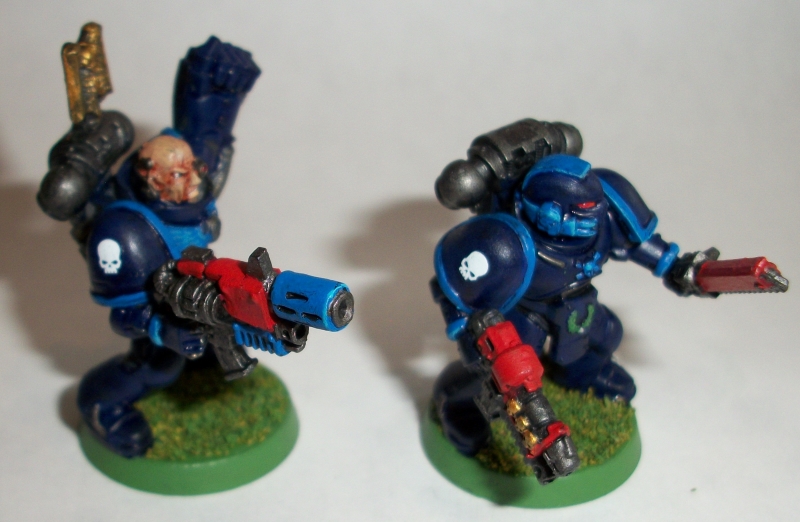
Also, as part of the ongoing decal project, I added decals to my old pewter sniper scouts. They required almost no touch ups! I’ve been using them pretty regularly for all of 8th, so they’ve really toughed it out!
Note that the kneeling version of this model has its right shoulder covered, and didn’t need decals.
Next: a bevy of Scout Sergeants to round out Scout Sergeant weapon options, and some close combat scouts get some TLC and decals!
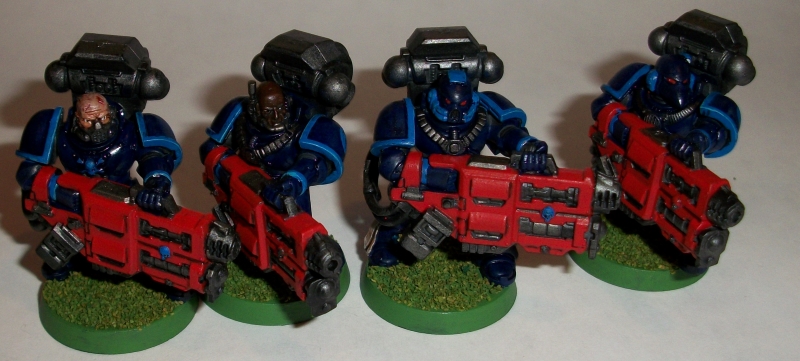
Firstborn Lieutenant, Tactical Sergeant, and Bolter Scout Overhaul
Two more models from the gray pile to the done pile!
In addition, I broke out my old pewter Bolter scouts. They were in rough shape, lots of paint chips and many details left un-detailed. I fixed them up, added detail, and replaced the hand-painted squad designation with a decal.
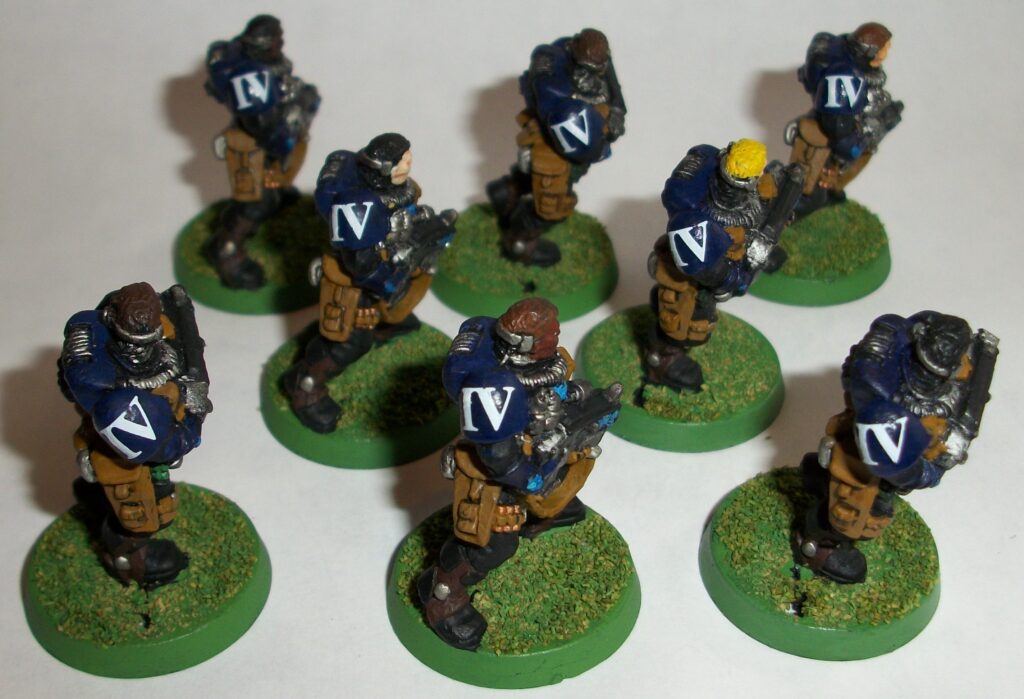
I actually had a bit of trouble this time! One of the decals mysteriously vanished. I had to use another. Luckily I had a few spares, but not many.
Next: The Lightguard return as Bladeguard Veterans, plus some more decal action! I’m keeping to my promise of one decal upgrade per finished new paint job.
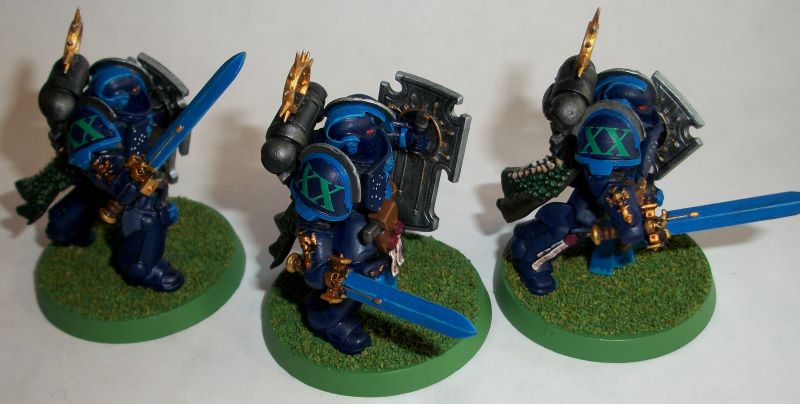
Bladeguard Ancient – Return of the Lightguard! Freehand Banner and Conversion
I’ve been hinting at the return of some old friends. Long ago I ordered some Forge World Mk V armor to make a custom Honor Guard for Chapter Master Perseus: The Lightguard.
I never got to use them. They were too expensive. Now, honor guard seem to be an Ultramarines thing. Boo.
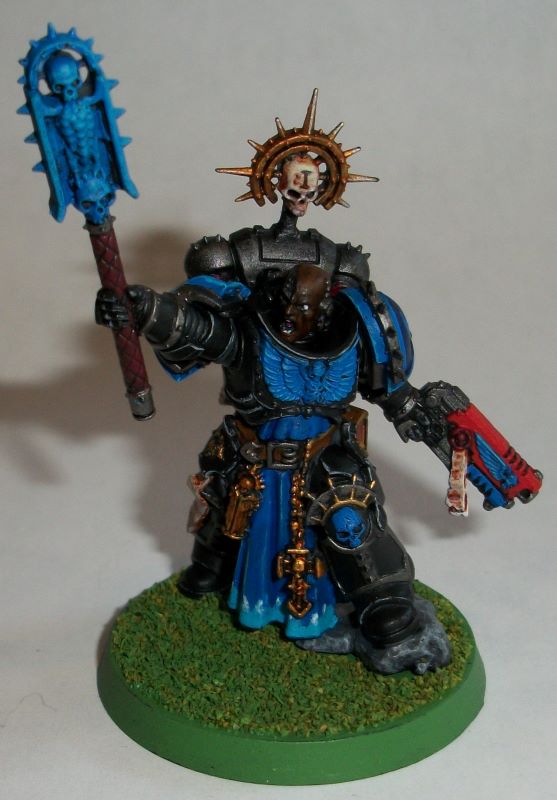
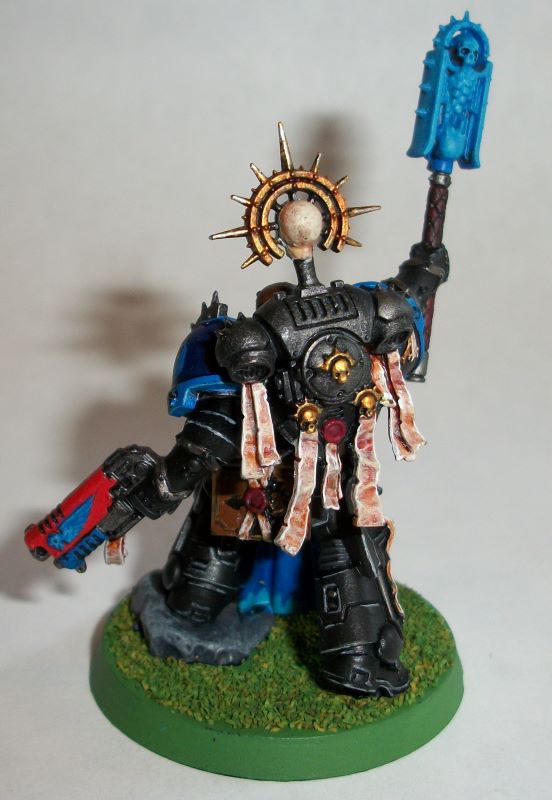
But they’re not gone. In fact, they’ve crossed the Rubicon! Behold, my Indominus Bladeguard Ancient, the first of the Lightguard Reborn!
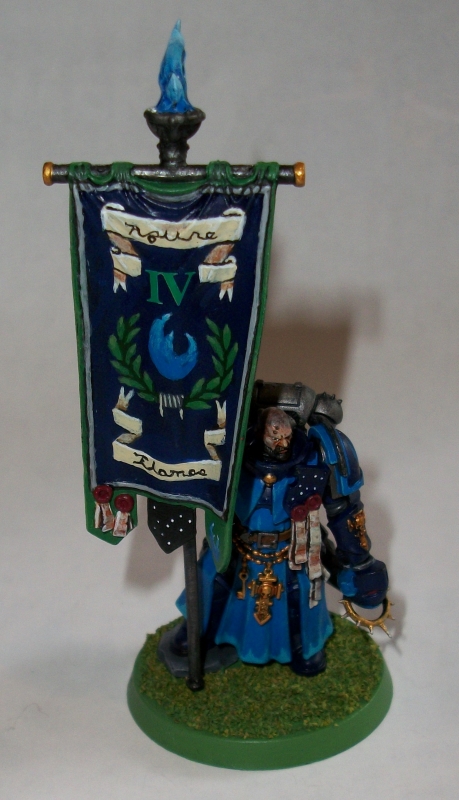
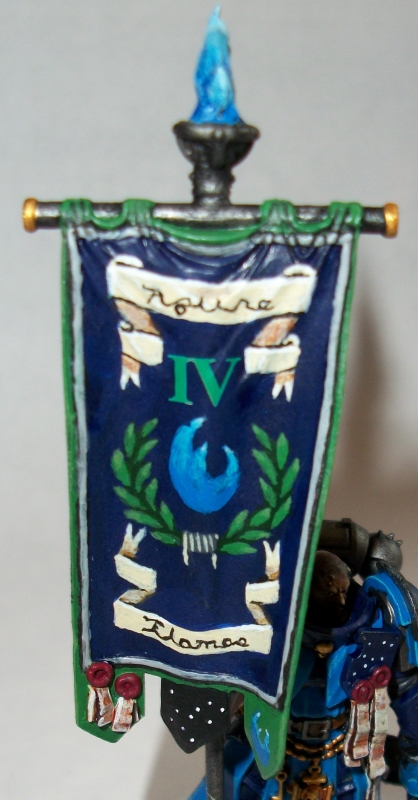
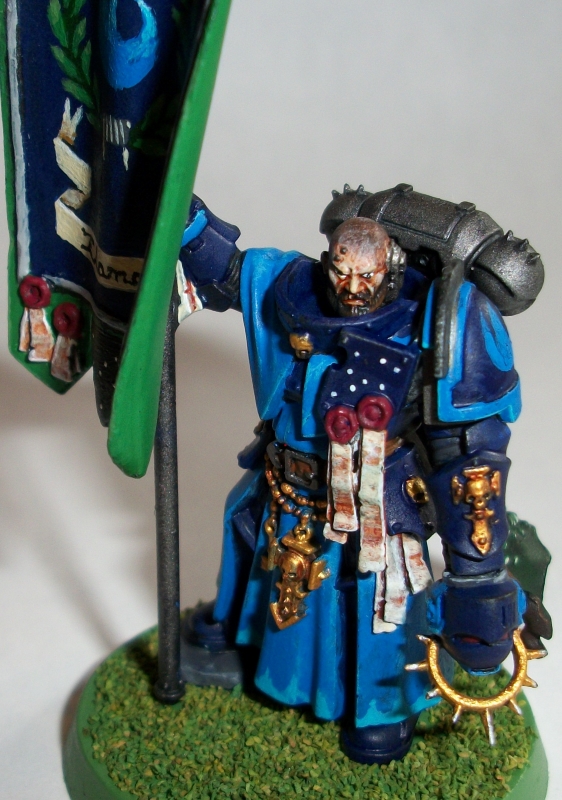

What’s this? That’s not the Bladeguard Ancient from the Indominus box! Where’s his creepy skeleton banner and useless bone hand?
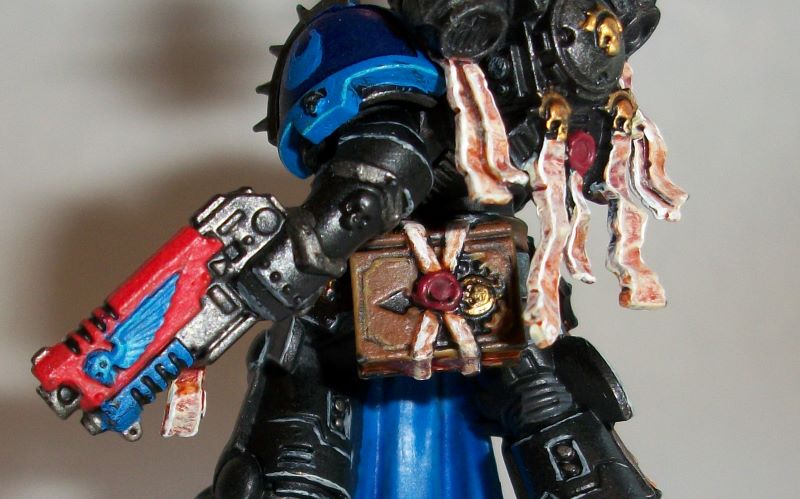
They’ve been removed. I drilled into the helmet, removed the skeleton hand, and carved the fingers so he can hold the helmet instead. I’ve replaced the head with a Sternguard Veteran head. I chopped off the skeleton banner and replaced it with the regular banner from the old Command Squad box set (I had a spare). Finally, a Black Ark Corsair cloak was green-stuffed onto his back, under the backpack.
Because the previous Lightguard had my first freehand banner, I could do no less for this venerable gentleman. The only part that is not freehand is the “IV” decal. I added the Lightguard Chasma Spica Constellation logo to both the banner and the heraldry shield on the chest. These stars represent the 11 star systems in the Azure Flame’s home sector, fought over in BG V.
The cloak had each scale highlighted on both top and bottom for a nice 3D effect. The flame up top was started with Enchanted Blue and coated with contrast paint, then highlighted all the way to white.
Next: a squad gets their decals, and some Tactical Sergeants get finished!
Firstborn Tactical Sergeants and Intercessor Decals
These Sergeants have been in and out of my lists for the entirety of 8th ed, but it’s only now I’m getting them painted up.

For efficiency, I also added decals to my Intercessor squad, so I could varnish them all at once. It went well, so instead of making each decal squad a project, I’m going to do a squad worth of decals for each paint job I do from now on.
Next: back to Indominus! No more cookie cutter by-the-book models, it’s time to bring back some old friends and make the Indominus sculpts fit the Azure Flames more closely!
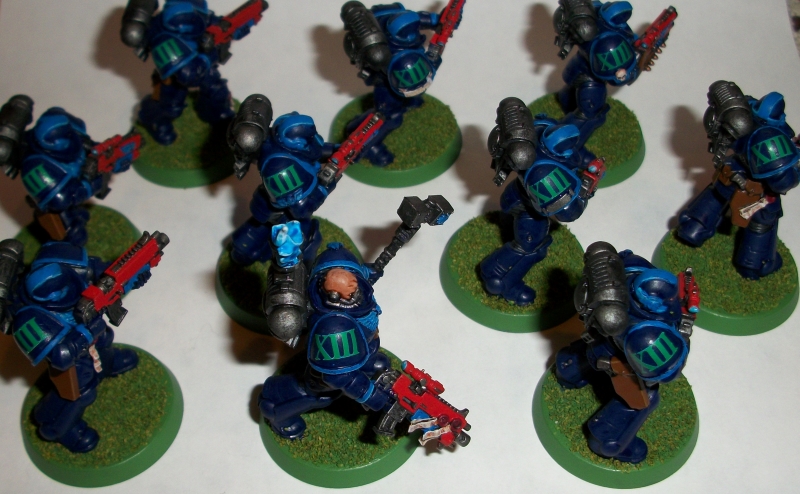
New Major Project: Decal Squad Markings
Thanks to Josh Muma of Bedlam Creations, I am about to do something that I’ve always wanted to do.
I’m completely re-doing the shoulder pad squad markings for the entire Azure Flames army.
Bedlam creations helped me to set up a very large decal sheet with roman numerals 1-20 in all of the colors of the companies except orange and purple (they wouldn’t fit).
Due to the complete coincidence of Bedlam Creations being so close to me, they shipped incredibly fast. I got them today and took them for a spin on the new Indominus models I’ve already painted.
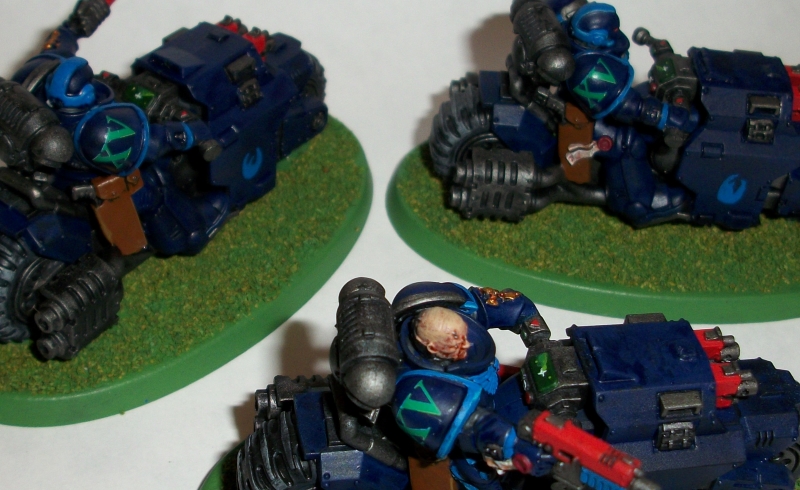
Only the green is shown so far because all of my Primaris marines are going to belong to the 4th company. Soon, though, I will intersperse labeling the other squads in my box. Once done with my current Firstborn Sergeants, I will now work on alternating between Indominus and already painted squads to replace shoulder pads.
On a more practical note, even in a good case, paint jobs and models suffer wear and tear. I haven’t done a full-case maintenance job for half a decade and it’s long overdue. This is the perfect opportunity.
If other things go well, Firstborn marines may even get a base size upgrade, if that seems like a good idea. It doesn’t now, but it may in the future.
AAAAAAAAAAAAAAA HOW DOES MY PLATE ALWAYS STAY SO FULL? Too much ambition!
Next: Firstborn Sergeants and then a special Indominus surprise! Some old friends are coming back!
Indominus Primaris Chaplain
One more of the Indominus box set done.
This chaplain proved to be a bit of a challenge. First, when clipping the backpack from the sprue, the back of the skull at the top snapped off! It was not able to be bent back or repaired, so I had to completely remove the pole that held the crowned skull and replace it with plastic rod. Mine will be a bit taller than a normal Indominus Chaplain as a result.
During painting, my sub-assemblies were:
- Base
- Legs, head, and Crozius
- Front torso and bolt pistol
- Backpack
Next: Firstborn Sergeants for Tactical Squads. After that, if I get a shipment from my LGS, I’ll do Bladeguard Veterans. If not, probably the Lieutenant with the Volkite Pistol. Stay tuned!
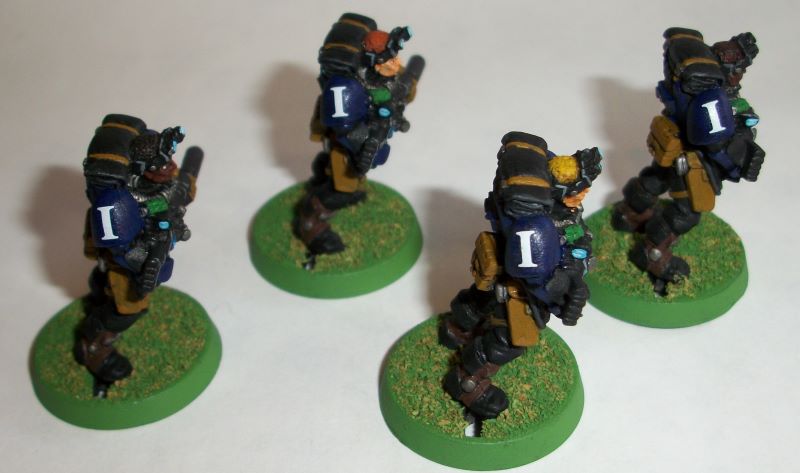
Multiple Meltas
…and with that, I have four of every heavy weapon for Devastators painted! It’s been a while, almost 21 years.
My initial Devastator project had me buy four sets of the old Devastator box. Most of my Devs are those old half pewter minis. I never did Multi-Meltas because until now they were kind of awful.
Now these gentlemen are going to pile into a drop pod or outflank, and rain hell on some poor Knight or tank column.
Next: Indominus Primaris Chaplain! I already have complaints, and he’s barely off the sprue!
Firstborn Devastator Grav Cannons with Grav Amps
I am painting these side by side with some Multi-Meltas. Those are almost done. Then, I’ll go back to Indominus. Probably try out a character. My next Indominus project used to be the Bladeguard, but I have a special conversion in mind for them which requires some time.
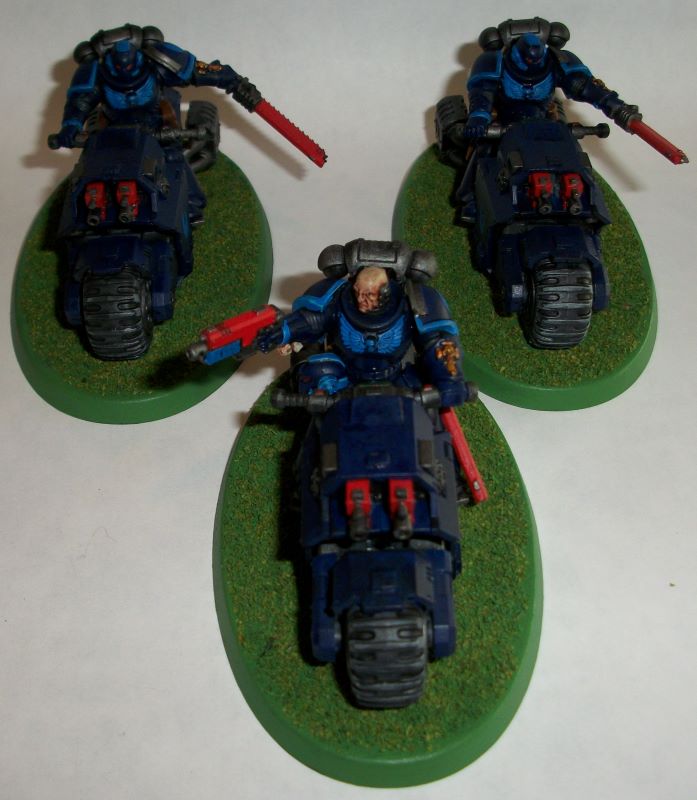
Primaris Outriders: a critique of the sculpt compared to the old Space Marine Bike
Primaris Outriders are finished!
These models were quite annoying to assemble and paint. Due to the overlapping armor plates, I did a sub-assembly procedure as follows:
- Central bike body plus wheels
- Left Bike Armor, leg, and exhaust
- Right Bike Armor, leg, and exhaust
- Torso, head, and arms
- Backpack
- Chainsword (one model only)
My initial gripe was that the pins that make this model a snap-together break exceedingly easily, especially the thin pins that slot into the larger pins for the side armor. However, I consider this to be a blessing rather than a mistake. If you are building these models, BREAK THESE PINS OFF. You don’t need them.
My sub-assembly procedure was also not a good idea for this snap together in terms of pieces fitting. Before priming, the model dry-fit together snugly. With the added layer of primer, these became too tight to fit without a pin vise gently scraping the inside of the holes. Even then it was so tight that excessive force was needed.
Excessive as it was, it was not enough for the front armor plating. All three models had to have a gap in this plating filled with green stuff and filed smooth.
I also had trouble with the incredibly thin join between the foot/pedal and the side armor. This bent a bit too often. If I had to do over, I might have used a modeling knife to completely separate these two parts. It would have made painting and assembly easier.
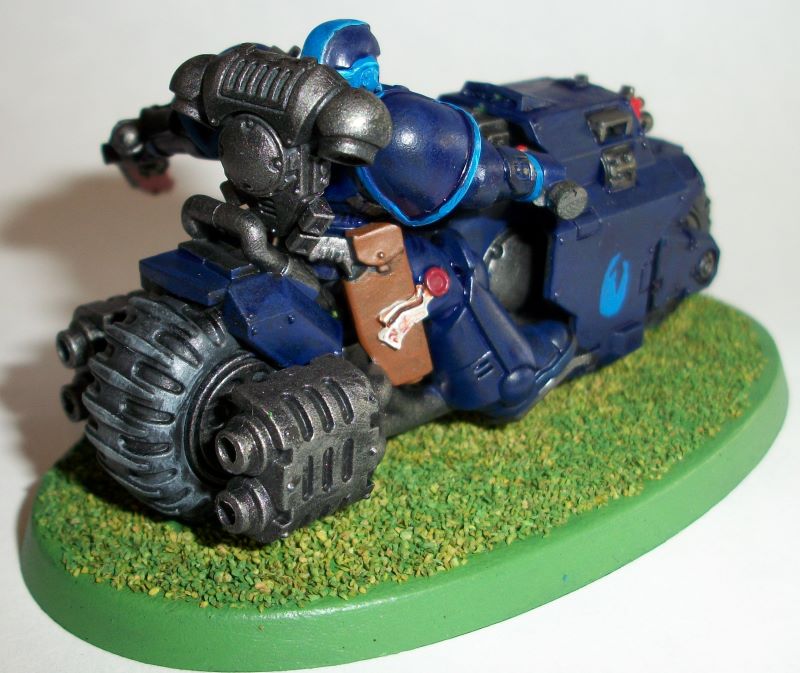
As a final note, I’d like to compare these to the original Space Marine Bikes. Here is a stock photo below:
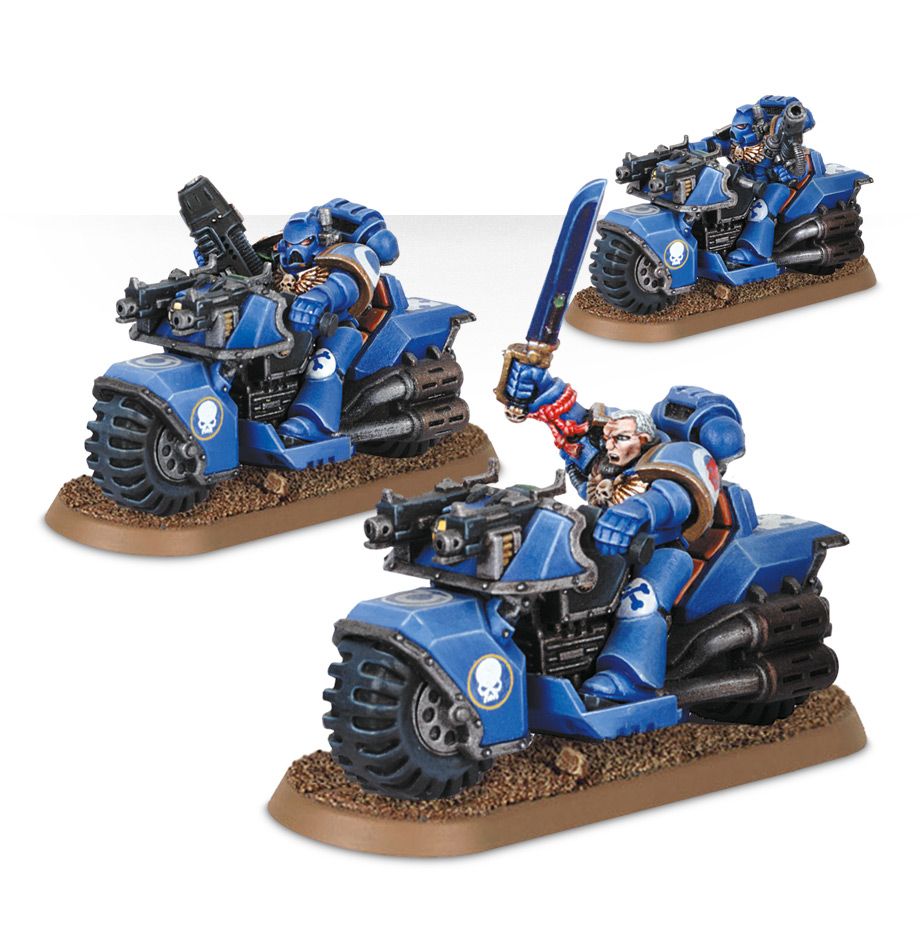
The old bikes were 90’s sculpts, and it shows. What doesn’t show is that these bikes had a similar problem to the new Primaris ones. The halves of the main body met in the middle, sometimes leaving a gap that needed putty. Not shown in this stock photo is the join of the riveted armor moulding where it comes together on the back of the bike. This was almost always mis-cast. The moulding itself was annoying to paint (I like the lack of it on the Primaris models).
All in all, the new Primaris are a huge step up from old bikes. However, they still have significant flaws. Use caution and think ahead when assembling and painting yours.
Next: I like the idea of alternating between Primaris and Firstborn. I’m going to finish up my Devastators with Multi-Meltas and Grav-cannons. With Multi-Meltas having 2 shots at D6+2 damage, I can revive my old failed Melta drop strategy to assassinate a knight (or two!) Plus with two wounds on all firstborn, I’ll need those Grav Cannons in working order.